What will you do when creating a promotion campaign for your WooCommerce store? Even though it’s not a holiday or any occasion, you can increase your traffic by running limited-time offers, such as “Deals of the Day”.
This strategy helps your store boost sales and create urgency among shoppers. In WooCommerce, you can easily set up daily deals with a countdown timer to encourage quick purchases.
By leveraging the features of YayPricing, this blog post walks you through the process step by step to make your campaign effective.
The Goal of WooCommerce Deals of the Day
Running a WooCommerce store, we all know the effect of promotion strategies for driving short-term sales and brands. For example, if you’ve ever seen a timer ticking down on an online sale, you know how powerful it can be. Suddenly, you need that product, and you need it now before the deal disappears! But aside from boosting sales, there are a ton of other reasons why setting up daily deals in WooCommerce is a fantastic idea:
- Increase conversions: Time-sensitive offers motivate customers to buy now rather than later.
- Enhance customer engagement: Daily deals keep customers returning to check for new offers.
- Clear out inventory: Promote slow-moving products by featuring them in daily deals.
- Boost average order value: Customers might add more items to their cart to take advantage of the limited-time offer.
Now, let’s get started with setting up your own deals of the day.
How to Create WooCommerce Deals of the Day
Step 1: Install and Activate a Daily Deals Plugin
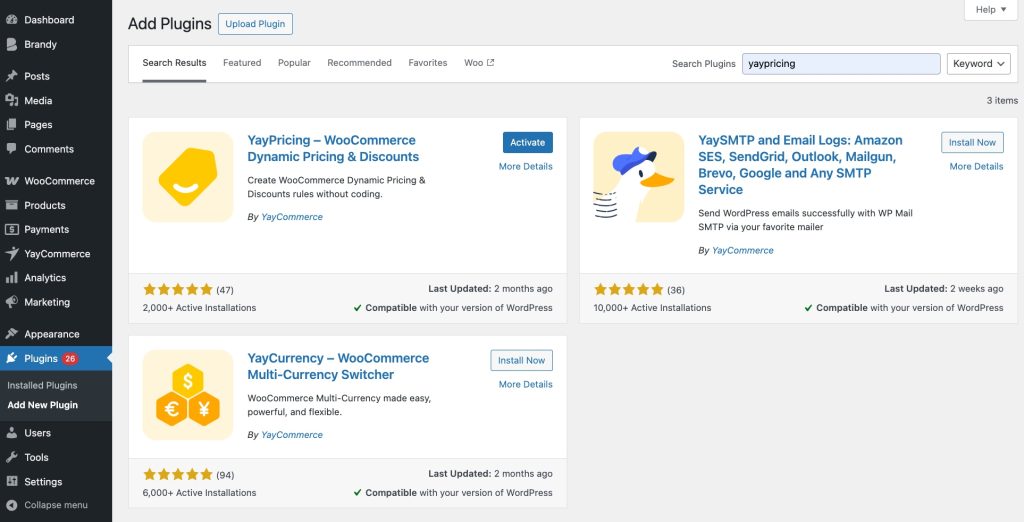
WooCommerce doesn’t come with built-in daily deals or countdown timers, but no worries, you can easily add this feature with YayPricing. The plugin has more than 2,000+ active installs, it allows you to create dynamic pricing discounts with a lot of conditional logic.

To install a plugin, head over to your WordPress dashboard and go to Plugins, you can download the free version of YayPricing from the WordPress repository. Click Install now, then hit Activate once it’s ready.
Boom! You’re all set to configure your first daily deal.
Step 2: Configure Your Daily Deal
Now that you’ve got the plugin installed, it’s time to set up your deal.
To set up pricing, follow our guide below:
- Access YayPricing Setting > Product Pricing > Add Rule
- Choose your desired campaign on a popup window
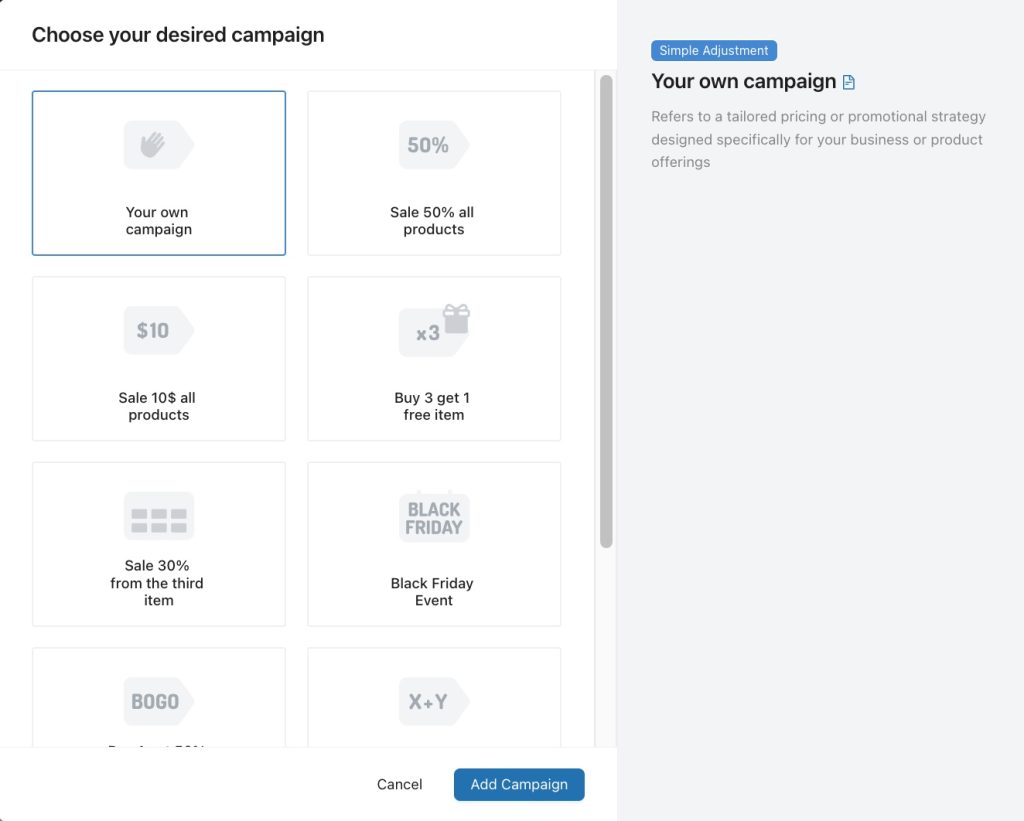
YayPricing provides a lot of pre-built pricing campaigns, such as BOGO, Buy X Get Y, percentage-based, fixed amount, or bulk discounts based on product quantity, user roles, or cart conditions.
For example, we’ll create a deal like “Only Today: Buy One Get One for Skincare Products”. Let’s see the image below as we set!
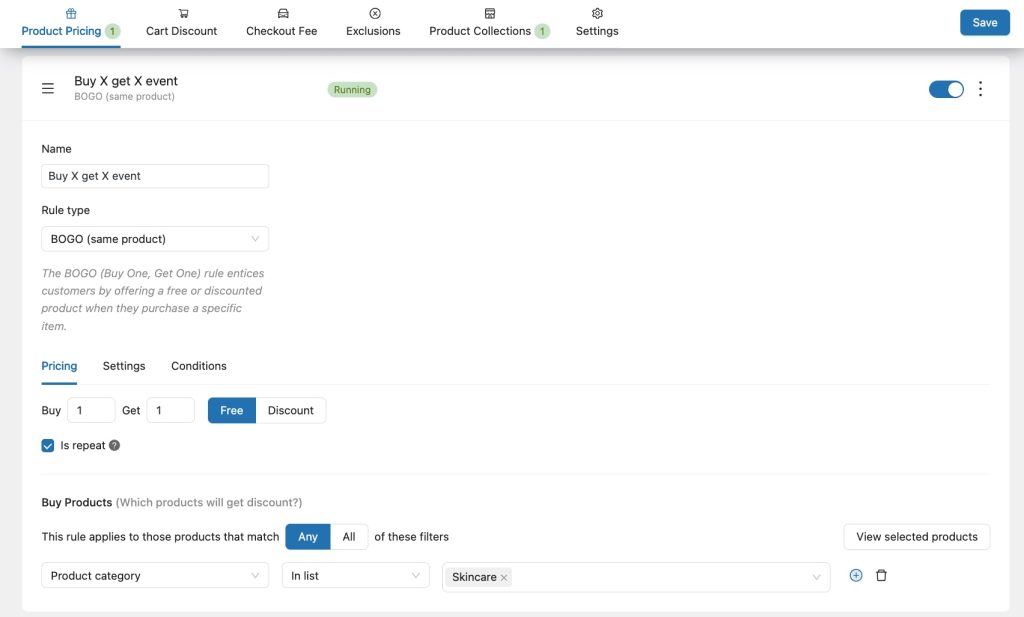
You can also create many types of pricing, refer to the YayPricing tutorial.
We won’t configure the conditional logic, because we don’t need it. Just move to the setting section to schedule the deal. It runs for just one day:
– Scroll down to Schedule Settings.
– Set your Start Date and Time.
– Set your End Date and Time.
The image below describes the specific configuration, which will automatically start and end at the right time without you having to lift a finger.
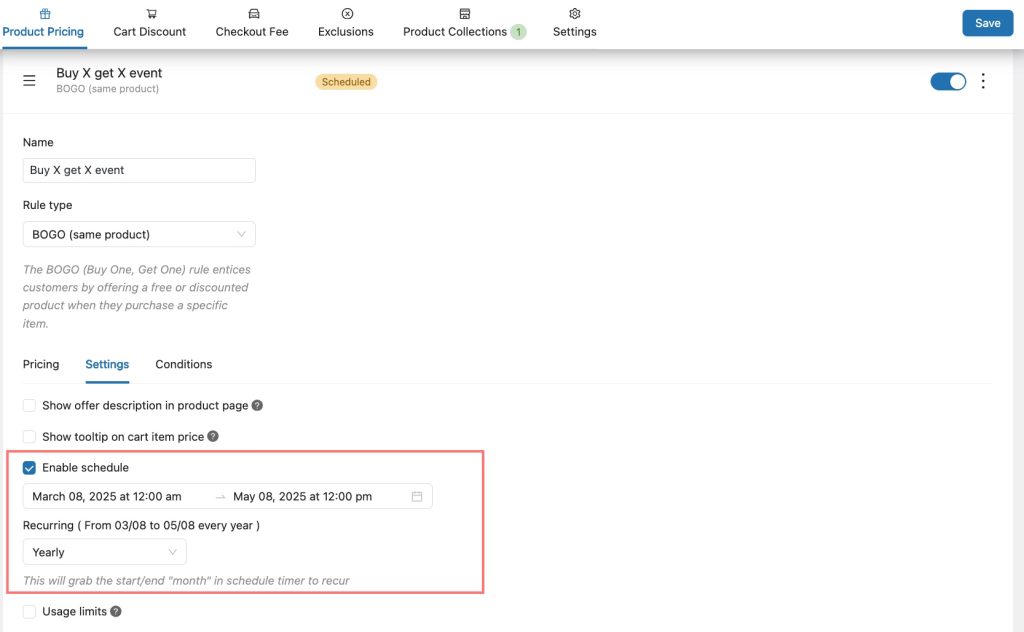
Then, don’t forget to click “save” to activate the rule!
Step 3: Make the Countdown Timer Stand Out
Now that your Deal of the Day is set up, let’s make sure people actually notice it. Therefore, a countdown timer is a game-changer. It psychologically encourages shoppers to buy NOW instead of “thinking about it.”
So, all we have to do is enable the Countdown Timer in YayPricing. Navigate to the Settings tabs, scroll to the Countdown Timer section > Click the checkbox to “Automatically show countdown timer on bottom of page”.
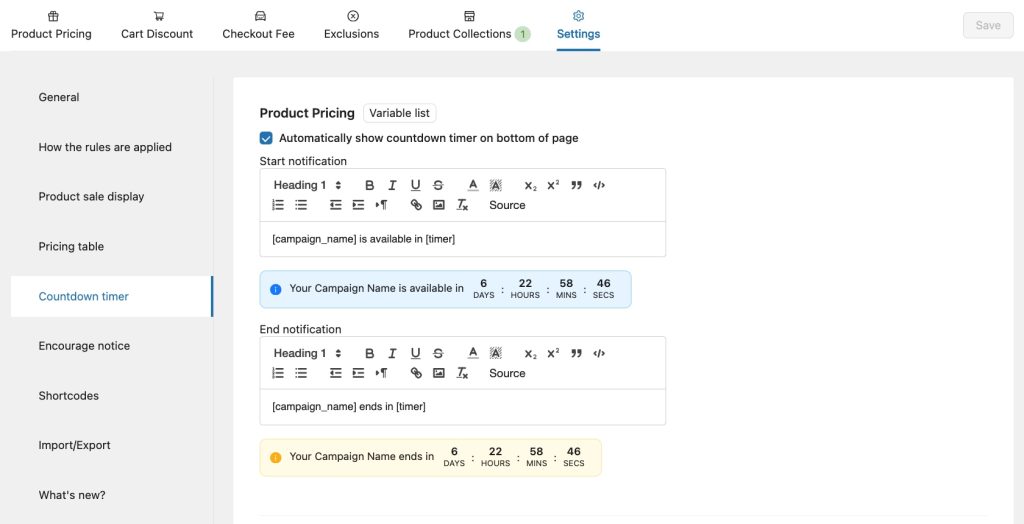
With the countdown timer from YayPricing, you can add the encourage notice and the timer on the modification box for Start/End notification, with the support of Variable list. Also, you should customize the style – make it bold, bright, and impossible to ignore!
Save your changes and check the front end to make sure everything looks perfect.
You think that’s it! Your countdown timer will now automatically show up during the sale period.
Step 4: Display All Sale WooCommerce Products in Any Post/Page
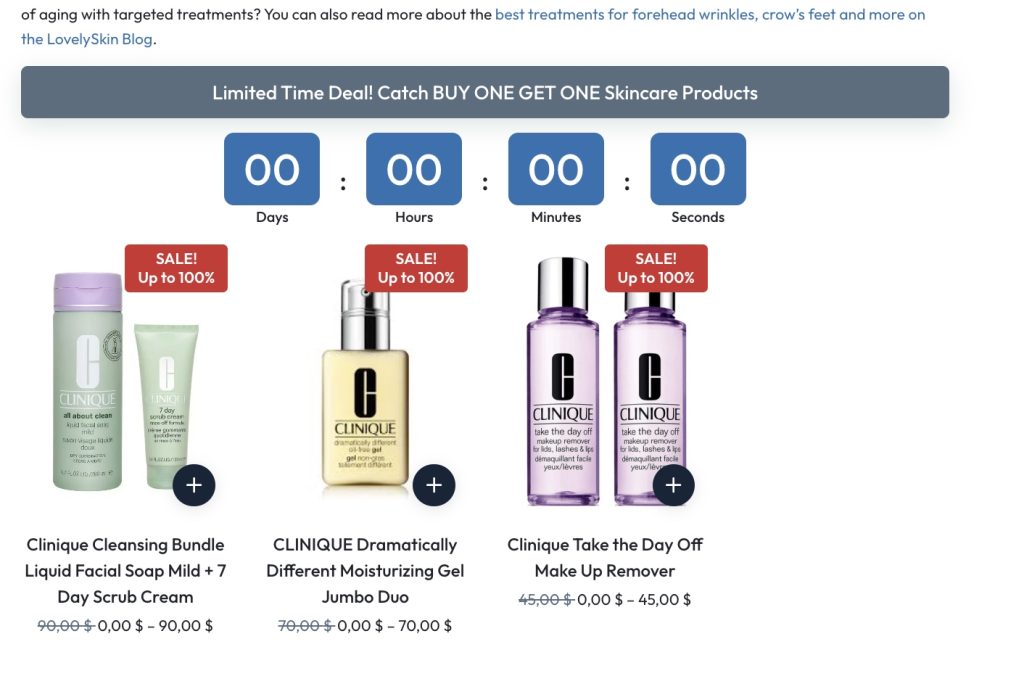
Make your rule active and now, we highly recommend that you display all the WooCommerce products in the sale list by using the shortcode of YayPricing.
To make it work, navigate to the Settings tabs in the YayPricing dashboard. Scroll down, and you will see the shortcode option. In here, you can choose the pricing rule to display and then generate the shortcode, such as <yaydp-on-sale-products>.

Let’s see the front end on the blog page, how WooCommerce displays sale products.
Step 5: Spread Your Deal the Word with Brandy Integration!
Your deal is live, your countdown is ticking – now it’s time to make sure people know about it! This is where Brandy joins the game.

A new warrior – Brandy theme and its associates – Brandy Starter Sites, Brandy Blocks will make your WooCommerce store wonderful from a scratch with some pre-built templates and powerful blocks.
It also lets you add a countdown timer, also badges, labels, and banners to your products.
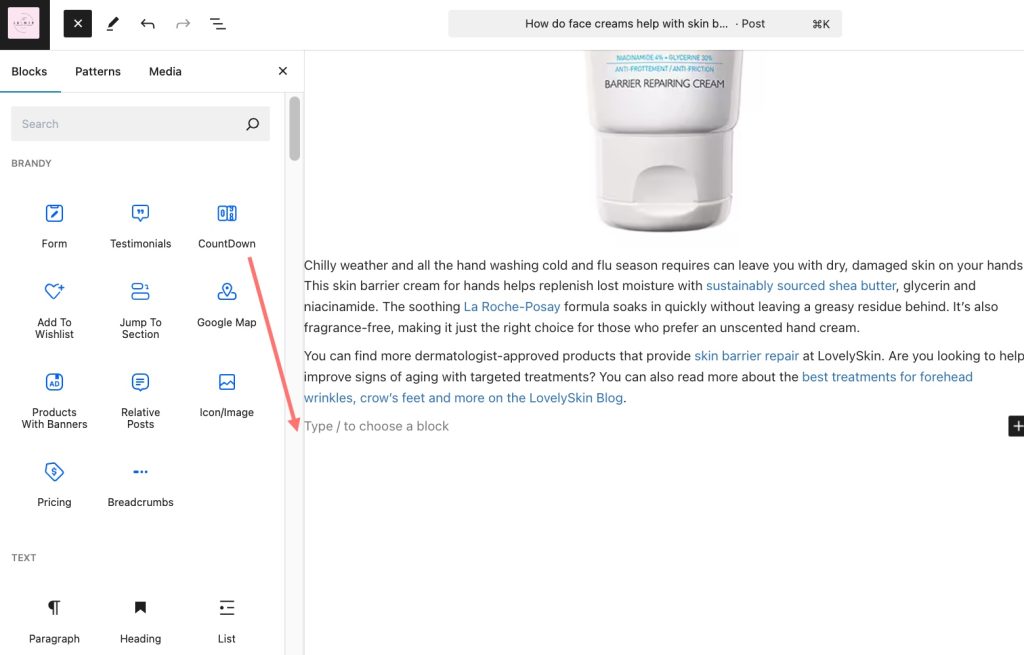
Let’s see how to create another countdown timer with Brandy Blocks. You can add the countdown timer block about the promotion in any page, post, or custom post type of your WooCommerce store.
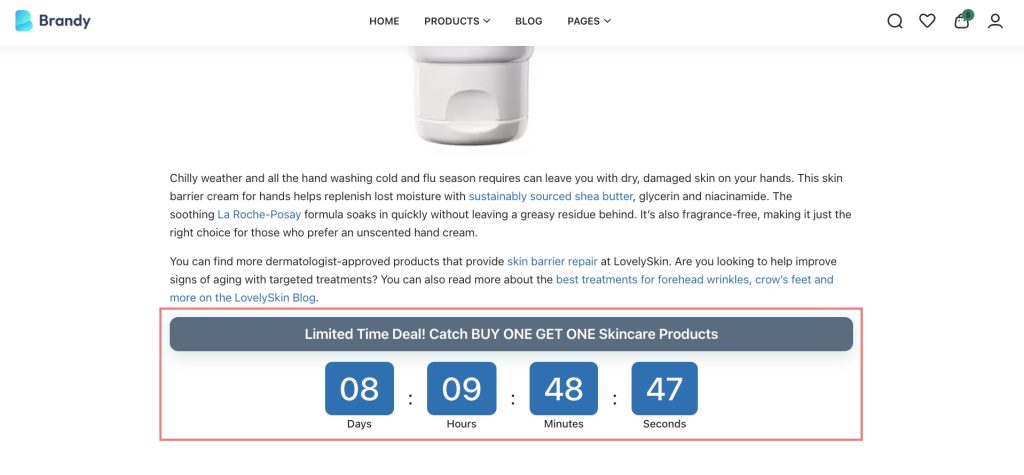
For example, our blog post was written about the skincare topic, we’ll add a countdown timer with a CTA button to let customers know about our upcoming promotion.
You can customize the style of countdown timer to match with the article.
In addition, you can also create a countdown banner to display site-wide, letting visitors know about today’s special offer. Consider adding it:
- At the top of your homepage: Make sure visitors see today’s deal the moment they land on your site.
- Use popups or announcement bars: Keep the deal front and center as customers browse your store.
- In the cart page: remind them to check out before the deal expires.

This way, no one misses out on your deal!
Tips to Make Your Daily Deals Even More Successful
Now that your WooCommerce Deal of the Day is live, let’s get more people to buy:
- Send a WooCommerce email blast: Notify your email subscribers about the one-day-only deal.
- Use exit-intent popups: Show a popup like “Don’t Miss Out! This Deal Ends in X Hours” before customers leave.
Final Thoughts
Sometimes, you have to create a flash sale like that to increase traffic to your WooCommerce store. Adding “Deals of the Day” to your WooCommerce store with a countdown timer is a surefire way to drive urgency, boost sales, and keep customers engaged. With YayPricing and Brandy, a bit of customization, and smart promotion, you’ll turn your store into a deal-hunting paradise.
So what are you waiting for? Start setting up your first daily deal today and watch your sales skyrocket!
FAQs about Deals of the Day in WooCommerce
- Can I run multiple deals of the day at the same time in WooCommerce?
Of course! YayPricing allows you to feature multiple products at the same time. You can set different countdown timers for each deal or run a storewide flash sale.
- Can I schedule deals in advance?
Absolutely! With the recurring feature of YayPricing, which lets you set up sales days, weeks, or even months ahead. This is perfect if you want to automate your promotions without having to set them up manually each day.
- Do I need any coding skills to set this up?
Nope! YayPricing and Brandy theme are beginner-friendly. Everything is done through the WooCommerce dashboard with easy-to-use settings.
- What happens when the deal expires?
Once the end time is reached, YayPricing will automatically remove the discount, and the countdown timer will disappear. You don’t have to do anything manually!