Do you want to create conditional fees in WooCommerce? If you are looking for the right method, keep reading this article.
If you run a WooCommerce store, adding custom fees would be useful. For example, automatically adding fees would be a cool feature, depending on the situation. This way, you can run the business smoothly without affecting the profit margins.
By default, WooCommerce doesn’t come with this feature.
This post will show you how to create conditional fees in WooCommerce without hassle.
But first, let’s see why you need to create conditional fees in WooCommerce.
Table of contents
Why You Need to Create Conditional Fees in WooCommerce
Running an online store with WooCommerce offers incredible flexibility, but it also comes with the challenge of meeting diverse customer needs while maintaining profitability.
This is where conditional fees come into play. By implementing conditional fees, you can customize the checkout experience based on specific criteria, such as order totals, product categories, shipping locations, or customer types.
This level of control ensures that your pricing structure aligns with your business goals, whether you’re looking to incentivize larger purchases, offset shipping costs for certain regions, or charge extra for premium services. Without conditional fees, you’re stuck with a one-size-fits-all approach that might not reflect the nuances of your operation.
Moreover, conditional fees help you stay competitive in a crowded e-commerce landscape. Customers today expect tailored experiences, and static pricing can feel rigid or unfair—especially if they encounter unexpected costs at checkout.
For instance, you might want to add a small handling fee for fragile items or offer free shipping only when a customer’s cart exceeds a certain amount.
Conditional fees allow you to set these rules seamlessly, enhancing transparency and reducing cart abandonment. They also save you from manually adjusting prices or relying on workarounds, streamlining your workflow and giving you more time to focus on growing your business.
How to Create Conditional Fees in WooCommerce
We will use two additional plugins since WooCommerce doesn’t have this feature. They are:
- YayCurrency
- YayPricing
Below, we will show you how to use each plugin to add custom fees to your WooCommerce store.
Both YayCurrency and YayPricing are freemium plugins. Check out YayCurrency Lite and YayPricing Lite if you use the lite version. They can be accessed from the WordPress plugins repository.
In this case, we will use the premium version of YayCurrency and YayPricing.
Once you have installed and activated those plugins, you can see their settings on the left-hand side.
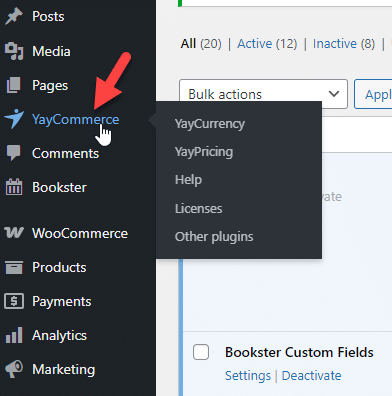
1. Adding a Currency Conversion Fee in WooCommerce
If you are accepting a global audience and need to accept multiple currencies, you should consider adding a currency conversion fee to the website.
This way, you can handle the unexpected currency exchange rates. The YayCurrency plugin has an excellent option for adding an extra fee to the total order value.
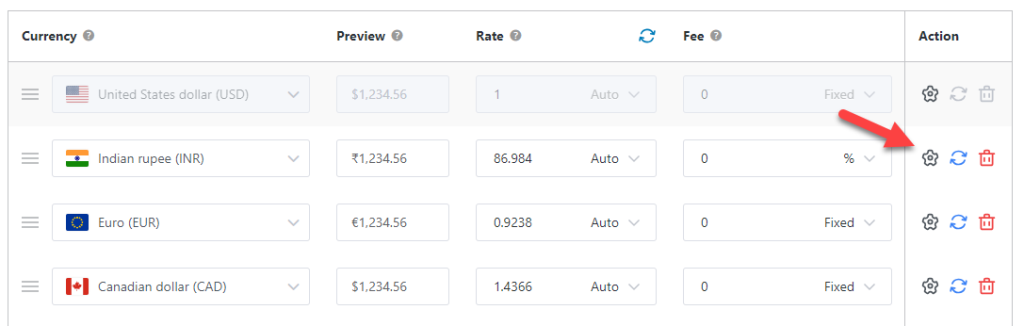
If you go to the plugin’s settings page, go to the fee section.
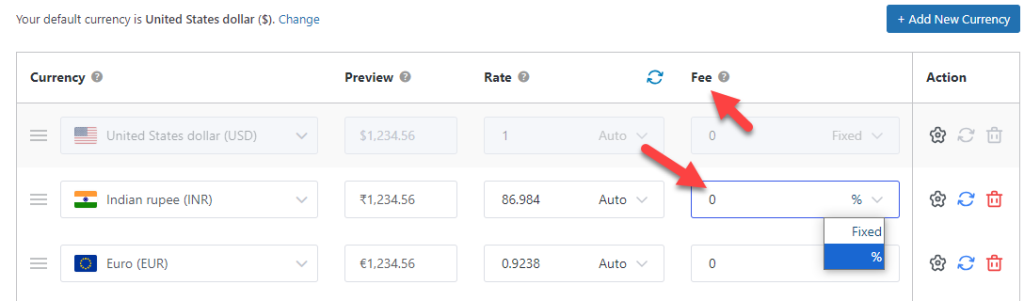
As you can see in the screenshot, you can either add a flat fee or a percentage-based fee to all third-party currencies. Once you have modified the settings, save the changes.
When someone pays using the third-party currencies available on the website, an additional fee is added to the total checkout amount.
2. Round Off Function
The next thing we are going to explain is the rounding-off function. You can use this function when the converted currency does not show a round figure.
Here is how you can do it.
The first thing you need to do is go to the currency settings.
Scroll down until you see the rounding option.

This function is disabled by default. There are three main options. Pick one and save the settings accordingly. From now on, the converted amount will be rounded off according to your configuration.
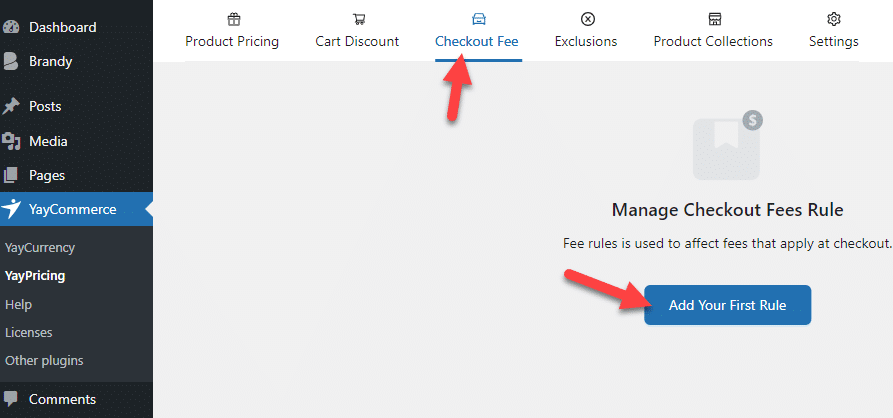
3. Add Cusdtom Checkout Fee
Sometimes, you need to add a custom fee to every order. This option comes in handy if you need to add a fee for shipping to every order.
Here is how you can do it.
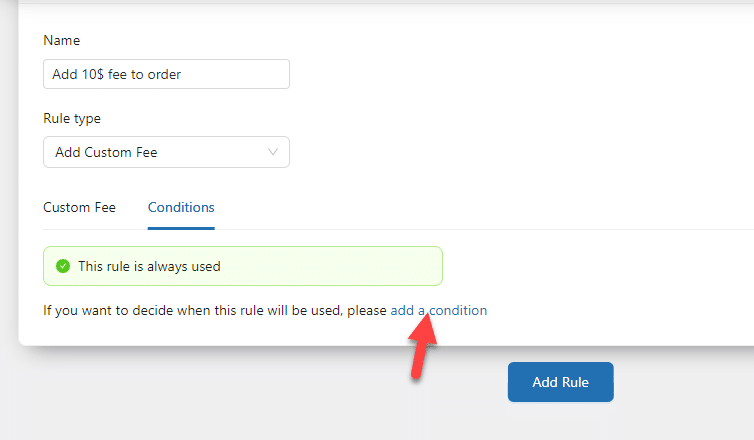
Once you have activated the YayPricing plugin, enter the checkout fee section and create a new rule.
Choose the fourth campaign available.
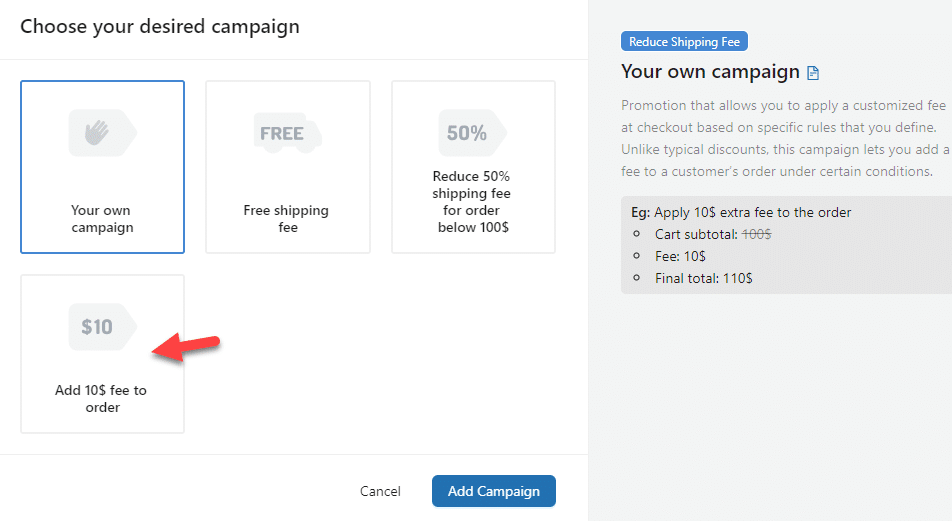
Now you will see a screen like this:
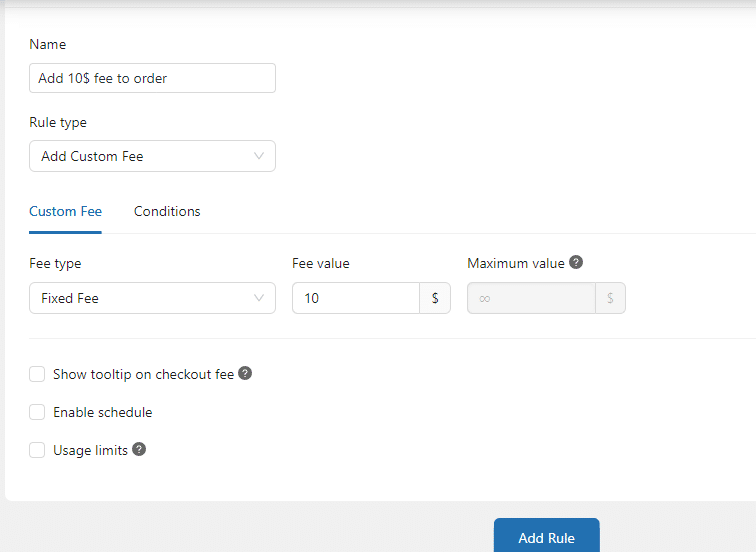
If you check the configuration options, you can see
- name for the campaign
- rule type
- fee type
- fee value
You can choose these options based on your requirements. Regarding the fee, you can add a flat fee or a percentage-based fee.
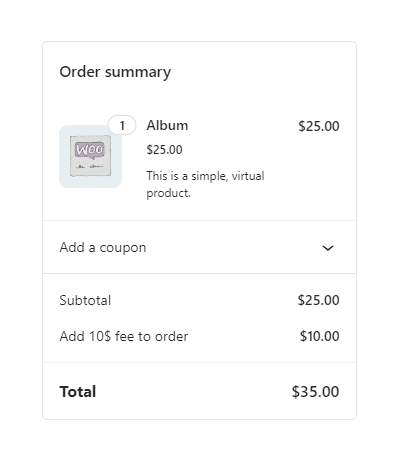
If you choose the percentage-based fee, an extra fee will be added based on your total cart value. once you have configured it, save the changes. Now, you can test it by adding a product to your cart and going to the checkout option.
You should modify the rule name to something friendly so people can understand it better.
4. Add Custom Fee to Specific Products
Last time, we added a custom fee site-wide. In this case, we will add a custom fee to specific products. To do that, go to the conditions section.
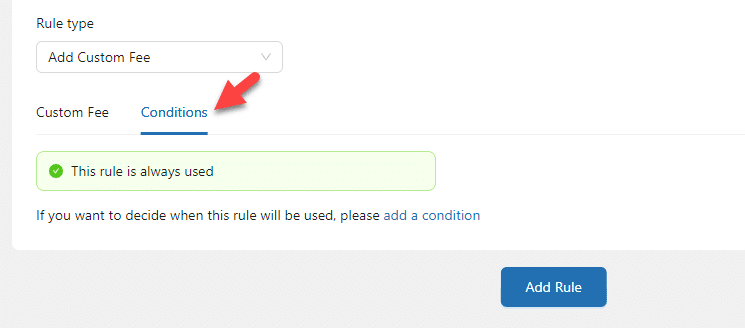
By default, there won’t be any conditions.
Now, from the dropdown, choose the product condition.
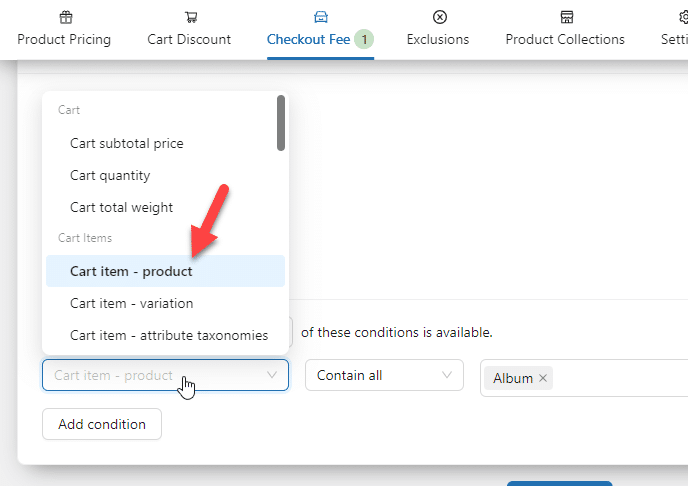
Now, select all the products you need to apply this rule.

When someone adds these products to their cart, a fee will be added to the total price.
5. Add Custom Fees to Specific Categories
Instead of products, you can also add a custom fee for the whole category. Here is how you can do it.
When choosing the condition, instead of products, you need to choose a category.
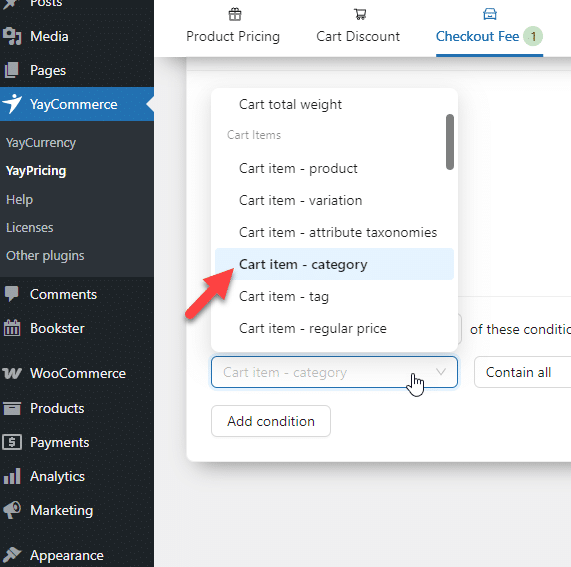
Now, you need to list all the categories in the option.

And that’s it!
When someone adds products from these categories to their cart, the extra fee is added to the total amount.
Frequently Asked Questions
Now, let’s see some frequently asked questions and answers.
Conditional fees in WooCommerce are additional charges or discounts applied at checkout based on specific conditions you set for your store. These could depend on factors like the total order amount, the types of products in the cart, the customer’s location, or their purchase history.
Conditional fees allow you to tailor pricing to boost profitability and customer satisfaction. For example, you can encourage larger purchases by waiving fees above a certain order threshold or adding surcharges for special services like expedited shipping.
Not at all! While the setup process depends on your store’s specific needs, conditional fees can generally be implemented with straightforward rules that you define based on your business logic. Once you decide on the conditions—like applying a fee for orders under a certain amount or for specific product categories—it’s a matter of configuring those rules in your store’s system.
Yes, conditional fees can significantly enhance the shopping experience when used thoughtfully. Customers appreciate clarity and fairness in pricing, so offering incentives like free shipping for higher orders or adding fees only for justifiable reasons (like handling specialty items) can build trust.
Conclusion
Incorporating conditional fees into your WooCommerce store is more than just a technical tweak—it’s a strategic move that can transform how you manage pricing, enhance customer satisfaction, and drive revenue.
By tailoring fees to specific conditions, you gain the flexibility to adapt to your business needs while offering a checkout experience that feels fair and personalized to your customers.
Whether you offset costs, incentivize bigger orders, or stay competitive in a dynamic market, conditional fees empower you to strike the right balance between profitability and appeal.
As eCommerce continues to evolve, embracing this level of customization is a smart way to future-proof your store, streamline operations, and build lasting trust with your audience. So, take the leap—set up conditional fees today and watch your WooCommerce store thrive.
What type of conditional fees would you add to the website?
Let us know in the comments.
Also, if you prefer video content over written tutorials, please check out our YouTube channel.