
Are you looking for a way to save Contact Form 7 forms to the database? You’ve reached the right place. This tutorial will walk you through saving your form database with the help of a free plugin. Let’s dig in.
I’m using the free Database for Contact Form 7 plugin in this article. This plugin automates the process of saving submitted information to your database.
On top of that, it offers a great DEMO in both the front-end and back-end to give you a quick taste of the plugin before downloading it. Enabling the Contact Form 7 save to database feature in your WordPress installation only takes a few minutes.
Without any further ado, let’s get started.
Contact Form 7 Save to Database: Explained
The main things you need to do are:
- Install Contact Form 7 Database add-on
- View the Data and Organize them
- Edit Data (if necessary)
Let’s get into the tutorial.
1. Install Database for Contact Form 7 Plugin
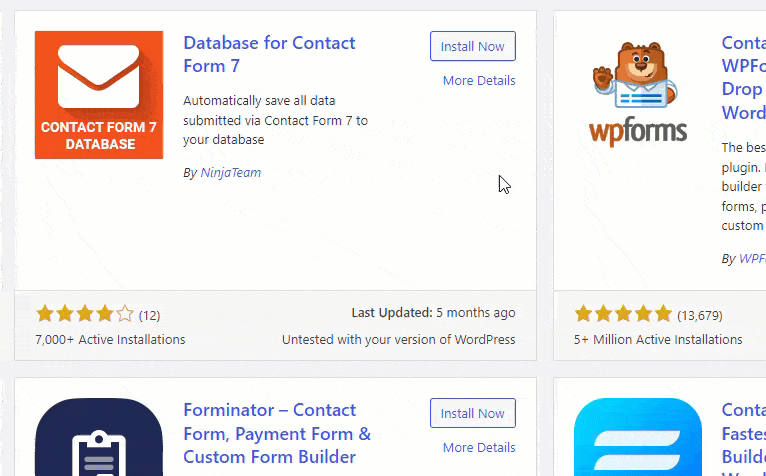
The first thing you need to do is install the database addon plugin on your website. Since the plugin is a freemium tool, you can get the free version plugin from the WordPress plugins repository.
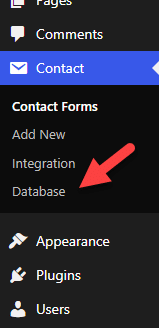
Once you have installed and activated it, you will see the plugin’s settings under the Contact Form 7 settings.
The plugin doesn’t come with a dedicated setting panel. Once you have completed the activation, it is a plug-and-play tool.
2. View the Database for Contact Form 7 Forms
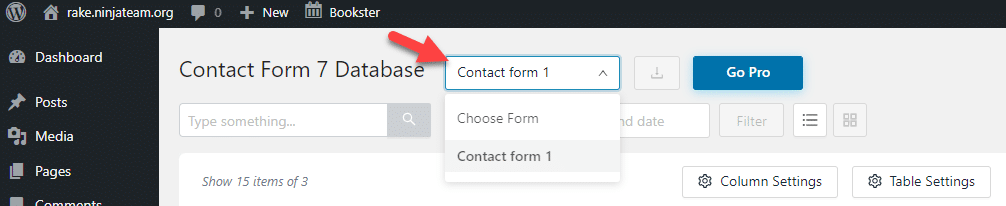
The free version of this plugin allows you to choose only one form to keep in the database. As a premium user, you can save an unlimited database for multiple forms.
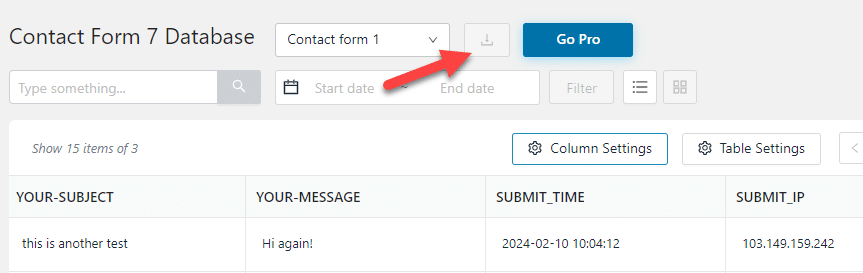
Right now, just choose a specific form from the dropdown menu to view its database.
Now, you can see all the entries on the screen.
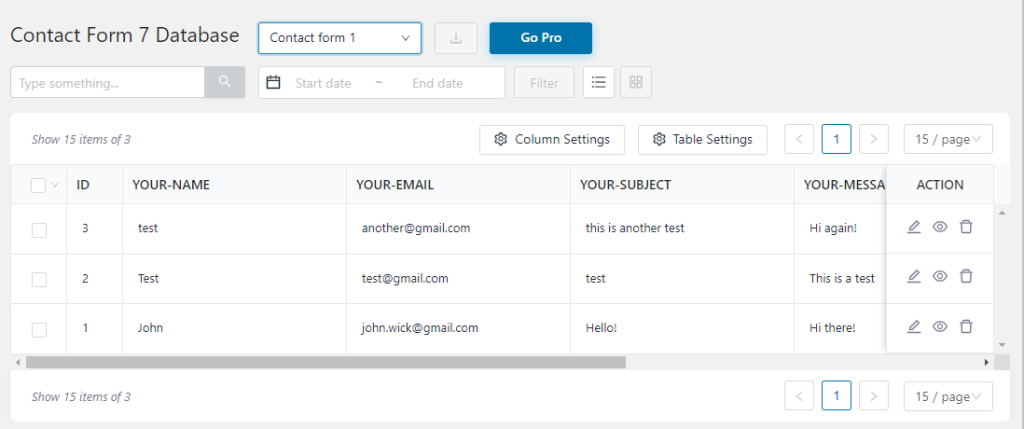
As you can see in the screenshot, you will see details like:
- Submission ID
- Name
- Subject
- Message
- Submit time
- The IP address of the visitor
On top of that, you will see multiple actions on the right-hand side.
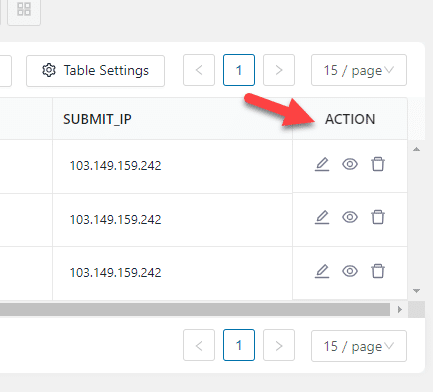
They will help you
- Edit the submission
- View it
- Delete it
If you need to edit the submission, click the pencil icon.
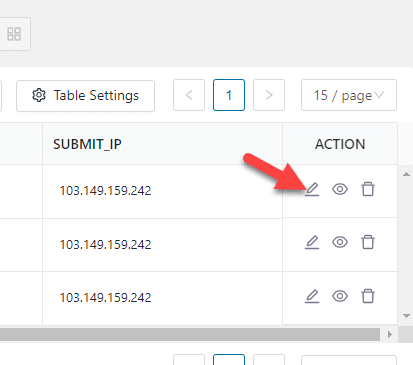
Now, you will see the information you can edit on a popup.

Once you are done with it, save the changes. Similarly, you can click the eye icon to view the message. Finally, click the trash icon to remove it from the website.
NOTE: If the contact forms are not working properly, this is because of the default PHP Mail function. To learn more about this, check our guide on fixing the WordPress not sending email issue.
3. Organize and Edit Data
The plugin comes with multiple features to organize the data. For example, if you have the plugin’s premium version, you can download the entire form as a CSV file.
Plus, you have the feature to get submissions from a specific date range.

The premium version plugin will unlock all potential features. Here are the three main reasons you should use the organize feature:
- Hide columns: Display options allow you to hide particular fields when you think they are not helpful in the current view. This helps lessen distractions and boost your focus.
- Delete spam emails: If you collect phone numbers and the received value is hardly functional, you can bulk-select and delete them.
- Export data: A contact list is easy with just a single click. With the data export, you can sort out and evaluate the leads and gain more insights for the next campaigns. Pivot tables enable you to analyze figures to spot trends.
Conclusion
Contact forms are mandatory for every website. No matter whether you run an online store or a personal blog. Contact forms are feasible if a user needs to contact you from the website’s front end. As you know, you can see several contact form plugins for WordPress.
Contact Form 7 is a viable option for creating forms in WordPress without coding if you are a beginner. Integrating Contact Form 7 with a database plugin is mandatory to ensure your leads are not lost. In our experience, Save to Database is the best tool you can use in this case.
The Lite version plugin comes with every feature you need. You can get it directly from the WordPress plugin’s repository. The premium version will cost you $25 (one-time fee), and you can get it from the CodeCanyon marketplace.
So, would you try the contact form 7 save to database feature?
Let us know in the comments!