Do you want to add a refund request button to WooCommerce? If you are looking for a simple guide, keep reading this article.
Customers often need an easy way to request refunds without sending emails or opening support tickets. WooCommerce does not provide a built-in refund request button on the customer order page by default. Adding one helps streamline refund requests and keeps them tied to the correct order.
In this article, we will show you how to add a refund request button to WooCommerce.
Before going further, let’s see why you have to add a refund request button to WooCommerce.
Table of contents
Why You Have to Add a Refund Request Button to WooCommerce
Adding a refund request button to WooCommerce gives customers a clear and structured way to ask for refunds directly from their order page. Instead of relying on emails or contact forms, refund requests stay connected to the correct order and customer details. This improves store organization while making the process faster for both shoppers and store owners.
- Reduces customer confusion by showing a visible refund option on the order details page
- Keeps refund requests linked to the correct WooCommerce order instead of scattered emails
- Helps lower support workload by avoiding manual back-and-forth communication
- Improves customer trust by offering a transparent and easy refund process
- Speeds up issue resolution because store admins can review requests directly in WooCommerce
- Creates a better post-purchase experience, which increases the chance of repeat purchases
- Prevents refund abuse by allowing you to control when and where the refund button appears
Now let’s see how to add a refund request button to WooCommerce.
How to Add a Refund Request Button to WooCommerce
In this section, you will learn how to finish the task. Since WooCommerce doesn’t come with this feature by default, you have to use a code snippet.
So, you need to be using it on your child theme, or you need a site-specific WordPress plugin. To make things simple, we will be using Code Snippets.
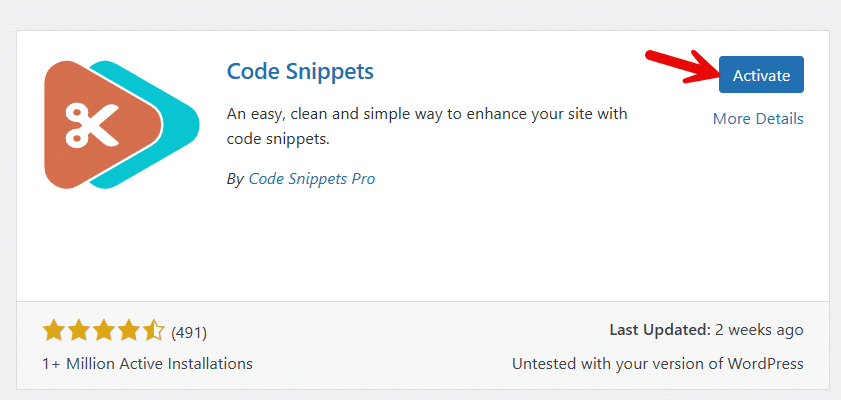
The first thing you need to do is install and activate this plugin on your WooCommerce store.
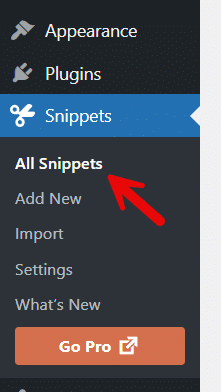
On the left-hand side of the admin dashboard, you can see the plugin’s settings.
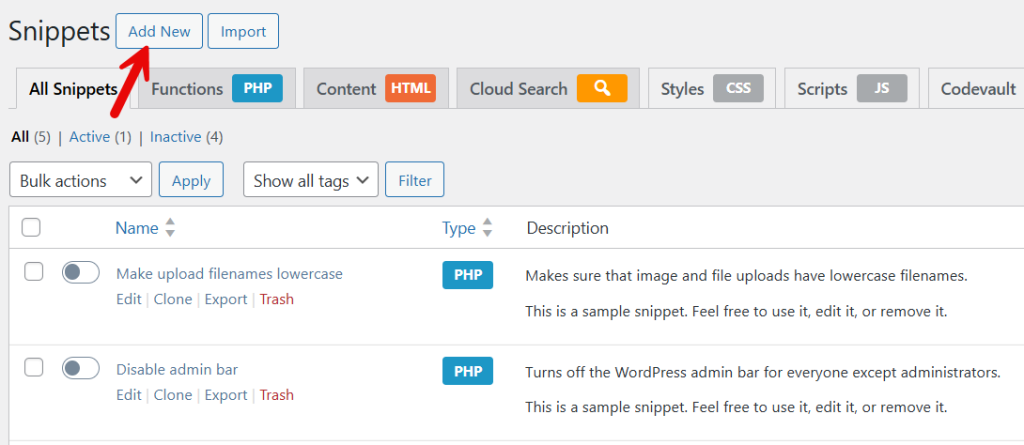
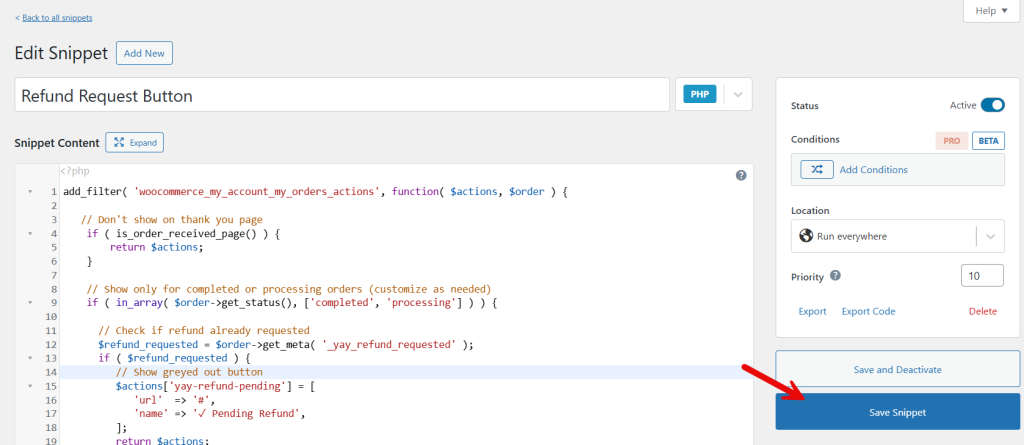
Add a new snippet to the site.
Now it is time to paste the code. The snippet you need to use is:
add_filter( 'woocommerce_my_account_my_orders_actions', function( $actions, $order ) {

   // Don't show on thank you page
    if ( is_order_received_page() ) {
        return $actions;
    }

    // Show only for completed or processing orders (customize as needed)
    if ( in_array( $order->get_status(), ['completed', 'processing'] ) ) {

      // Check if refund already requested
      $refund_requested = $order->get_meta( '_yay_refund_requested' );
      if ( $refund_requested ) {
         // Show greyed out button
         $actions['yay-refund-pending'] = [
            'url'  => '#',
            'name' => '✓ Pending Refund',
         ];
         return $actions;
      }

      // Check if order is within 60 days
        $order_date = $order->get_date_created();
        if ( $order_date ) {
            $days_since_order = ( time() - $order_date->getTimestamp() ) / DAY_IN_SECONDS;

            if ( $days_since_order <= 60 ) {

            $actions['yay_request_refund'] = [
               'url'  => '#refund-' . $order->get_id(),
               'name' => 'Ask for a Refund',
               'aria-label' => 'Ask for a Refund',
            ];

         }

      }

    }

    return $actions;
}, 10, 2 );

/**
 * Add CSS to grey out pending refund button
 */
add_action( 'wp_head', function() {
    ?>
    <style>
        a.yay-refund-pending {
            opacity: 0.5;
            cursor: not-allowed !important;
            pointer-events: none;
        }
    </style>
    <?php
});

/**
 * Output the HTML dialog modal + small JS handler
 */
add_action( 'woocommerce_view_order', 'yay_output_refund_modal' );
add_action( 'woocommerce_after_account_orders', 'yay_output_refund_modal' );

function yay_output_refund_modal() {
    ?>

    <dialog id="yay-refund-dialog">
        <form method="dialog" id="yay-refund-form">
            <h3>Request a Refund</h3>

            <input type="hidden" name="order_id" id="yay-order-id" value="">

            <label for="yay-reason">Reason for refund:</label>
            <textarea id="yay-reason" name="reason" required style="width:100%;height:120px;"></textarea>

            <div style="margin-top:1rem;">
                <button id="yay-refund-cancel">Cancel</button>
                <button id="yay-refund-submit">Submit</button>
            </div>
        </form>
    </dialog>

    <script>
        // Open dialog when clicking the custom action
        document.querySelectorAll('a.yay_request_refund').forEach(function(btn){
            btn.addEventListener('click', function(e){
                e.preventDefault();
            const orderID = this.getAttribute('href').replace('#refund-', '');
                document.getElementById('yay-order-id').value = orderID;
            document.getElementById('yay-reason').value = '';
                document.getElementById('yay-refund-dialog').showModal();
            });
        });

        // Cancel button
        document.getElementById('yay-refund-cancel').addEventListener('click', function(e){
            e.preventDefault();
            document.getElementById('yay-refund-dialog').close();
        });

        // Submit button
        document.getElementById('yay-refund-submit').addEventListener('click', function(e){
            e.preventDefault();

            const orderID = document.getElementById('yay-order-id').value;
            const reason  = document.getElementById('yay-reason').value;

            if( !orderID || reason.trim() === '' ) return;

            fetch('<?php echo admin_url( "admin-ajax.php" ); ?>', {
                method: 'POST',
                headers: { 'Content-Type': 'application/x-www-form-urlencoded' },
                body: new URLSearchParams({
                    action: 'yay_submit_refund_request',
                    order_id: orderID,
                    reason: reason,
               nonce: '<?php echo wp_create_nonce( "yay_refund_nonce" ); ?>'
                })
            })
            .then(r => r.json())
            .then(data => {
                document.getElementById('yay-refund-dialog').close();
                if(data.success) {
                    alert('Your refund request has been submitted.');
               location.reload();
                } else {
                    alert('Error: ' + (data.message || 'Something went wrong'));
                }
            })
            .catch(() => {
                alert('Network error. Please try again.');
            });
        });
    </script>

    <?php
}

/**
 * AJAX handler: add customer note + send admin email
 */
add_action( 'wp_ajax_yay_submit_refund_request', 'yay_submit_refund_request' );
add_action( 'wp_ajax_nopriv_yay_submit_refund_request', 'yay_submit_refund_request' );

function yay_submit_refund_request() {

    // Verify nonce
    if ( ! isset( $_POST['nonce'] ) || ! wp_verify_nonce( $_POST['nonce'], 'yay_refund_nonce' ) ) {
        wp_send_json_error( ['message' => 'Security check failed'] );
    }

    if ( empty( $_POST['order_id'] ) || empty( $_POST['reason'] ) ) {
        wp_send_json_error( ['message' => 'Missing required fields'] );
    }

    $order_id = absint( $_POST['order_id'] );
    $reason = sanitize_textarea_field( $_POST['reason'] );

    $order = wc_get_order( $order_id );
    if ( ! $order ) {
        wp_send_json_error( ['message' => 'Invalid order'] );
    }

    // Mark as refund requested
    $order->update_meta_data( '_yay_refund_requested', current_time( 'mysql' ) );
    $order->update_meta_data( '_yay_refund_reason', $reason );
    $order->save();

    // 1) Add customer note
    $order->add_order_note( 'Customer requested a refund: ' . $reason, true );

    // 2) Notify admin
    wp_mail(
        get_option( 'admin_email' ),
        'Refund Request for Order #' . $order_id,
        "A customer has requested a refund.\n\nOrder: #{$order_id}\nReason:\n{$reason}\n\nView order: " . admin_url( 'post.php?post=' . $order_id . '&action=edit' )
    );

    wp_send_json_success( ['message' => 'Refund request submitted'] );

}
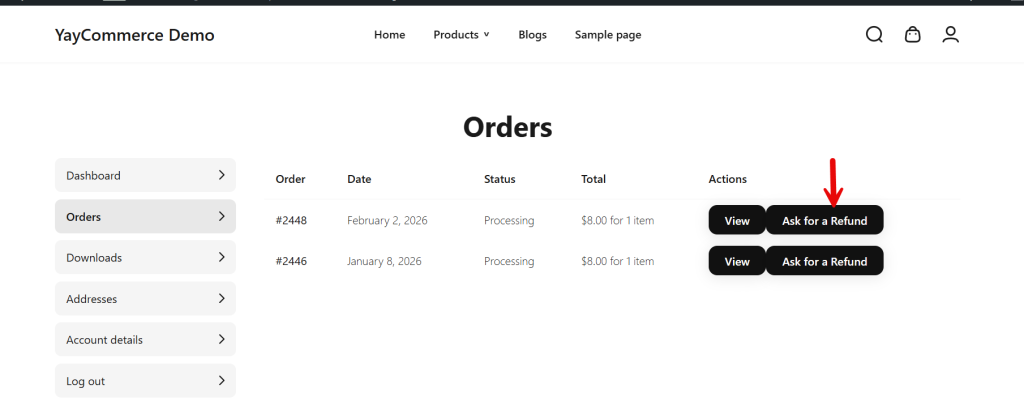
After activating the snippet, you are done. You can visit the my account page and navigate to orders. If you check the right-hand side, you will see a ask for refund button.
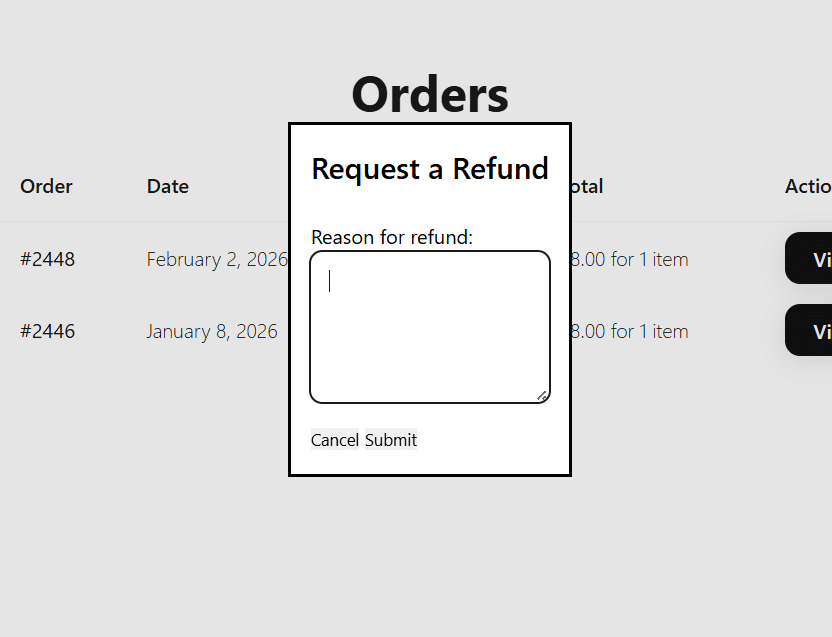
When the user click on the button, a box will pop up, and they can enter the reason there and submit.
If you found this article helpful, here are some related posts that will help you customize your WooCommerce store even more:
- How to Allow Only Simple Products in WooCommerce
- How to Programmatically Mark Products as Featured in WooCommerce
- How to Automatically Hide WooCommerce Products Without a Featured Image
- How to Add a Complete Order Button in WooCommerce Admin
- How to Auto-Cancel WooCommerce Orders After Failed Payments
Frequently Asked Questions
Now, let’s take a look at some of the frequently asked questions and answers regarding this topic.
Yes, you can add a refund request button using custom code, as explained in this guide. This method works with your theme’s functions.php file or a custom plugin and does not require installing any extra WooCommerce extensions.
The refund request button is usually added to the My Account → Orders page or the individual order details page. This way, only customers who have placed an order can see the button and request a refund for a specific purchase.
Yes, you can control when the button appears based on order status. For example, you can show it only for completed or processing orders and hide it for pending or failed payments. This helps prevent invalid refund requests and keeps your store workflow organized.
No, this feature does not replace WooCommerce’s built-in refund tools in the admin area. It only gives customers a way to submit a refund request. You still approve and process the actual refund from the WooCommerce dashboard as usual.
Yes, you can fully customize the button label and the message that appears after a customer clicks it. This allows you to align the wording with your store’s refund policy and maintain a clear, professional tone.
It is safe as long as the code is added correctly and tested first on a staging site. You should also make sure your theme is not overwritten during updates by using a child theme or a custom plugin for the snippet.
Yes, a refund request button is usually more efficient because it connects the request directly to the correct order. This reduces manual work, prevents missed details, and gives customers a clear, structured way to request a refund, instead of sending emails or filling out generic contact forms.
Conclusion
Adding a refund request button to WooCommerce makes the refund process clearer and more convenient for both store owners and customers.
Instead of relying on emails or manual support requests, you give shoppers a direct way to request refunds from their account page, linked to the exact order. This improves customer experience, reduces confusion, and helps you manage refund requests in a more organized and consistent way.
We hope you found this article helpful and enjoyed reading it. If you need to learn more WooCommerce tips and tricks, check out the YayCommerce blog. Also, feel free to check out our social media handles, such as Facebook, X, Instagram, and YouTube, for more interesting content.