About the WooCommerce products storage
If you’re just starting out with WooCommerce or WordPress in general, you might be surprised to discover that WooCommerce products are handled just like any other type of content in WordPress—they’re stored as Custom Post Types.
To break it down, a “Custom Post Type” is essentially a different category of content within WordPress. For instance, blog posts are one type, and pages are another. WooCommerce products fit into this same system, meaning they’re stored in the same wp_posts table in your database alongside your posts and pages.
This setup opens up some exciting possibilities. WordPress includes a built-in class called WP_Query that lets you query or fetch content from your database. With WP_Query, you can pull up your products by querying the wp_posts table, just as you would with blog posts or pages.
But there’s more. Products often have additional details like price, SKU, or stock status. This extra information is stored in the wp_postmeta table as meta fields. If you’ve used plugins like Advanced Custom Fields (ACF), Meta Box (MB), or Pods, you’re already familiar with this setup. These tools let you add custom fields to your posts, and all this data lives in the wp_postmeta table, making it accessible and easy to use.
Mastering the WP_Query class is a valuable skill. It gives you precise control over what content you retrieve and how it’s displayed. However, it can be a bit overwhelming for newcomers. The WP_Query class comes with a long list of arguments—essentially a series of key names—that you need to get just right.
It’s powerful, but it can be time-consuming and requires a good amount of reading through documentation to master. Plus, it’s easy to make mistakes, especially if you’re new to WordPress development.
And here’s the catch: neither WordPress nor WooCommerce provides built-in templates to display your queried products. So, even after you’ve managed to pull the right data, you’ll need to create the HTML markup to display it manually.
This can be complex and adds another layer of difficulty, particularly if you’re just starting out. But don’t worry—there’s a better solution: the Advanced Views Framework (AVF) from WPLake. AVF offers the same flexibility and power as WP_Query, but it’s much faster and more user-friendly. With AVF, you can query and display WooCommerce products without getting bogged down in the intricacies of WP_Query or crafting your own templates from scratch. In the next sections, we’ll explore how Advanced Views Framework can simplify your workflow.
Advanced Views can make your life easier while still giving you full control over your product displays.
About the Advanced Views Framework
Advanced Views is a WordPress framework that aims to simplify your content query and display tasks. If you’ve struggled with the complexity of post queries or template creation Advanced Views might be just what you need.
This framework brings smart templates to the WordPress front end making it easier to query posts and build templates.
The main idea behind Advanced Views is to help you get top-notch results without the time-consuming steps that often come with traditional methods. It offers a strong base for your projects cutting down the time you need to bring them to life.
But don’t think Advanced Views is just another clunky page builder—it’s a clever tool that steers clear of the common traps of those all-in-one solutions.
In essence, AVF equips you with all the tools you need so you can focus on what really matters: bringing your vision to life. Whether you’re working on a small personal project or a large-scale site, Advanced Views streamlines the process, allowing you to create professional, polished results in a fraction of the time it would take using traditional methods.
We recommend watching the introduction video and visiting the Key Aspects section in the documentation to get a closer look at how the Advanced Views Framework works. These resources will help you quickly get familiar with the core concepts and see the framework in action.
How to Query WooCommerce Products using AVF
When running a WooCommerce store, there are countless scenarios where you’ll need to display WooCommerce products in a way that goes beyond the standard layouts. Here are five real-life examples where custom product queries are necessary:
- Displaying the 3 Latest Products:
Perfect for highlighting the newest arrivals on your homepage or a dedicated section. - Showcasing All Cheapest Products in a Specific Category:
Useful for creating a “Budget Buys” section that filters products by price within a chosen category. - Creating a Featured Products Section:
You might want to hand-pick a selection of products to highlight, perhaps based on a special tag or custom meta field. - Displaying Products on Sale:
Automatically pull in all products currently on sale, great for a “Deals of the Day” page. - Listing Products by Custom Attributes:
For example, displaying all products made of a certain material or products that are in stock and available for immediate shipping.
Although you can find plugins that cover some of these needs, none match the wide-ranging flexibility of the Advanced Views. AVF lets you build any query you can think up.
What makes it so powerful? The framework uses WP_Query under the hood! But here’s the thing: instead of writing WP_Query arguments by hand, you get a user-friendly interface to set up your queries.
This means you don’t need to search through docs or remember complex arguments. Also, the framework keeps you in charge of the WP_Query instance and the layout, so you can tweak everything to fit what you need.
AVF Lite vs. Pro:
The Lite edition of AVF works seamlessly with all the primary filters you’ll need: such as date, author, post type, and others.
However, if you want to delve into more advanced queries—like filtering by meta fields or taxonomies—you’ll want to consider upgrading to the Pro edition.
With AVF: Pro edition, you can create sophisticated queries, like pulling in products from a specific category that’s been selected in a meta field on the current page. This level of customization is perfect for creating dynamic, context-aware product displays.
Step-by-step guide
Let’s walk through an example of how to use the framework to display the 3 latest products in a specific category. Let’s imagine we’re creating a website for a second-hand car warehouse, and we need to display the 3 latest cars that have arrived at the warehouse.
This example will involve installing the Advanced Views plugin, creating a View to control how each product (car) is displayed, and setting up a Card to master the product query.
Step 1: Install Advanced Views
- Navigate to your WordPress dashboard.
- Go to Plugins > Add New.
- Search for Advanced Views Framework.
- Install and activate the plugin.
Step 2: Create a View
A View in Advanced Views automatically generates a template using either Twig or Blade, giving you a solid starting point without having to build everything from scratch. You can think of a View as a blueprint that defines how each product result will be displayed on the front end.
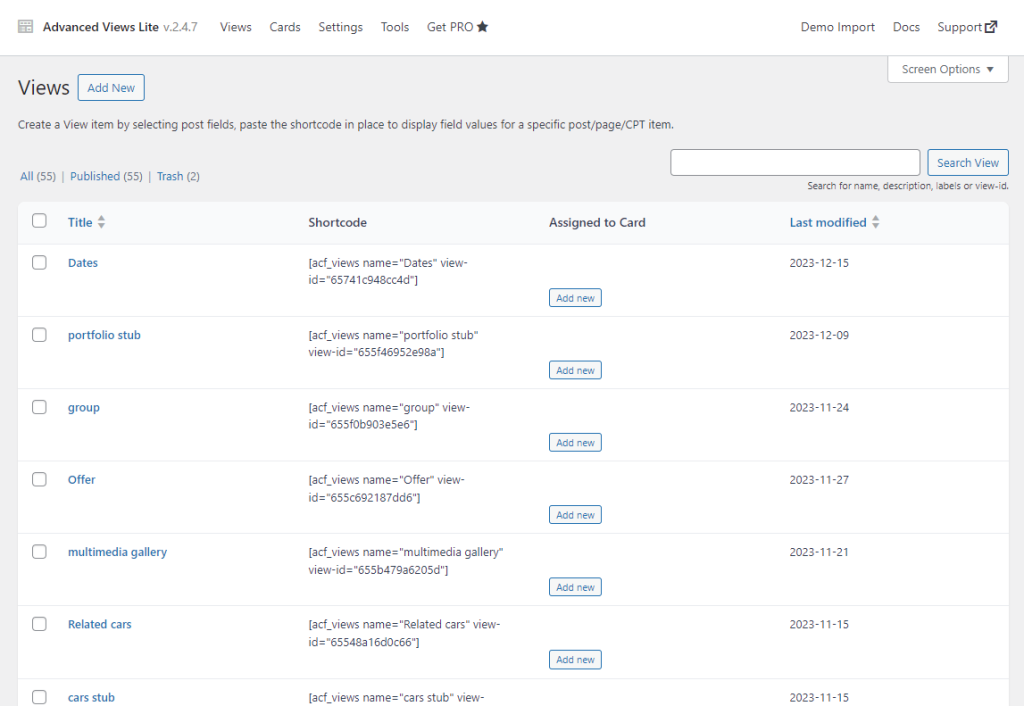
- In your WordPress dashboard, go to AVF > Views.
- Click Add New to create a new View.
- Give your View a name (e.g., “Product Display”).
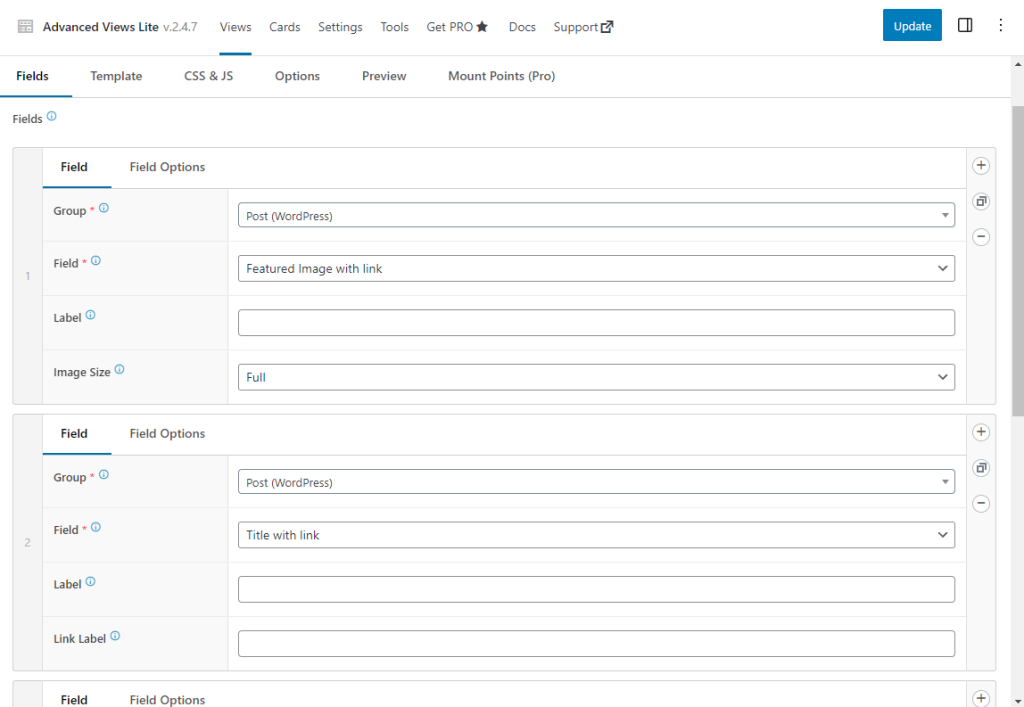
- Choose the necessary fields in the Fields tab and press the Save button.
In the example case, it’s going to image a Product Image, Price (Woo meta field), Year (ACF meta field), and Product Category. - The framework will generate a default template for you automatically, using Twig or Blade. This template is fully customizable, so you can tweak the HTML, CSS, or structure to fit your needs.
- Customize the template directly within the built-in editor, or, if you prefer using your favorite IDE, activate the File System Storage to work on your templates locally. This gives you the flexibility of HTML control while speeding up the process, as you’re amending an existing template rather than starting from scratch.
- Use the CSS fields within the View settings to further style and customize your layout. This means you can handle all your styling without ever leaving the WordPress dashboard, or, if you prefer, manage styles through your IDE with full control.
- Save your View.
Step 3: Create a Card to Master the Query
A Card is where you define the actual query and select which View will display the results.
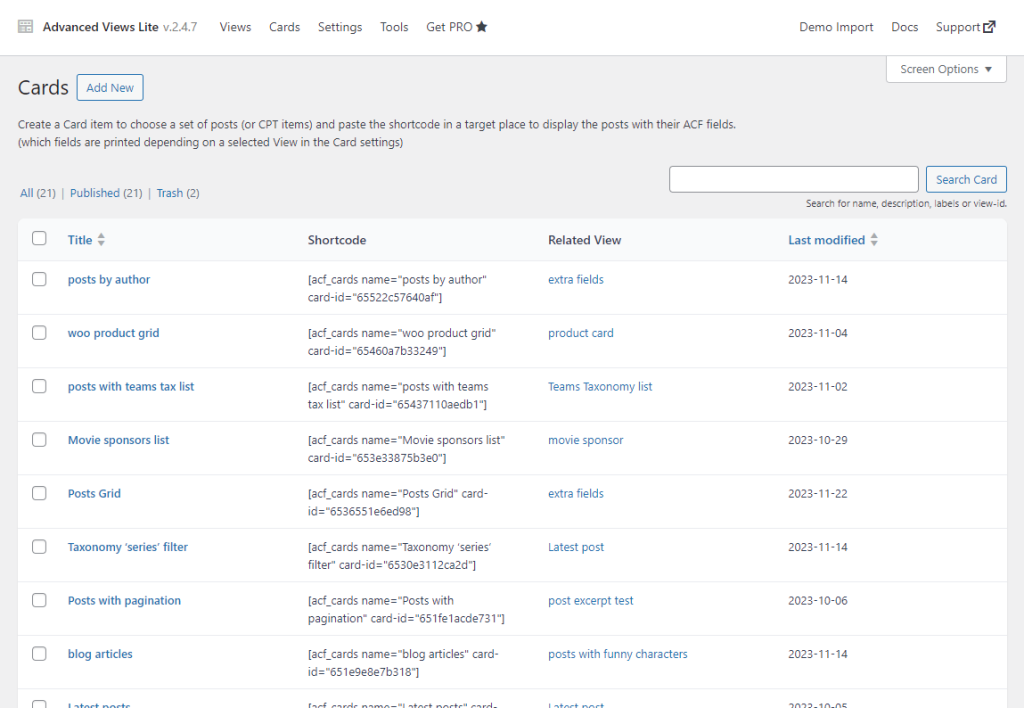
- Go to AVF > Cards.
- Click Add New to create a new Card.
- Name your Card (e.g., “Latest Products in Category”).
- In the Query section, set the post type to Products.
- Use the filters to:
- Select the desired category (in our case Cars).
- Order by Date and set the Order to Descending to get the latest products.
- Limit the number of products to 3.
- In the View section, choose the View you created earlier (“Product Display”).
- You can also use the built-in CSS field here to apply any specific styles to this set of results.
- Save your Card.
Step 4: Add the Card to Your Page
Finally, you’ll want to display this query on your site.
- Copy the shortcode generated for your Card.
- Navigate to the page or post where you want to display WooCommerce products.
- Paste the shortcode into the content editor.
- Update or publish your page.
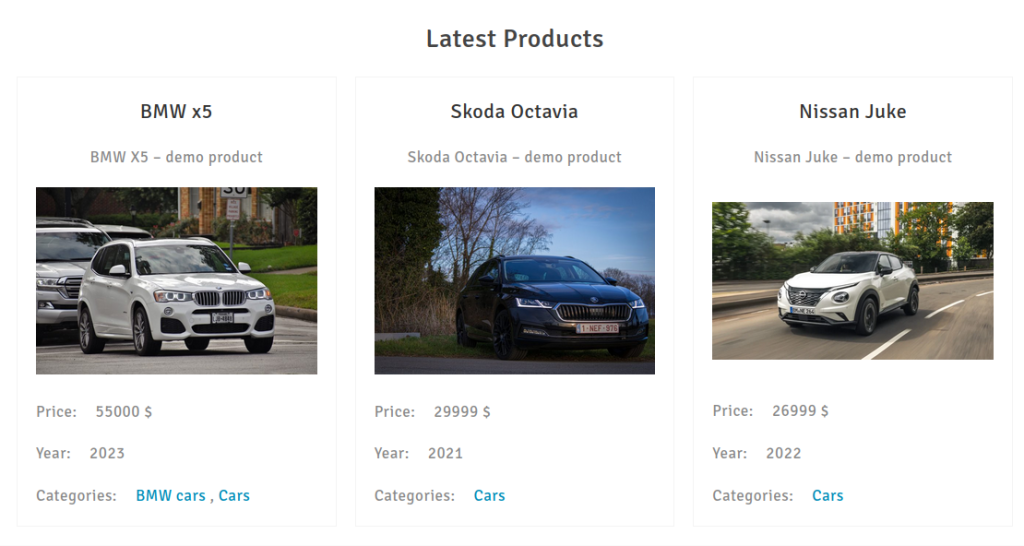
And that’s it! You now have a custom query displaying the latest 3 products in a specific category without any hassle. AVF makes it easy to create powerful, dynamic product displays with just a few clicks, giving you full control over how your WooCommerce store looks and functions.
How to Display WooCommerce Products Details Using AVF
Advanced Views isn’t just about handling lists or grids of WooCommerce products—it offers so much more. When it comes to displaying detailed product information, the framework steps up as a powerful tool, as it also lets you customize how each product appears on your site.
Let’s look at a few ways you can use AVF to enhance your product details:
- Bringing Meta Fields into the Spotlight on Product Pages:
Say you’ve got custom meta fields like “Manufacturer,” “Product Weight,” or “Material” for each product. With AVF, you can easily pull these into the product single page. This way, your customers get all the important details in one place, making their shopping experience smoother. - Highlighting a Custom ‘Delivery Date’ on Product Lists:
If you’ve added a custom meta field for “Estimated Delivery Date,” AVF lets you display this right on your product list or grid view. This is especially handy if delivery time is a key selling point for your store—customers can see this information at a glance. - Showcasing Related Products:
Want to show products that are related by category, tag, or even custom fields? The framework makes it easy to do just that. You can set up a View that automatically displays WooCommerce products related to the one a customer is viewing, helping to encourage more sales. - Featuring Product Reviews or Ratings:
If customer feedback is crucial for your business, Advanced Views can help you prominently display product reviews or average ratings right on the product page. Plus, you can tailor how these reviews look to match your store’s style. - Displaying a Custom Warranty Period:
Got products with a warranty? You can create a custom meta field for the warranty period and use Advanced Views to display this on the product page. This way, customers can easily find the warranty details without having to search around.
Seamless Integration with Meta Fields
One of the best parts about AVF is that it supports popular meta field tools like Advanced Custom Fields (ACF), Meta Box, and Pods right out of the box. So, whether you’re creating simple or complex meta fields, AVF will recognize them and load them into your template with the proper markup—no extra steps needed.
Step-by-step guide
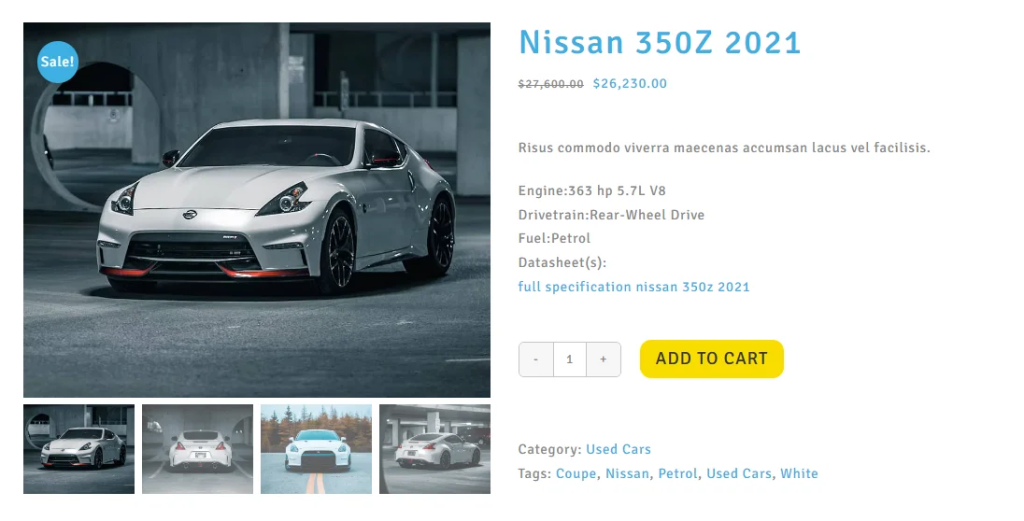
Let’s continue with the car warehouse example and walk through a scenario. Imagine we’ve added two custom meta fields: “PDF Specifications” and “Delivery Date”. Our task now is to display the ‘PDF Specifications’ link on the product’s single page and the ‘Delivery Date’ on the product listing page.
Step 1: Set Up Your Custom Meta Field
Before diving into AVF, make sure you’ve set up your custom meta fields using ACF, Meta Box, or Pods. Advanced VIews is designed to work with any field type from these vendors effortlessly. In our case, it’s the “PDF Specifications” file field, and “Delivery Date” text field.
Step 2: Create a View for the Product Single Page
- Head to your WordPress dashboard, and navigate to AVF > Views.
- Click Add New to start a new View.
- Name your View (e.g., “Product Single Display”).
- Add necessary fields to the Fields tab and press Publish.
- The framework will automatically generate a template for your product single page using Twig or Blade. It’ll include all the standard product details like title, price, and description.
- Customize the design and layout using the built-in CSS fields, or switch to your favorite IDE if you’re using File System Storage.
- Save your View.
Step 3: Apply the View to the Product Single Page
- Open your WooCommerce product single-page template (whether it’s a theme template or a page builder layout).
- Insert the shortcode or select the View you just created (“Product Single Display”) to replace or enhance the default product template.
- Save and preview your product page to make sure the meta field, in our case it’s the “PDF Specifications Datasheet”, is displaying correctly.
Step 4: Create a View for the Product List Page
- Go back to AVF > Views and create a new View.
- Give this View a name (e.g., “Product List Display”).
- AVF will automatically set up a default template for your product list or grid view.
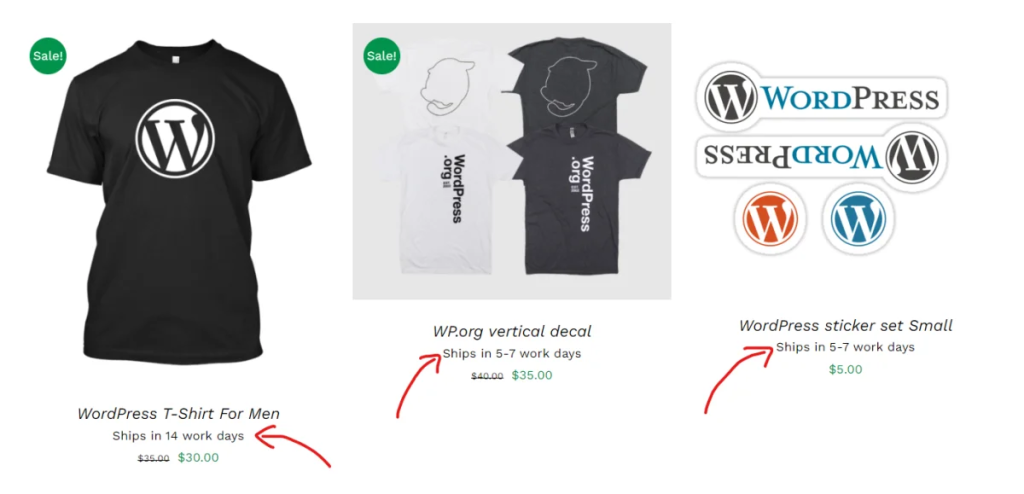
- Add the “Delivery Date” meta field into the template using AVF’s interface, which will generate the necessary HTML for you.
- Customize the design using the built-in CSS fields.
- Save your View.
Step 5: Apply the View to the Product List Page
- Navigate to the page where your product list is displayed (like your shop page or a custom page).
- Use the AVF Card to select and query the products you want, then choose the “Product List Display” View.
- Paste the generated shortcode into the content editor of your product list page.
- Save or publish the page.
And that’s it! You’ve successfully used AVF to display custom product details on both the product single page and the product list page. This method can be applied to any meta field or product detail you want to feature, giving you full control over how your WooCommerce products are presented. AVF’s seamless support for popular meta field plugins makes it easy to create detailed product displays without the usual hassle.
Summary
In this article, we delved into the features of the Advanced Views Framework for searching and showing WooCommerce products. If you want to make custom product lists to show in-depth product details or put the spotlight on specific meta fields, AVF gives you a flexible and easy-to-use answer.
The framework works well with popular meta field plugins like ACF, Meta Box, and Pods letting you create rich, custom product displays without needing to code a lot.
Advanced Views lets you focus on being creative and making things your own. It gives you the tools and templates to get high-quality results fast and well.
If you’re new to this or you’ve been doing it for years, AVF is a great addition to your WordPress toolkit. It makes complex jobs simpler and improves your WooCommerce store.