Do you want to set up different prices for different customers in WooCommerce? Keep reading this article if you need to add this function to your online store.
With WordPress and WooCommerce, anyone can start an online store with little effort. However, managing the store might be challenging. You must develop multiple strategies to boost conversion rates, revenue, etc.
If you have a group of loyal customers, offering them a different price than the usual cost for the product or service would be ideal. This way, you can improve the user experience and get more revenue. By default, WooCommerce doesn’t come with this feature.
If you need to implement this feature but don’t know why, keep reading this article. We will show you how to set up different prices for different customers in WooCommerce.
First, let’s see why setting different customer prices is ideal.
Why Set Different Prices for Different Customers
In WooCommerce, setting different prices for different customers can be a strategic approach to catering to a diverse customer base and enhancing customer loyalty. This practice is not about arbitrary pricing but rather a method of acknowledging and rewarding customers based on their value to the business.
Understanding market differences is crucial when setting prices. Charging different prices based on the customer’s location can be an effective strategy to make products more affordable and attractive to a global audience.
Now you know why setting up different prices in WooCommerce for different customers is ideal. The next section will show you how to set different customer prices.
How to Set Up Different Prices for Different Customers in WooCommerce
In this section, we will show you how to set up different prices for different customers in WooCommerce. Since WooCommerce doesn’t have this feature by default, we must use a third-party plugin.
The plugin we are going to use is YayPricing. It is a freemium WooCommerce plugin. The free version can be downloaded from the repository, and the premium version can be downloaded from the official website.
Configuring the Plugin
For this tutorial, we will be using the premium version of YayPricing. Once you have installed and activated the plugin, you can see its settings on the left-hand side.
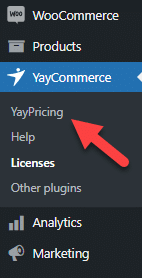
You will see five options once you have opened the plugin’s settings.
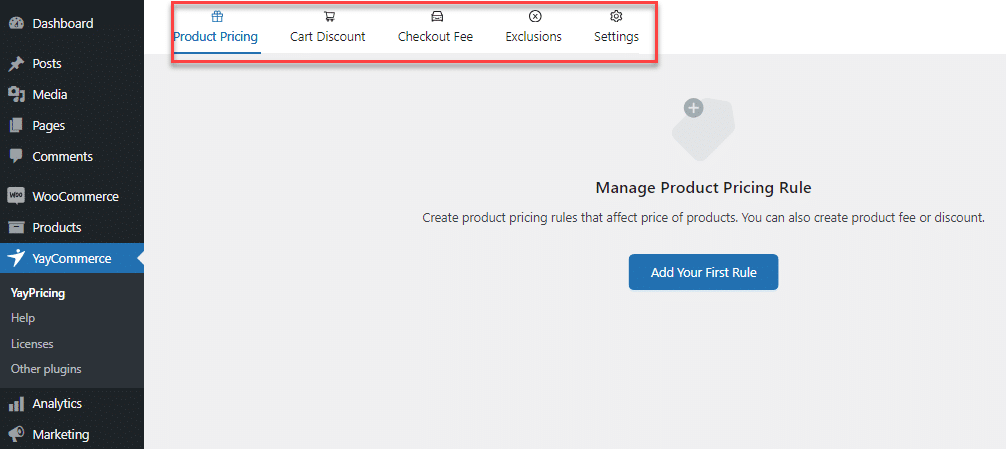
- Product pricing
- Cart discount
- Checkout fee
- Exclusions
- Settings
We will use the first option since we will tweak the product’s pricing based on the customer’s preference.
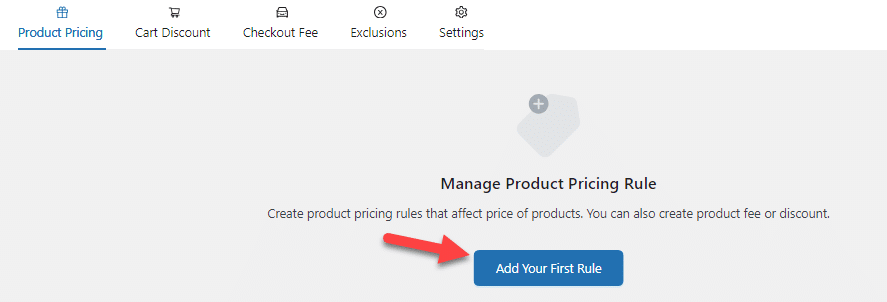
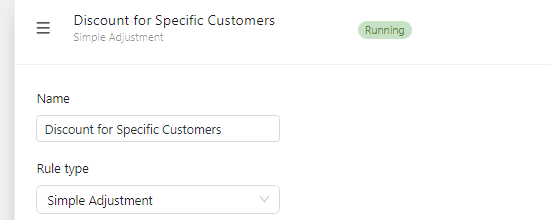
Creating a New Rule
You can create a new rule once you have landed on the plugin’s settings page.
On a pop-up, you can see several pre-made campaigns. From there, select the option to build a custom campaign.
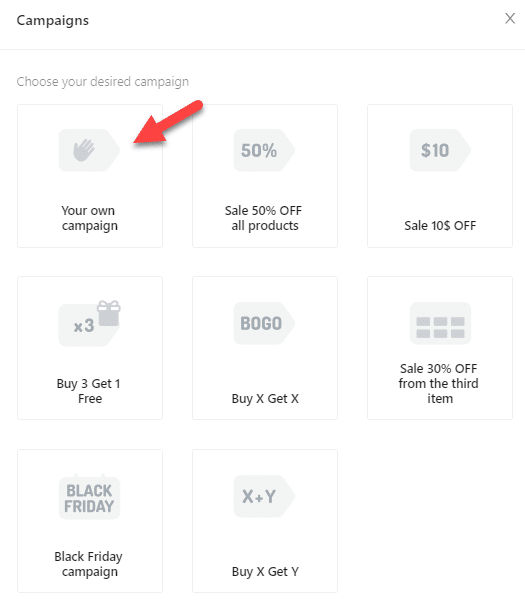
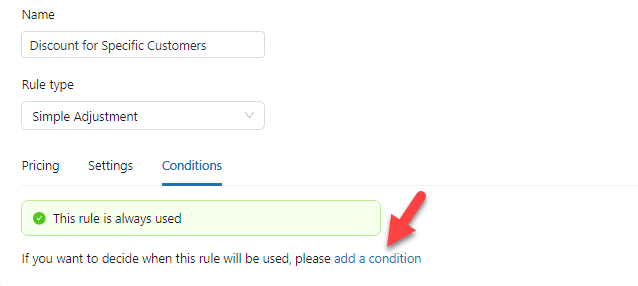
Next, you need to name the rule and select the rule type. The name won’t be visible on the front end of the website.
The name will help you identify the right one when you create multiple campaigns. Similarly, you can choose a simple adjustment as the rule type.
Now, open the pricing settings and decide how much discount the user needs.
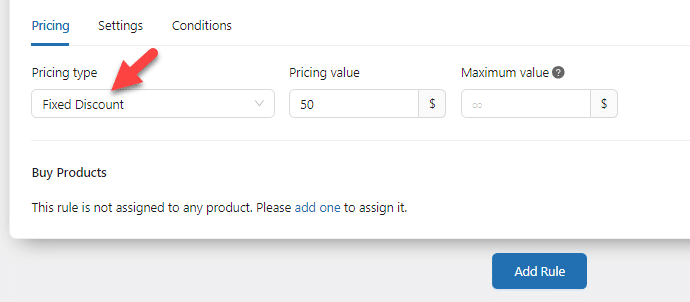
For example, giving them a 20% discount is enough if you have loyal customers. Next, choose the products that are active for this discount. There are multiple rules for selecting a product.
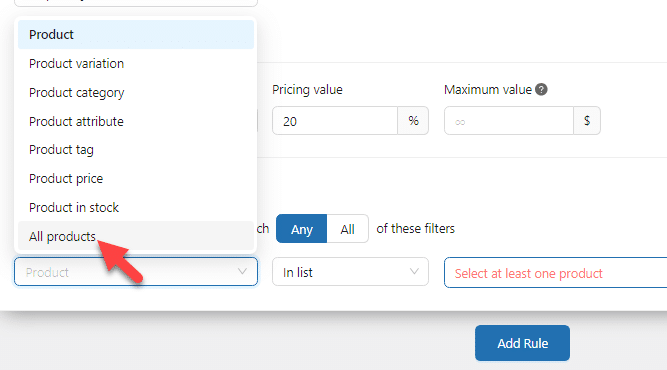
The main rules available are:
- Single product
- Product variation
- Product category
- Product attribute
- Product tag
- Product price
- Product in stock
- All products
For this tutorial, we will apply this rule to all our products. To check the affected products, click the view selected products button.
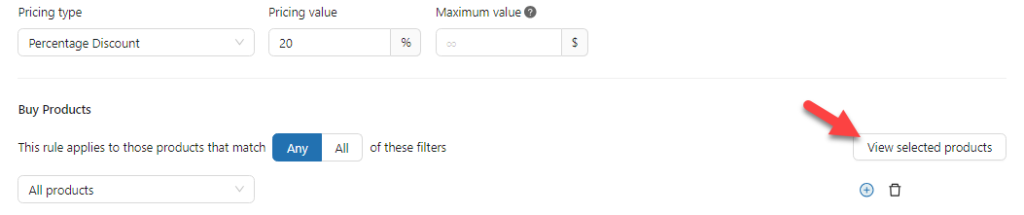
Once you have applied the rule, every customer will get a 20% discount on their product’s pricing. We do not need to do that; we must focus only on specific people. Here, we will show you how to apply this rule specifically to
- Specific users
- Custom user roles
- Logged-in users
- Account creation time
- User creation time
- Customers with good purchase history
- Potential customers
Let’s start by enabling this rule for custom users.
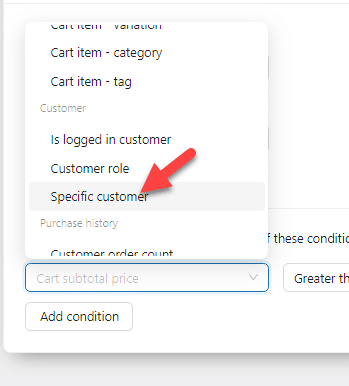
1. Specific Users
The first thing you need to do is go to Conditions and add a new condition there.
From the rule type section, choose the specific customer type.
Next, add the customers.
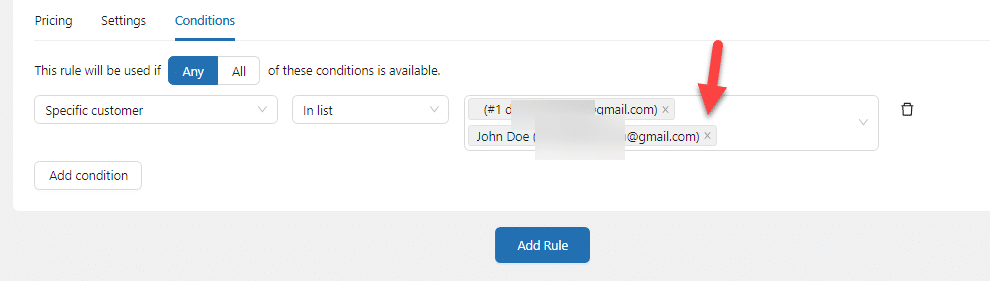
You can save the settings once you have listed all the customers in this section. When the listed customers get a product, they will receive different pricing than the regular customers.
In the next section, we will show you how to give a discount to a specific user role.
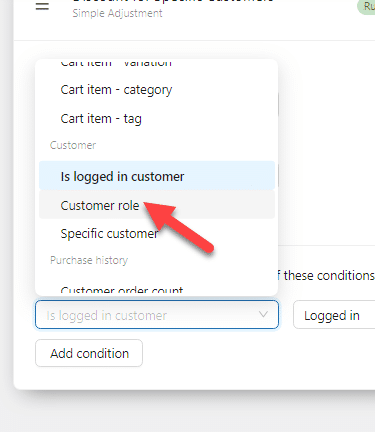
2. Custom User Roles
If you have created custom user roles on your WooCommerce store, you can assign a default discount to that specific user role. To do this, choose the customer role from the rule type.
Now, you can mention which user role can claim the discount.
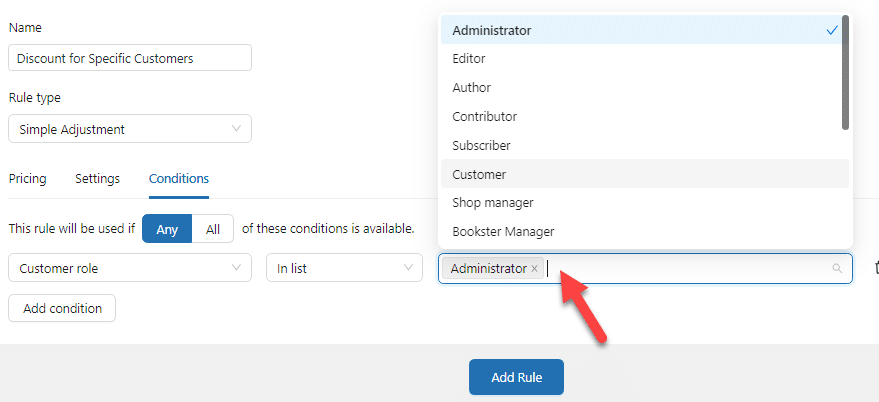
After that, save the settings. From now on, the specific user roles you have mentioned in this box will get a 20% discount on the products.
This is helpful if you are running a wholesale store. This option will also be useful for B2B users, B2B groups, and B2C users. All you need to do is configure the option accordingly.
3. Logged In Users
This rule doesn’t require much configuration. It is ideal if you are allowing guest checkout and need to increase customer signups. You can offer a discount to logged-in users so they can register on the website.
To configure this, choose logged-in as the rule type.
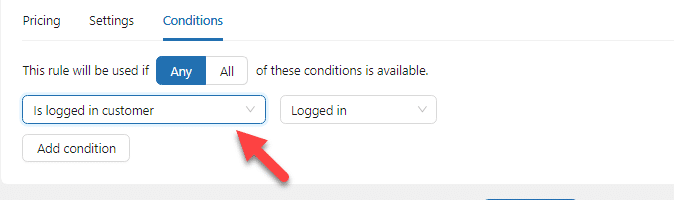
After that, save the settings.
4. Account Creation Time
You can use the next available option if you need to give a discount based on the account creation time. You could choose the rule from the dropdown and select the time duration.

The two main conditions available are:
- Give a discount to users who have created their account within X days
- Give a discount to users who have had an account for more than X days
You can choose a condition and save the changes depending on your needs.
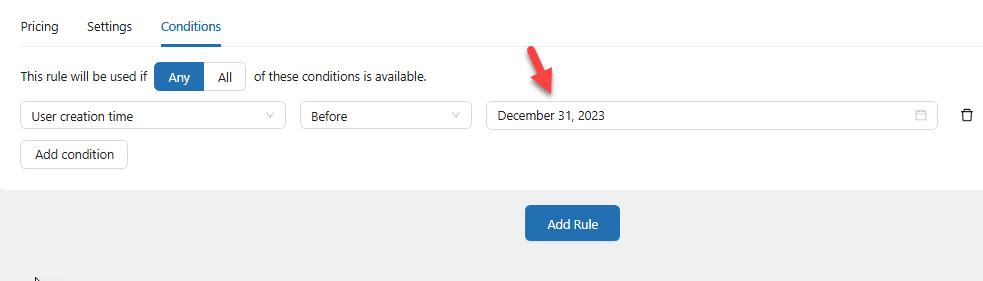
5. User Creation Time
The next available option is based on the user’s creation time. Use this function if you need to offer a discount based on a specific date.
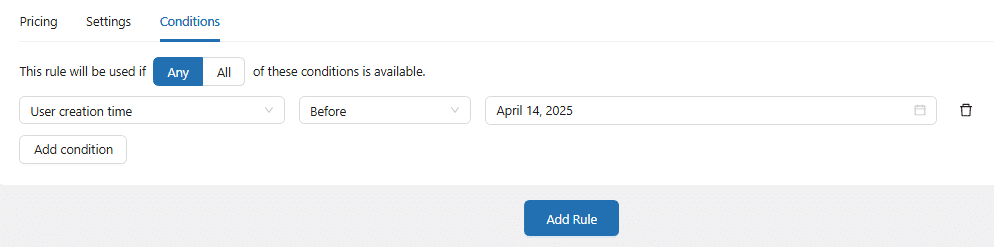
You can select the conditions such as:
- Before
- After
- On
- Between
Choose the date and condition, and save the settings. The discount code will be applied based on the conditions you mentioned.
6. Customers Who Have Ordered More than X Times from the Store
If you have a loyal customer who always orders something regularly, the YayPricing plugin offers something the store owner can do to help the customer with some discounts.
You need to choose the customer order count option from the purchase history section.
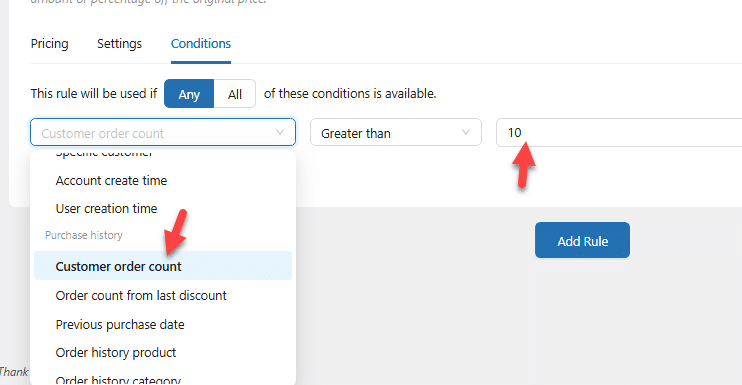
Choose the condition and the amount.
In our case, we have selected 10. This discount will be applied when the customer has processed more than 11 orders in the past (total orders since the beginning of their account creation date).
7. Potential Customers
If you need to give a discount to potential customers, follow this method. Potential customers may have created an account a few months or years ago but have not made many purchases.
So if a user created an account 2 years back but only purchased their first product this year, that can be considered a potential customer. For this configuration, we will be using two rules.
- User creation time
- Previous purchase date
The first condition goes like this:
The second condition would be:
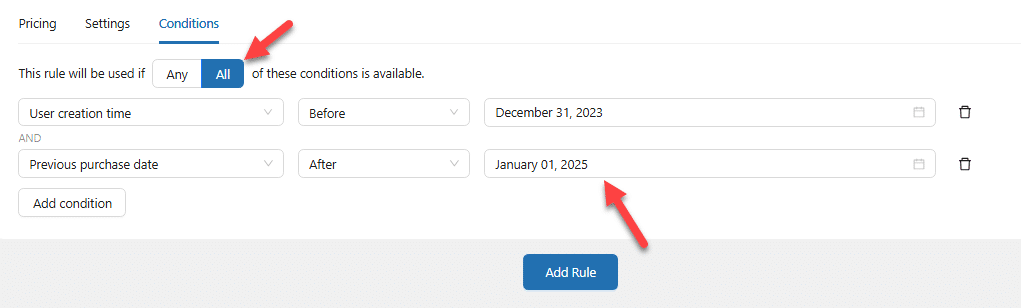
Adjust the dates according to your preferences. Also, choose All conditions applicable from the top.
That’s it!
This is how you can set up different prices for different customers in WooCommerce.
Conclusion
Customer satisfaction is one of the main things you need to focus on when running an online store. Improving the customer experience will help you generate more revenue and conversions.
In this article, we have shown you how to set up different prices for different customers in WooCommerce. The YayPricing plugin makes it easy to add dynamic pricing to the store. The best part is that you do not need to know any coding to complete the configuration.
Would you do this in your WooCommerce store?
Let us know in the comments.