By default, it is impossible to sort out files in the WordPress media library screen – where your media uploads and documents are located. Imagine the mess caused by the inability to categorize or create folders.
While we wait for WordPress to add a feature that does not categorize by default, you’ll have to depend on a plugin. This is where FileBird comes in.
FileBird is committed to the WordPress media library as a file manager plugin. It attaches a merged folder tree on the left sidebar, allowing you to tug and drop files into folders effortlessly. This will help bring the longed-for structure to your WordPress media library.
This article has a detailed breakdown tutorial on how to use FileBird.
- Organizing WordPress Media Library into Folders Using FileBird Plugin
- Valuable Features of the FileBird Plugin
- 1. Bulk Selection of folders
- 2. Deleting files from the media library folders
- 3. Gallery block
- 4. FileBird Document Library
- 5. You’ll be unable to rename or delete the uncategorized folder.
- 6. Choosing the default startup folder
- 7. If the plugin is deleted, what happens to the files and folders
- 8. Folder options
- 9. Fully uninstalling the FileBird plugin
- 10. Export/Import Media Folders
- Final thoughts
Let’s set out.
Organizing WordPress Media Library into Folders Using FileBird Plugin
FileBird is a very user-friendly plugin. It helps you to quickly arrange your WordPress library into separate folders through the drag-and-drop method.
Step 1
To install, all that is needed is to search the term FileBird and then install and activate the plugin.
Step 2
To access the plugin’s settings, go to the WordPress dashboard, then Settings > FileBird. One set might be of interest to you.

Ensure you enable the “Each user has his folders” feature when you open the first tab, Settings.
This will come in handy whenever you have numerous people accessing your WordPress blog or website and prefer each one to have separate folders. The most fitting example would be when you’re running a vlog with several authors.
Step 3
Your WordPress media library changes after installing and activating the FileBird plugin. You will also notice that there will appear a new section on the left side named Folders.
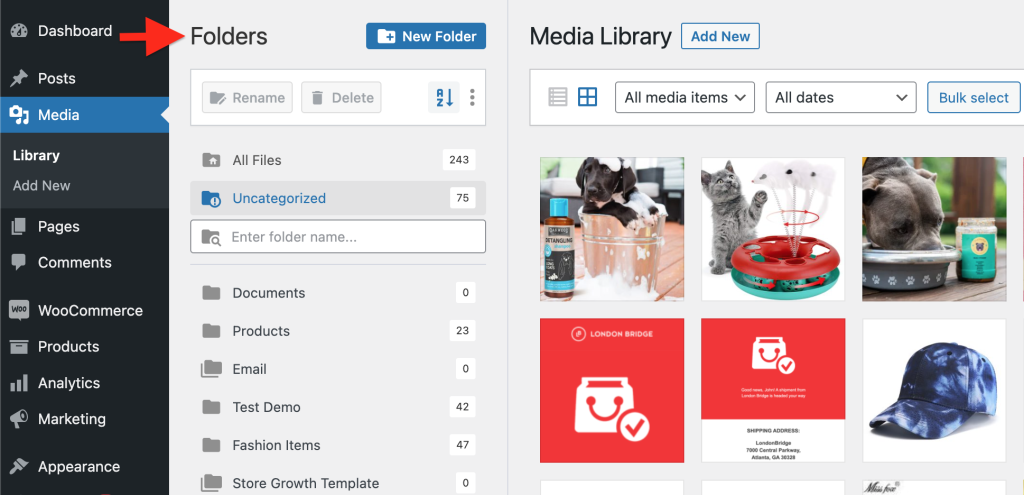
From there, you can begin creating your media library folders in WordPress.
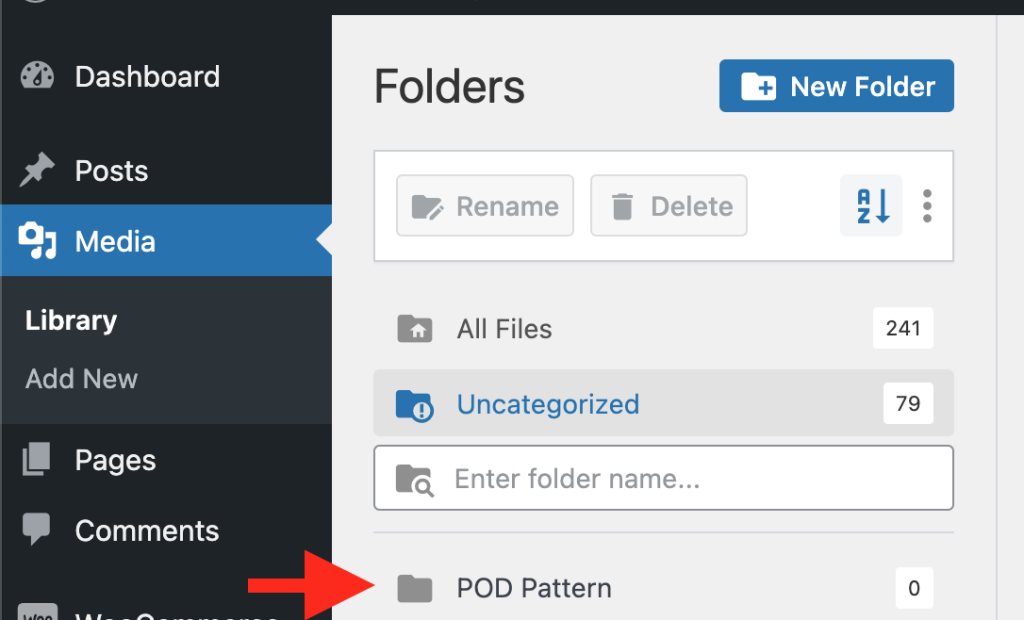
Click the New Folder button when you want to create a new folder. A new segment will emerge; you only need to name the folder and save it.
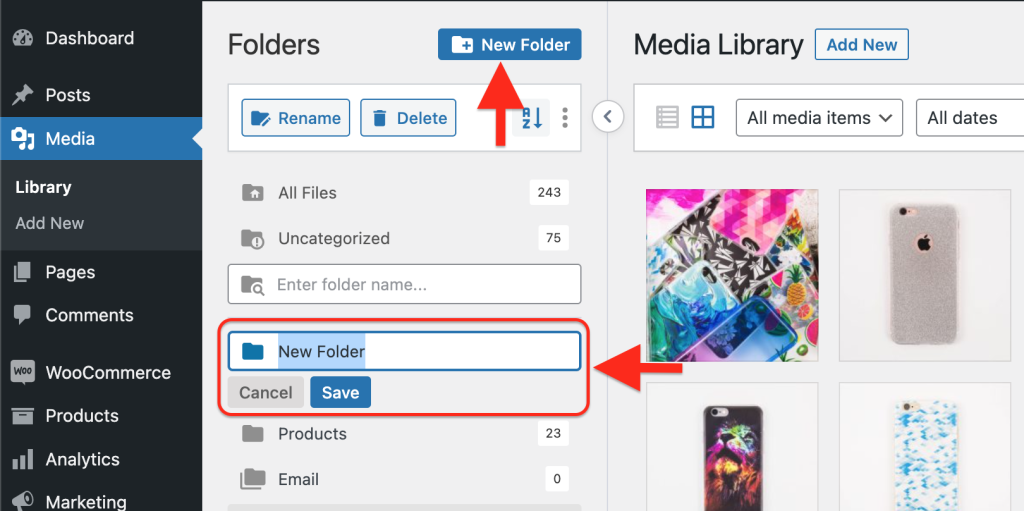
The folder is now present on the list. For instance, create a folder named “POD Pattern“.
To Create a subfolder.
Creating a subfolder requires you to click on the folder and select it, then the new folder.
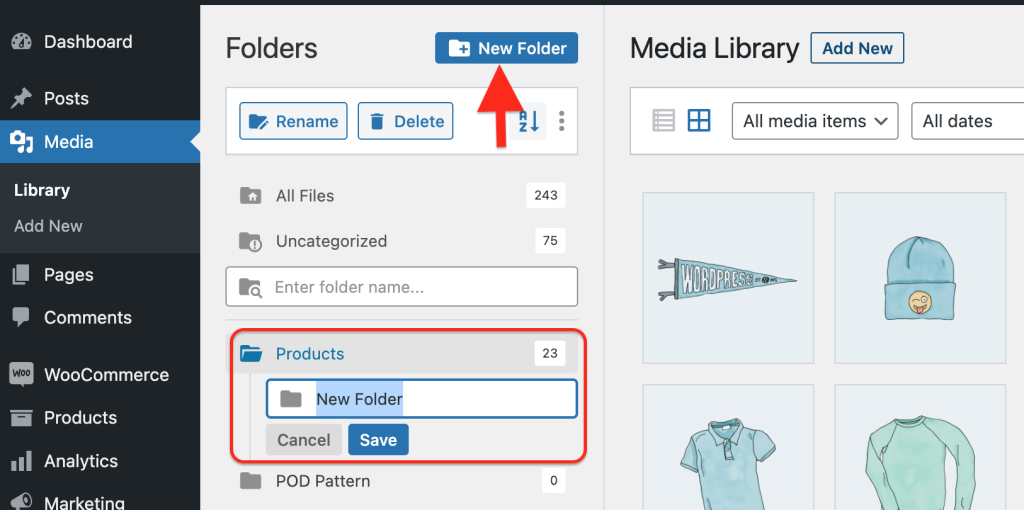
The next step will be to name the subfolder and save it.
After that, your list will have a folder with a subfolder. In this example, you could create a subfolder named “Cap” under the folder “Products”.
Step 4
How to add existing files to folders
This is what you must do to add your current files to your recently created folder in the WordPress library.
- Check the box that is beside them to select
- Click the hold anyplace in the File table, then move them into the folder. A tooltip automatically comes into view, written Move X items, X being the number of files you’ve picked.
In your example, you could add clouds in the Cloudy subfolder.
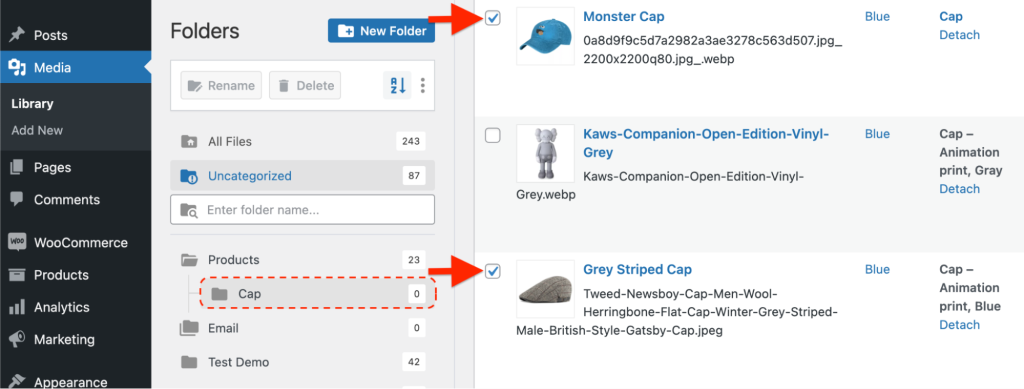
If you wish to look at the files, select the folder. Adjacent to the folder’s name, the number of files present will also be displayed.
Grid mode
Also, you can opt for the grid mode to use in your WordPress library. Next, choose the Bulk Select button.

Then:
- Select the files by clicking on them
- Hover your cursor over a particular selected file, then click, press down, and then drag them to a folder.
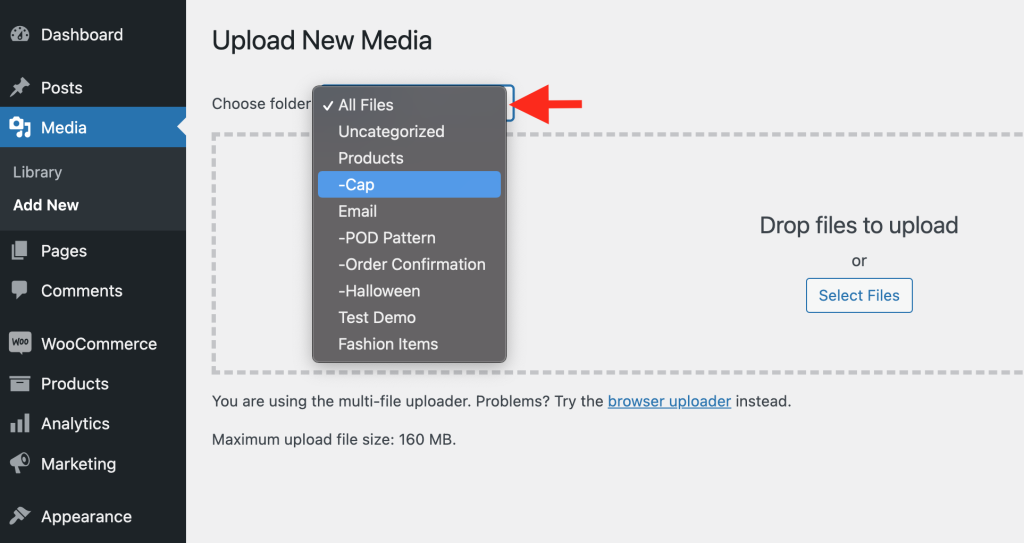
How to add new files straight into folders
To quickly add new files into folders, you just need to choose a folder from the pull-down menu before uploading the files to the WordPress library.
Working the WordPress editor
Whenever you need to transfer files straight to folders from your WordPress editor, through the image block, ensure you don’t press the upload button because it limits you from choosing a folder before it uploads.
Rather:
- Select the Media Library link.
- Click on the tab with upload files
- From your local drive, please select a file and add it to your page or post.
From this, you can see how FileBird simplifies the process of organizing your WordPress media library into desirable folders.
Valuable Features of the FileBird Plugin
Here are various things to remember while using this plugin to better classify your WordPress media library.
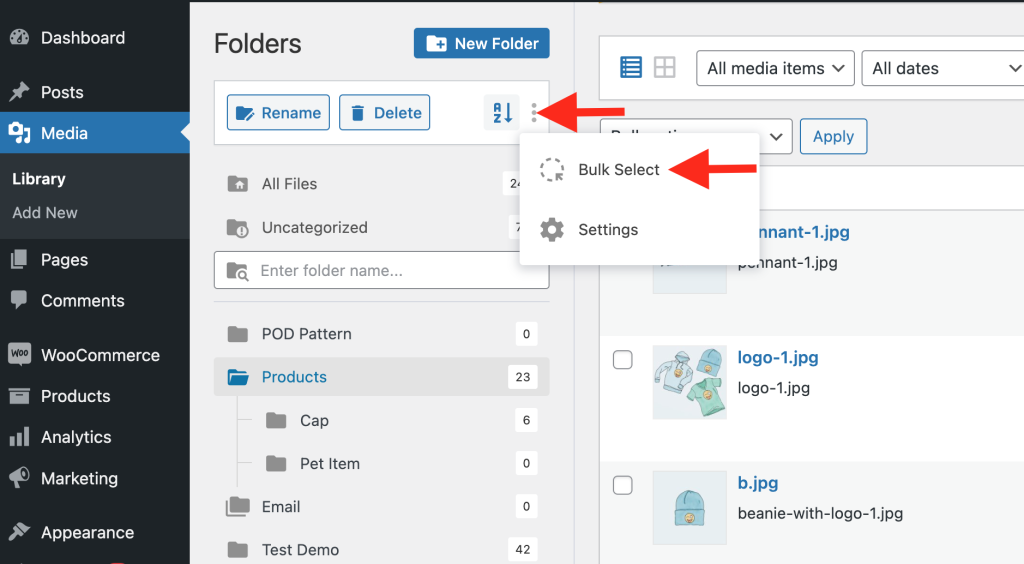
1. Bulk Selection of folders
To select several folders simultaneously, press on the vertical dots that appear and choose Bulk select. Some checkboxes pop up beside the folders waiting for you to select them.
2. Deleting files from the media library folders
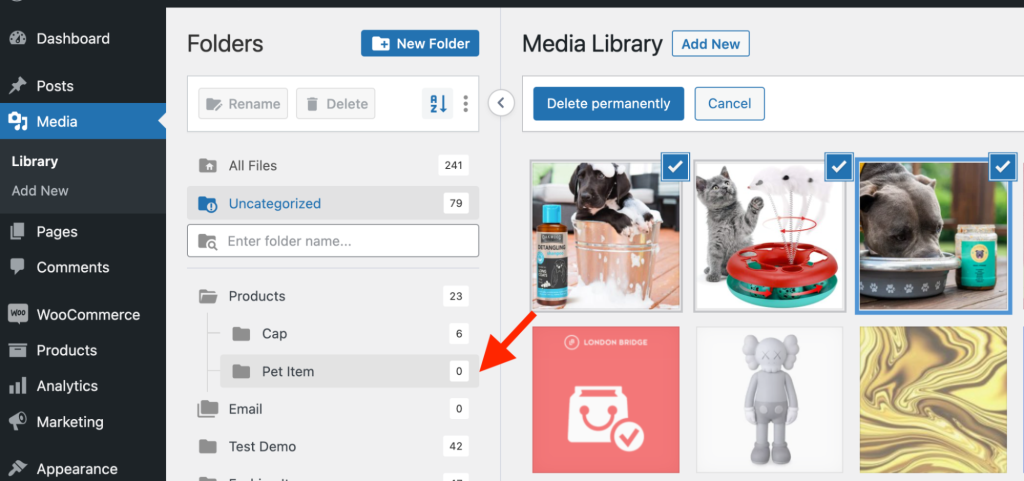
Avoid using the Delete permanently option to delete the files in a folder. They will disappear entirely from the site. Rather, drag them into the uncategorized folder. Technically, that will be your remove/delete alternative.
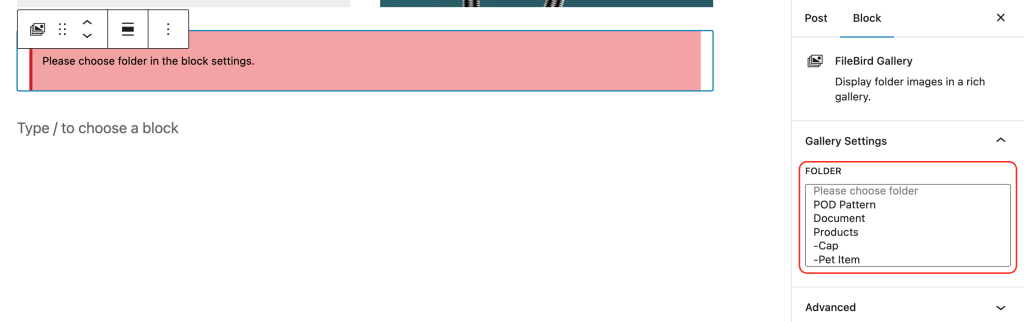
3. Gallery block
A FileBird gallery block comes with FileBird for the WordPress editor. This is especially useful since you won’t have to search for alternative WordPress gallery plugins.
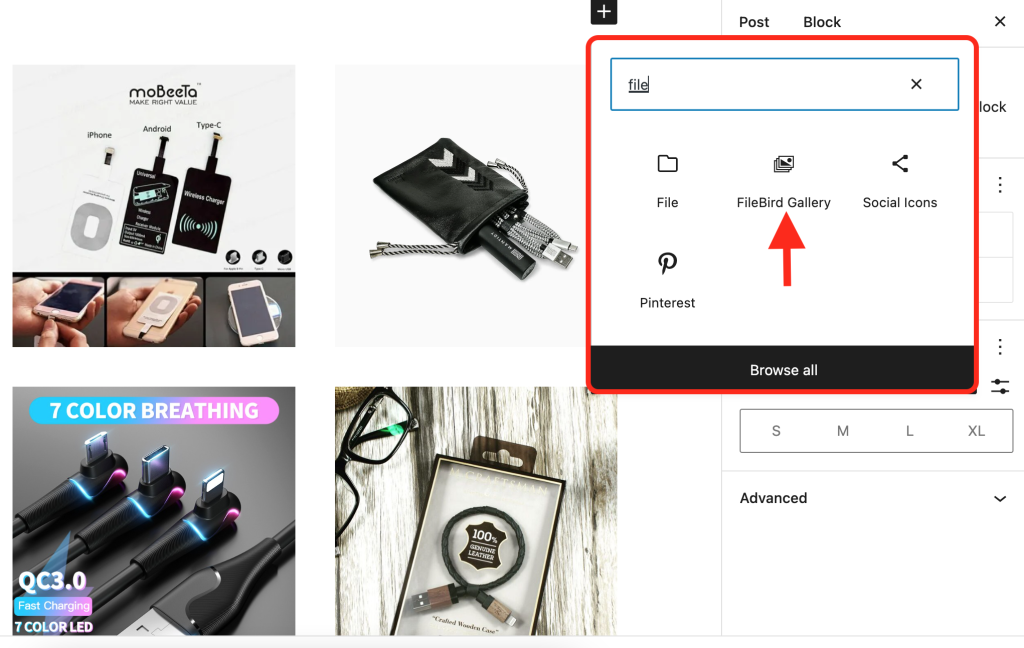
You can find different settings on the right sidebar of the editor.
4. FileBird Document Library
FileBird Document Library is a free WordPress media library add-on to help you publish a document gallery using Gutenberg editor and FileBird folders.
You can choose one of the two layout styles provided in the plugin:
- Document grid view
- Document list view
Customizing is so much fun, and you can set it up while having a side-by-side preview right in the Gutenberg editor.
When you’re done, just publish the document gallery to the WordPress page/post. And have a look! Now you can showcase the whole gallery with different file types all by yourself!
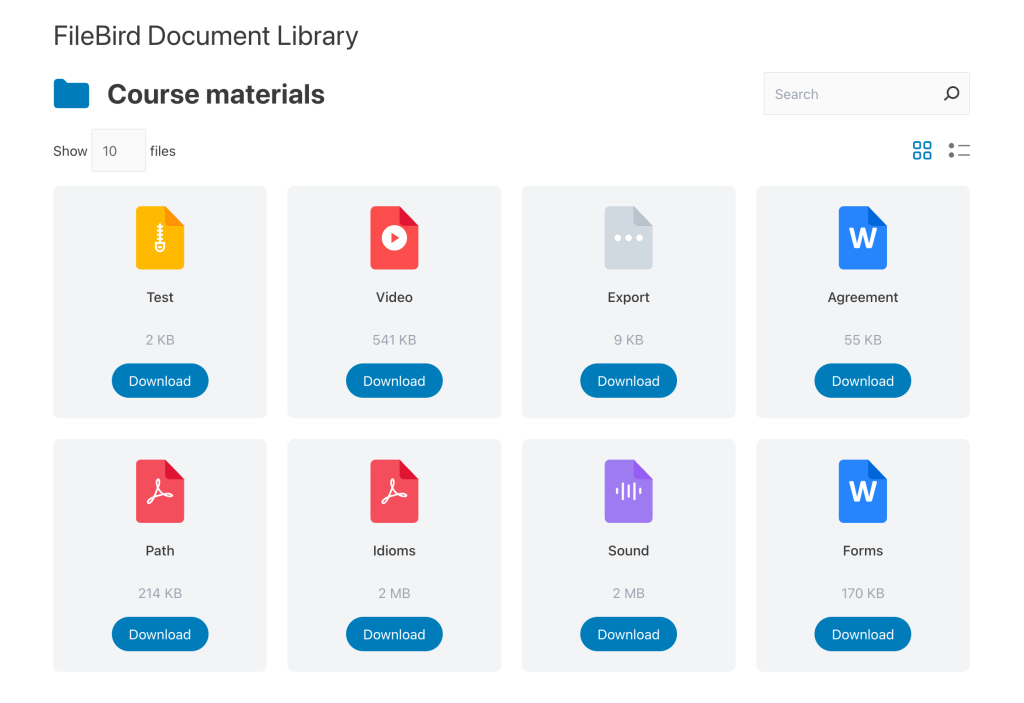
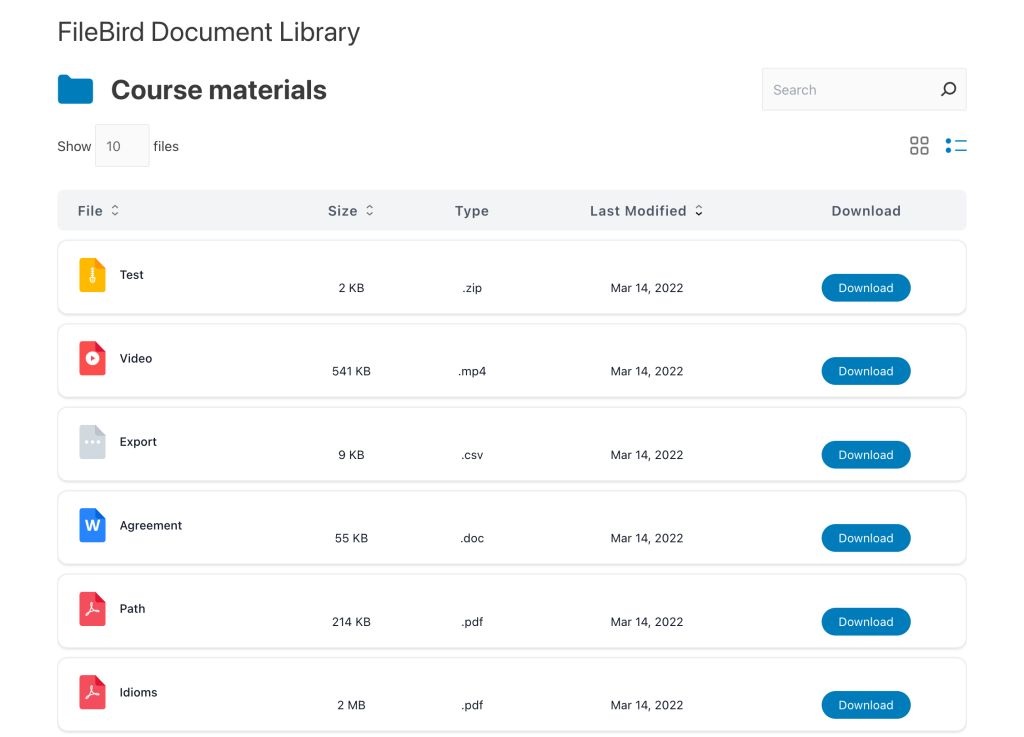
On the frond-end, your visitors can switch between the grid and list layouts, try downloading, change pagination, or sort the documents. It’s pretty cool, right?
5. You’ll be unable to rename or delete the uncategorized folder.
Seeing as the uncategorized folder is crucial, one cannot be able to rename or delete it. As mentioned before, it’s used in place of the removal or delete option.
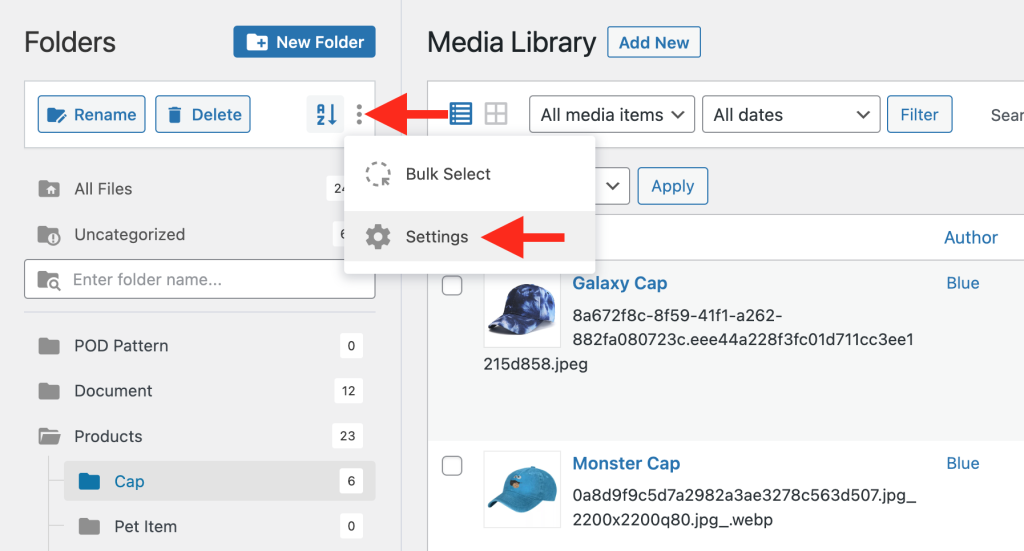
6. Choosing the default startup folder
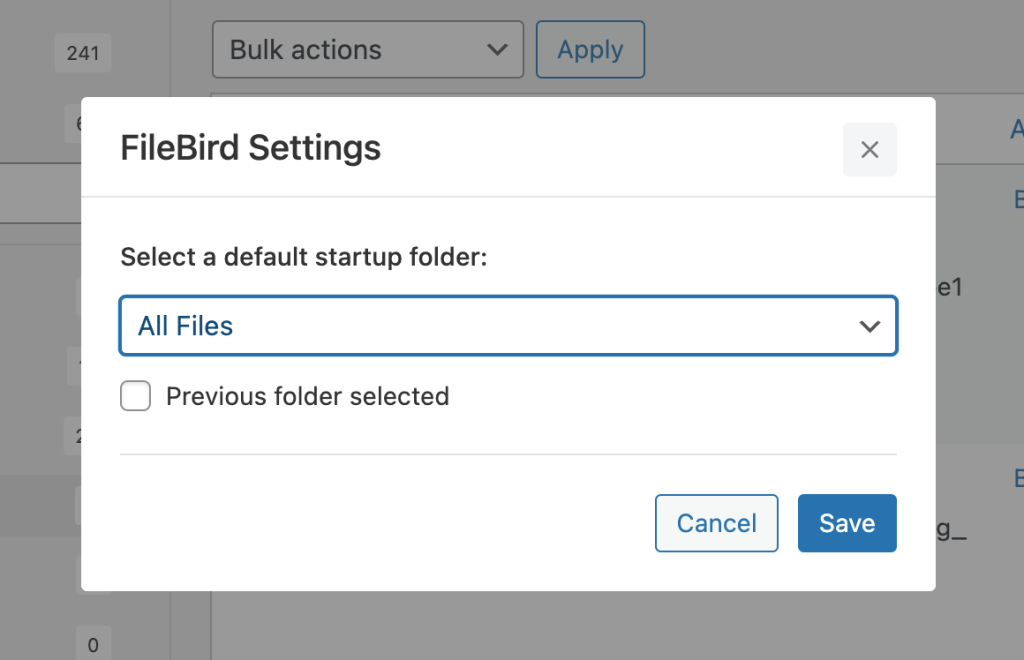
Generally, every uploaded file can be found in the uncategorized folder. Select Settings on the three vertical dots to add an alternative default folder.
In the settings popup on the FileBird, choose the default startup folder. Also, clicking on the previous folder selected means that the previously selected folder will be set as the default.
7. If the plugin is deleted, what happens to the files and folders
Deleting the FileBird plugin will cause the folders to disappear. This means that your WordPress media library won’t be organized into folders. However, the files will still be on your pages, media library, and posts.
In other words, everything goes back to its original messy state.
You could say that FileBird is smart as it doesn’t necessarily create folders on your computer. It simply makes virtual folders to avoid interfering with the links and files once you’re done using them.
8. Folder options
Right-click on a folder to display its options.
You can:
- Create a subfolder/folder
- Delete a folder
- Rename a folder
- Download a folder when you have the pro version
- Paste a folder
- Cut a folder
9. Fully uninstalling the FileBird plugin
Basically, not everything will disappear after uninstalling a plugin. Some settings and data are stored virtually in case you reinstall the plugin.
This means that some settings and data will be recovered on reinstallation. However, some unnecessary software bloat might be experienced.
If you want to remove all the data altogether when also uninstalling the plugin, FileBird gives you that option. Simply go to Settings > FileBird, choose the uninstall tab, and click the clear button.
Later, go to the plugins section and deactivate, then delete.
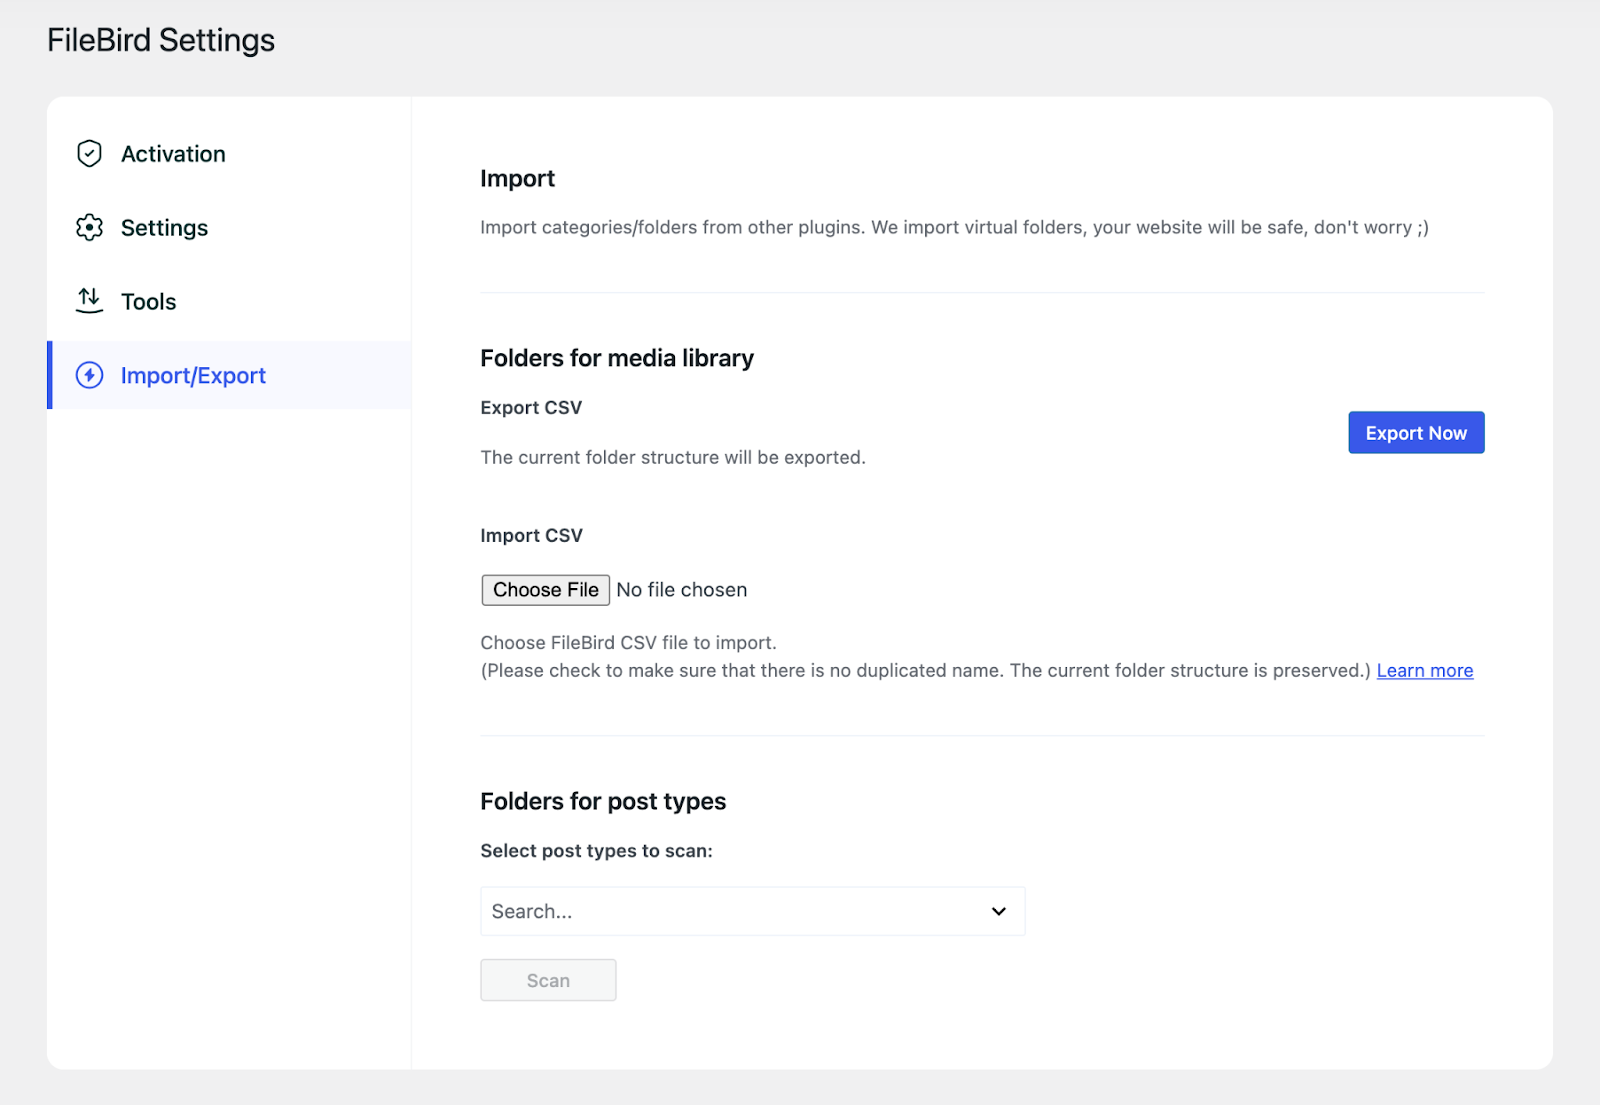
10. Export/Import Media Folders
While you can manually download each image individually and sort them later, this tedious process can become overwhelming and time-consuming, especially if you have thousands of media files.
FileBird Pro offers a convenient solution with its exclusive CSV export/import feature, allowing you to back up your folder organization effortlessly.
Beyond just managing media files, FileBird also organizes folders for custom post types, including posts, pages, templates, and landing pages, ensuring comprehensive content management.
Final thoughts
Are you tired of arranging and searching through tons of files of documents, images, and product videos on your WordPress media library to find a particular file? Then FileBird is your answer. This plugin will help declutter all your files and save you time. Additionally, this plugin will help you rename and delete folders easily. Choose FileBird today to help you organize your WordPress media library folders.