Do you want to stress test a WordPress website? If you are looking for a simple guide, keep reading this article!
Running load and stress tests on your WordPress website helps you understand how your site behaves under real-world traffic conditions.
When you test a WordPress site properly, you can see how response time, server resources, and plugins perform as the number of visitors increases. Many website owners only discover problems after traffic surges cause slow pages or downtime.
Learning how to stress test a WordPress website allows you to simulate high traffic, measure WordPress performance, and identify weak points before users are affected.
A proper load test shows whether your WordPress site can handle high traffic without breaking and whether your hosting provider, caching setup, and database configuration support scaling.
This guide explains how to test your website and improve user experience before traffic spikes occur.
First, let’s see why you should stress test a WordPress website.
Table of contents
Why Stress Testing Is Important for WordPress Sites
- Prepare for high traffic: A stress test helps you determine whether your WordPress website can handle large volumes without slowing down or crashing. When you test a WordPress site under load, you can see how it reacts to traffic increases and unexpected spikes before real visitors are affected.
- Protect user experience: Running a load test shows how response time and website speed change as more users visit your site simultaneously. This allows you to optimize performance issues that could hurt user experience on high-traffic WordPress websites.
- Detect plugin and database problems: When you test your WordPress site with a load testing tool, you can uncover heavy plugins, slow MySQL queries, and caching gaps. This makes it easier to optimize plugins, content delivery, and WordPress caching before traffic surges occur.
- Prevent downtime for business sites: For an ecommerce website or any business website, downtime means lost revenue. Running a stress test tool lets you test your website’s performance under normal and high load, so your site can handle traffic without breaking.
- Plan for future growth: Learning how to stress test a WordPress website helps you understand how your WordPress site’s performance changes as traffic grows. This makes it easier to improve your WordPress site’s performance and prepare for long-term scaling.
- Identify hosting limits: WordPress hosting providers have different resource limits. WordPress stress testing reveals whether your hosting environment can support peak load or if you need better scaling or managed WordPress hosting to avoid performance degradation.
Best Tools to Stress Test a Website
- Loader.io – Free stress testing tool with minimal configuration options that lets you simulate traffic by entering your site URL and setting the number of users per test.
- k6 – Developer-friendly load testing tool that uses scripts to simulate high traffic and measure website load, response time, and performance under stress.
- BlazeMeter – Cloud-based stress test tool designed for large-scale traffic simulation and detailed performance reports for high-traffic websites.
- Gatling – High-performance load testing tool focused on simulating large numbers of users and analyzing how a website or application behaves under heavy load.
These tools let you test your website’s performance, simulate high traffic volumes, and understand how your WordPress site behaves under peak load conditions.
How to Stress Test a WordPress Website
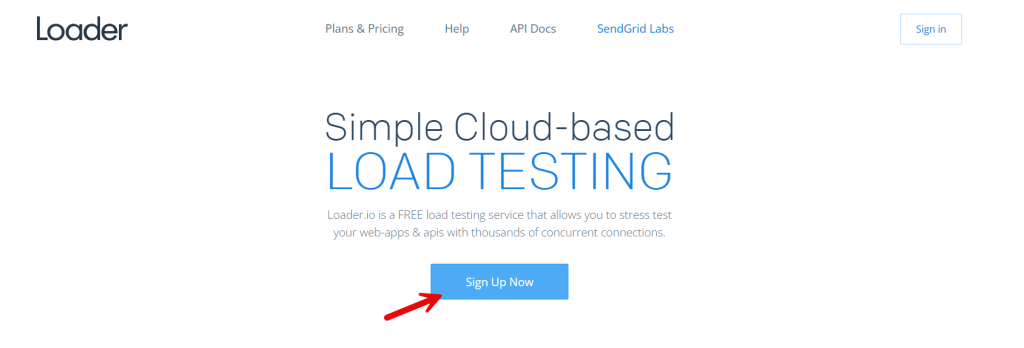
For this tutorial, we will be using the Loader.io platform. It is a free tool you can use to stress test your website. If you do not have an account, register for one.
If you have an account, log in.
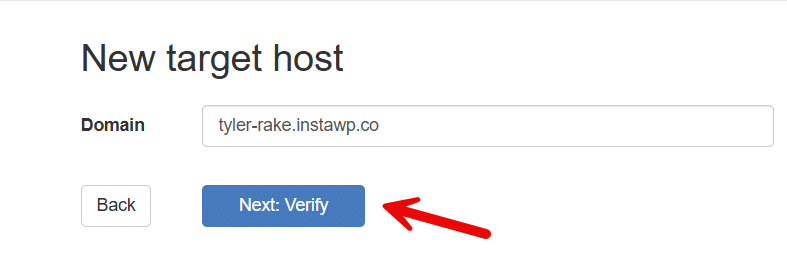
Once you have logged in, you need to add your target host.

Now enter the domain name.
In the next step, you have to verify the site. You can use the DNS method or the file verification method.
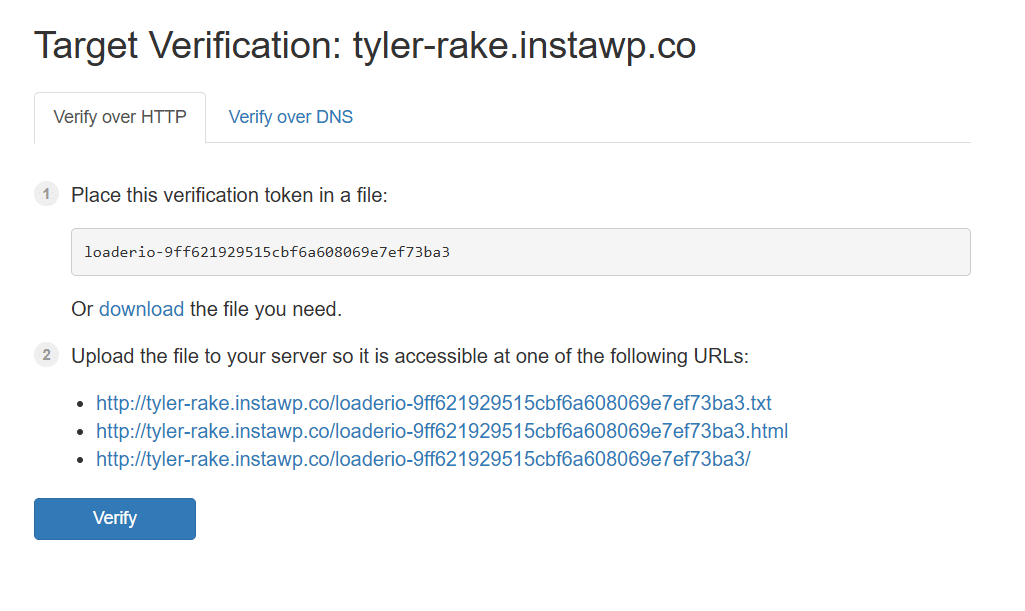
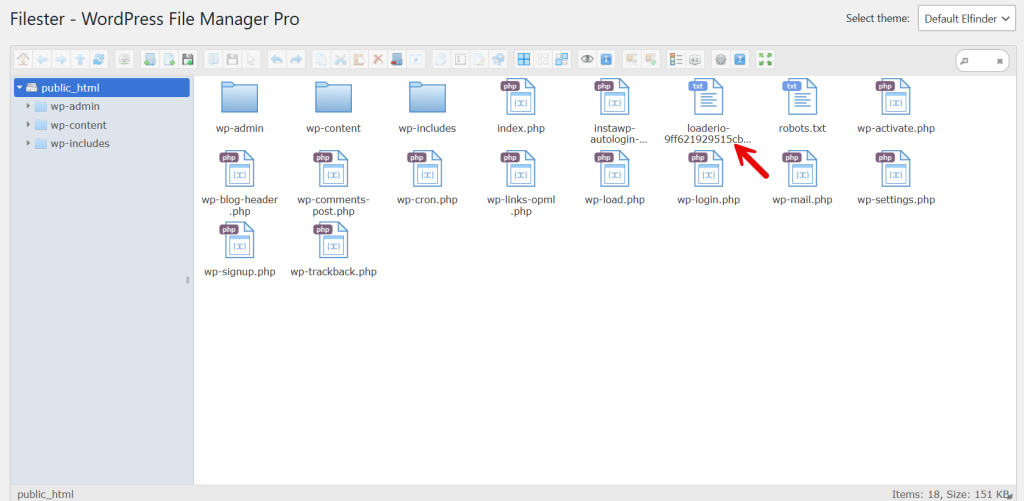
In this case, we will use the file upload method. If you have a File Manager plugin such as Filester on your website or access to FTP, you can upload the file to your website’s root folder and complete the verification.
After uploading, click the verify button.
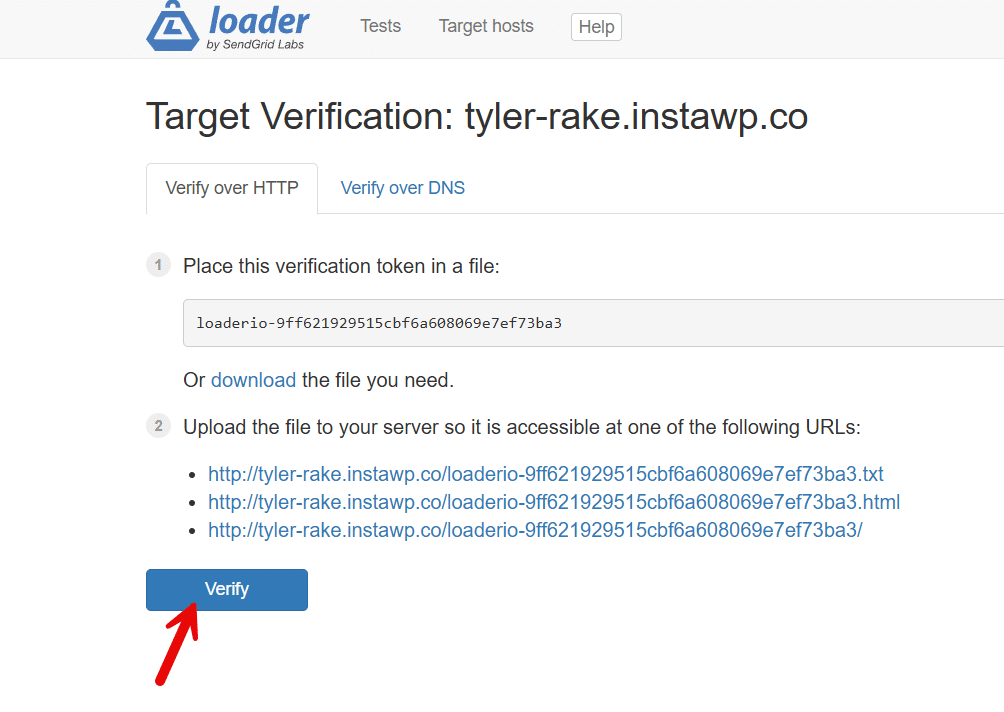
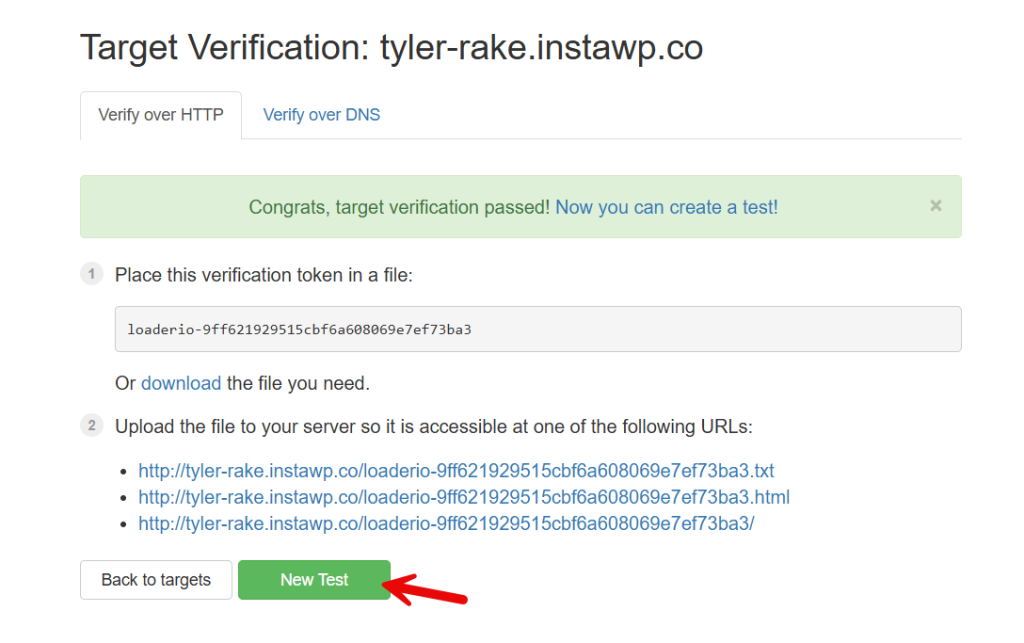
In a few seconds, the platform will verify the target, and you can start with the tests.
You will be redirected to the wizard where you can tweak the test settings.
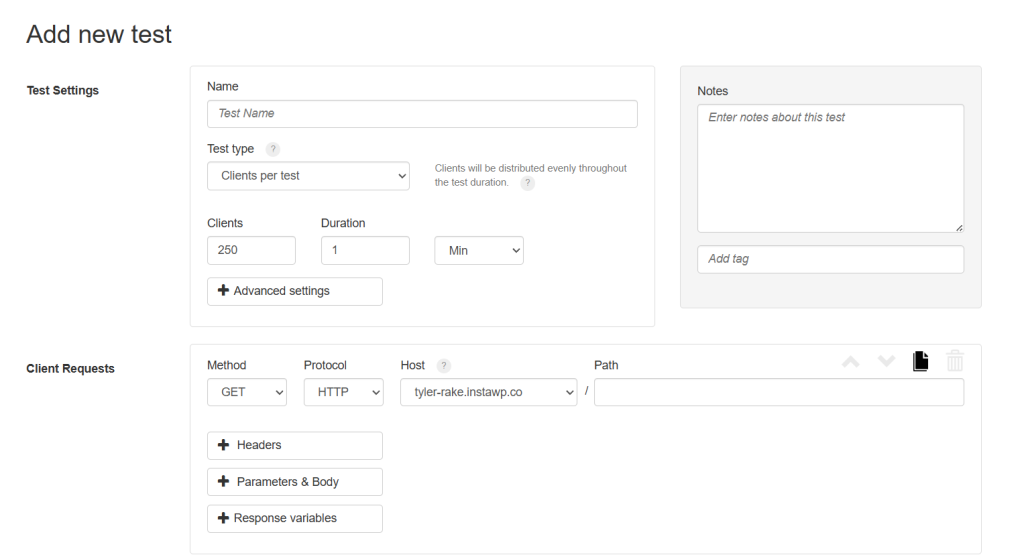
You have to choose
- the name for the test
- the type
- number of clients
- duration
- test path
and so on. There are three test types you can choose:
- Clients per test – the number of clients will be distributed evenly during the test duration
- Clients per second – the number of client requests made per second
- Maintain client load – a constant number of clients will be maintained in the target site
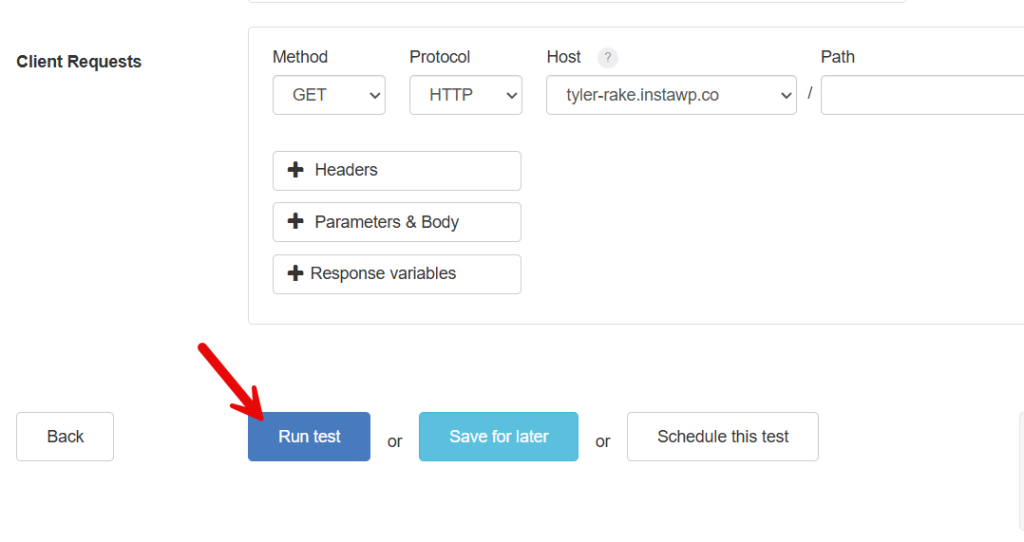
You can pick one based on your needs. In this case, we will choose the first option. And the next thing you need to choose is the number of clients. We will choose 1000 and a 1-minute duration.
Once you are done with it, run the test.
It will take some time to finish the test. Then, you can see the result.
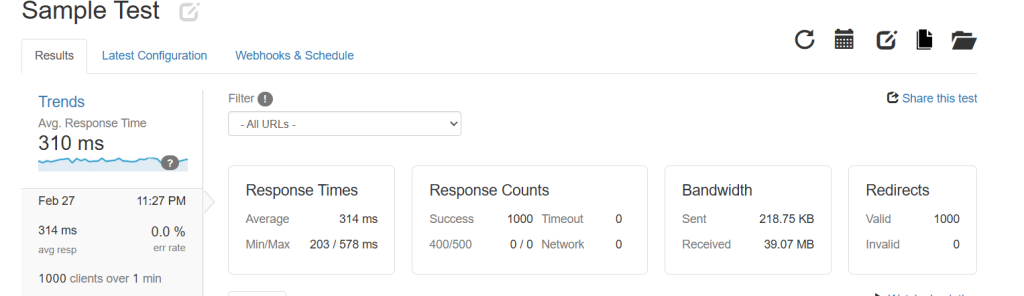
Below that, you can also see the detailed graph.
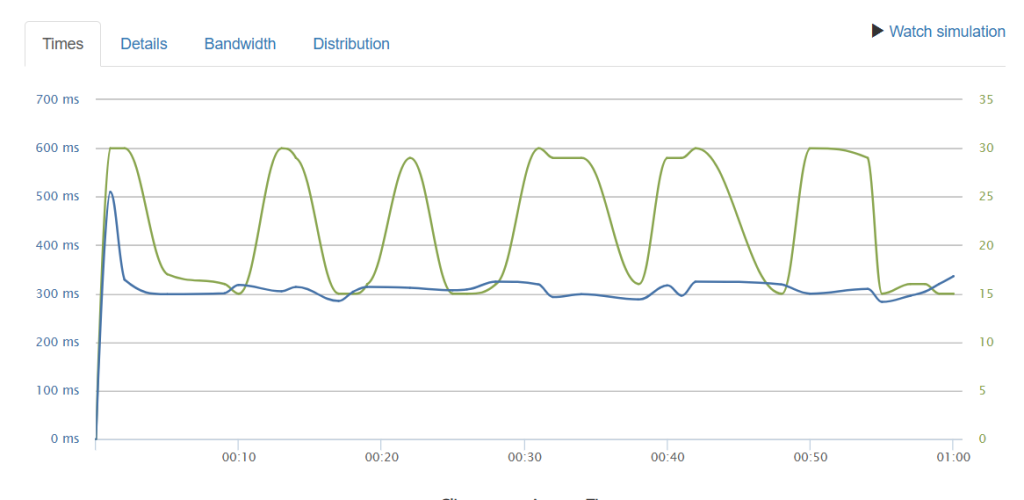
You can even go to individual details, such as
- Times
- Details
- Bandwidth
- Distribution
As you can see in the screenshot, our average response time is 314ms, which is not bad. You can run as many tests as you need and find the average time.
That’s it!
This is how you can stress test your WordPress website.
Here are a few more arrticles you might find helpful:
- 20 Ways to Promote Your Online Store in 2026 (Small Business)
- Best 9 WordPress Post Grid Plugins in 2026
- How to Add Icons to the WordPress Navigation Menu (2 Methods)
- Best WordPress Social Media Plugins in 2026
- Best 7 WordPress File Sharing Plugins You Need to Know
Frequently Asked Questions
Now, let’s take a look at some frequently asked questions and answers about this topic.
A stress test pushes a WordPress website beyond normal traffic levels to measure how the site performs under pressure. It helps you test your site’s speed, server limits, and overall WordPress site performance under heavy traffic. This process is useful when developing a website or preparing for unexpected traffic spikes.
A load test measures how your WordPress site performs under normal, expected traffic levels, while a stress test increases traffic until performance degrades. WordPress load testing focuses on load time and user experience, while WordPress stress testing shows how your website reacts when traffic surges beyond safe limits.
You can test a WordPress website on a live site, but it is always suggested to run the first test in a test environment. Running a stress test on a live site can slow down pages and affect visitors, especially on high-traffic WordPress websites. Testing during low traffic hours reduces risk.
Before you run the test, you should enter your website URL, select the test type, set the test duration, and define the number of clients per test. You will also want to make sure caching plugins like WP Rocket are active, and your WordPress hosting provider is prepared for website stress caused by high load.
You should track load time, your site’s speed, browser response time, and how your WordPress site performs as traffic increases. Monitoring website load and WordPress performance helps you understand if your site can handle high traffic without breaking.
Stress testing does not permanently damage your site, but it can temporarily overload the server. High load and large amounts of traffic may cause slowdowns or errors during the test. This is why it is best to use a test environment and avoid running tests during peak business hours.
Using tools like Loader.io is a simple way to test on your WordPress site. Many stress test tools offer a free plan where you upload the verification file, enter the URL, and simulate traffic. This lets you run a WordPress load test, observe website stress behavior, and confirm whether your site can handle traffic before real users arrive.
Conclusion
Stress testing and load testing are essential steps for maintaining a reliable and scalable WordPress website.
By taking the time to test a WordPress site under different traffic conditions, you can understand how it performs when visitor numbers rise and where performance issues begin.
This process helps you identify server limits, plugin-related slowdowns, and weaknesses in caching or database handling before they affect real users. Regular testing also allows you to prepare for traffic surges caused by promotions, product launches, or unexpected spikes.
When you consistently monitor load time, site speed, and overall WordPress performance, you can make informed improvements that protect user experience and prevent downtime.
In the long run, stress testing ensures your website can handle growth without breaking.
We hope you found this article helpful and enjoyed reading it. If you need to learn more WooCommerce tips and tricks, check out the YayCommerce blog. Also, feel free to check out our social media handles, such as Facebook, X, Instagram, and YouTube, for more interesting content.
How else would you test the website?
Let us know in the comments.