Do you want to customize your WooCommerce thank you page? If you are looking for a step-by-step guide to finish this task, keep reading this article.
The WooCommerce thank you page plays a key role in shaping how customers feel after completing a purchase.
Instead of leaving them with a simple order confirmation, you can customize the WooCommerce thank you page to add custom messages, share related products, or even redirect users to another page.
Creating a custom thank you page allows you to turn a standard order confirmation page into a personalized experience that strengthens trust, encourages repeat purchases, and makes your WooCommerce store stand out.
But before going further, let’s see why you should customize your WooCommerce thank you page.
Table of contents
Why You Should Customize Your WooCommerce Thank You Page
Customizing your WooCommerce thank you page helps you turn a simple confirmation page into a powerful tool for customer engagement.
- Add a personalized thank you message that makes customers feel valued and encourages them to return.
- Provide clear order details on the confirmation page so buyers can easily review their purchase.
- Showcase related products on the thank you page to increase upsell and cross-sell opportunities.
- Redirect customers to a custom thank you page URL with exclusive offers or promotions.
- Use the page to collect feedback or reviews, turning the thank you page into a trust-building tool.
- Share custom content such as discount codes, loyalty points, or upcoming sales to boost retention.
- Customize the thank you page template to reflect your brand identity and create a professional impression.
Now, let’s examine the method for customizing your WooCommerce thank-you page.
How to Customize Your WooCommerce Thank You Page
In this section, we will show you how you can customize the thank you page and also the success page.
The default WooCommerce thank you page would look something like this:
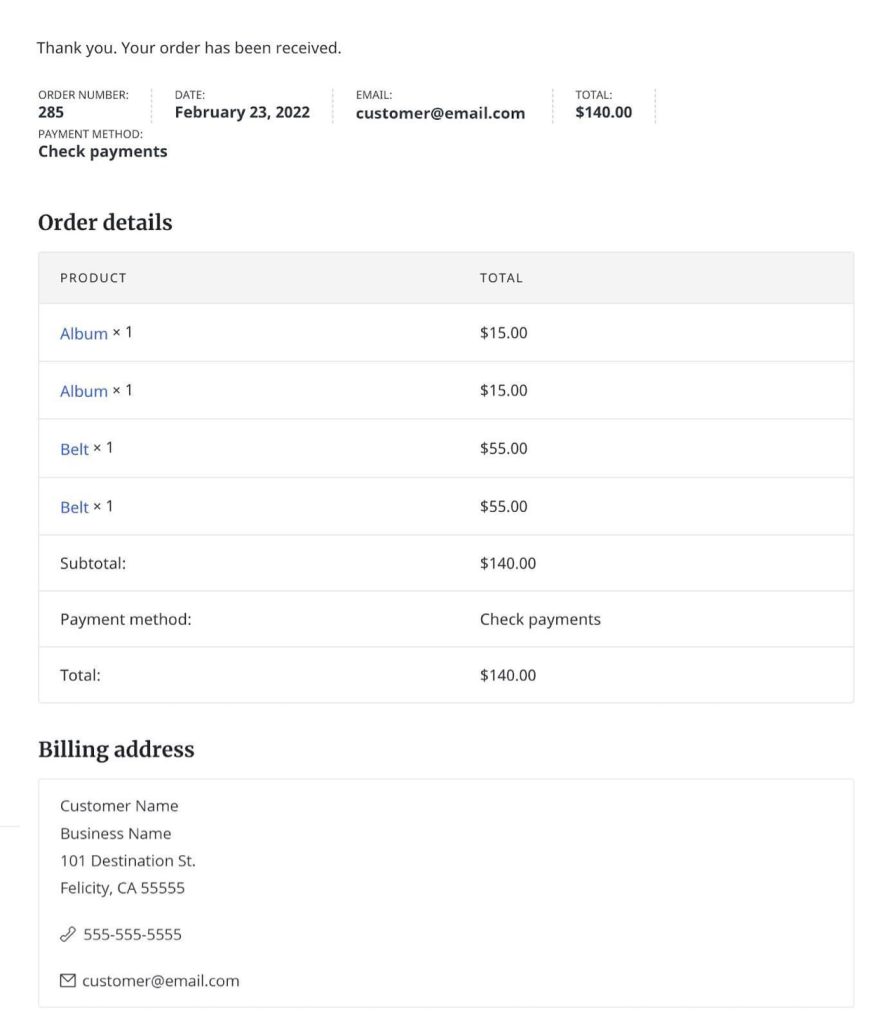
This is so basic. When running an online store, you need to stand out, so customizing it with your brand’s styling is essential. Here is how you can tweak the page using coding.
1. Coding Method
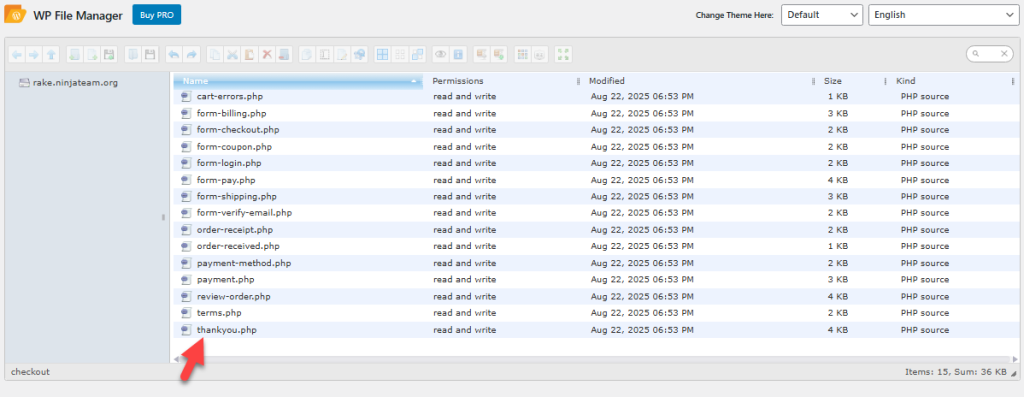
The first thing you need to do is access the thank you template. Use an FTP client such as FileZilla or a dedicated WordPress file manager plugin for this task.
You need to go to wp-contents > plugins > woocommerce > templates > checkout > thankyou.php.
You can use the built-in file editor to tweak the file or download it to your local storage and use a code editor like VS Code for editing it. However, before making any changes, we always recommend downloading a clean copy of the file just to be safe.
In case anything goes wrong, you can upload the actual copy of the thank-you page and restore your website to its normal state.
Inside the file, you will see this snippet:
<p class="woocommerce-notice woocommerce-notice–success woocommerce-thankyou-order-received"><?php echo apply_filters( 'woocommerce_thankyou_order_received_text', esc_html__( 'Thank you. Your order has been received.', 'woocommerce' ), $order ); // phpcs:ignore WordPress.Security.EscapeOutput.OutputNotEscaped ?></p>You need to replace it with this snippet:
<p class="woocommerce-notice woocommerce-notice–success woocommerce-thankyou-order-received"><?php echo apply_filters( 'woocommerce_thankyou_order_received_text', esc_html__( 'Thank you for placing an order with us!', 'woocommerce' ), $order ); // phpcs:ignore WordPress.Security.EscapeOutput.OutputNotEscaped ?></p>

<p class="thankyou-note”> Please note that delivery times are currently estimated at 7-10 business days for U.S. delivery. Orders outside the United States may take two weeks to 30 days to be delivered and may experience delays due to customs or other current policies that are out of our control. If you have any questions about your order, please contact us at [email protected].</p>
After making the changes, you can upload the file back to the templates folder. Now use these CSS codes to style the template:
.woocommerce-checkout p.woocommerce-notice {
font-size: 20px;
font-weight: 800;
color: #3857F1;
}
.woocommerce-checkout p.thankyou-note {
margin-bottom: 40px;
padding: 0 0 5px 20px;
border-left: solid 5px #c4401c;
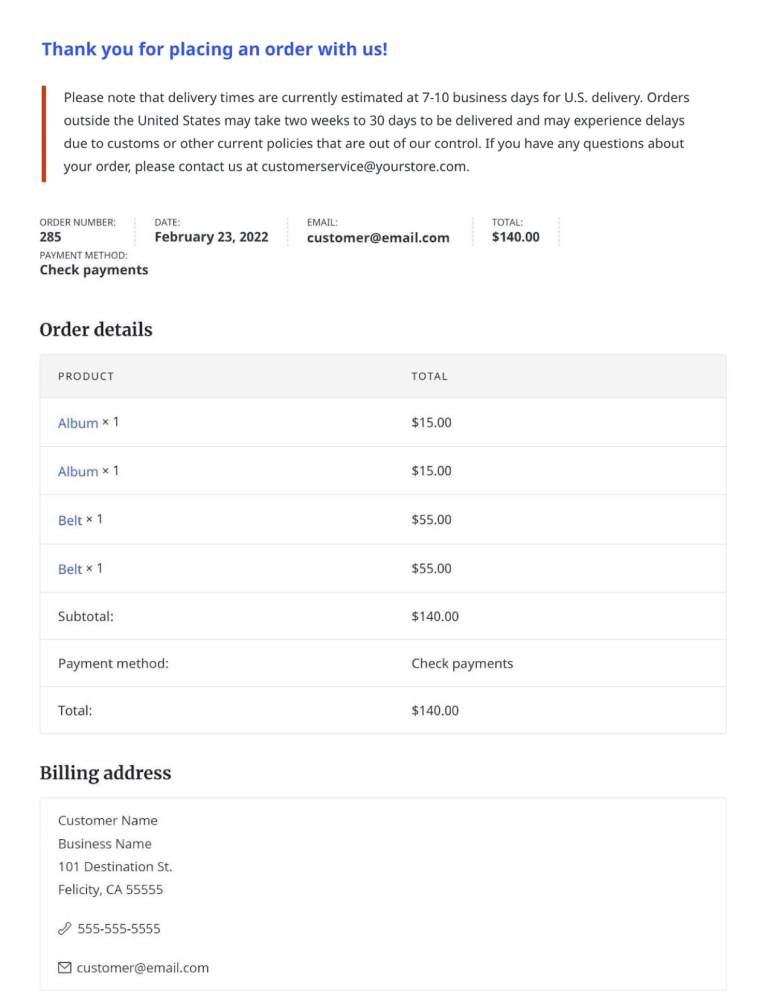
}You can add the code to your style.css file of the child theme, the additional CSS section in the WordPress customizer, or even use a site-specific plugin like Code Snippets. The new thank you page would look like:
You can also use custom hooks available in the WordPress ecosystem to customize the thank you page further. Here is an example of code that will give the user a unique coupon code when they purchase items worth more than $100.
You need to add the code below to your theme’s functions.php file or the Code Snippets plugin.
add_action( 'woocommerce_thankyou', 'coupon_thankyou', 10, 2 );
function coupon_thankyou( $order_id ) {
$order = wc_get_order( $order_id );
$total=0;
foreach ( $order->get_items() as $item_key => $item ) {
$item_data = $item->get_data();
$item_total = intval( $item_data[‘total’] );
$total += $item_total;
}
if ( $total>100 ) {
echo "<section class='woocommerce-thankyou-coupon'><h2 class='woocommerce-column__title'>Congrats! Get 50% off your next purchase!</h2><div class='tybox'><p>As a special thanks for spending over $100 with us today, we’d like to give you 50% off your next order of any full priced items in our store.</p><p>Use code <code class='tycoupon'>[ 50special ]</code> on your next order.</p></div></section>";
}
}Now add this CSS code to finish the customization:
.woocommerce .woocommerce-thankyou-coupon div.tybox {
    border: dashed 13px;
    border-radius: 3px;
    border-color: rgba(110,110,110,.2);
    padding: 12px 20px;
    background: rgb(176,34,195);
    background: linear-gradient(0deg, rgba(176,34,195,0.30) 0%, rgba(253,214,45,0.30) 100%);
}
.woocommerce .woocommerce-thankyou-coupon {
margin-bottom: 2em;
}
code.tycoupon {
    font-size: 18px;
    font-weight: 800;
}
Now the thank you page will look like this:
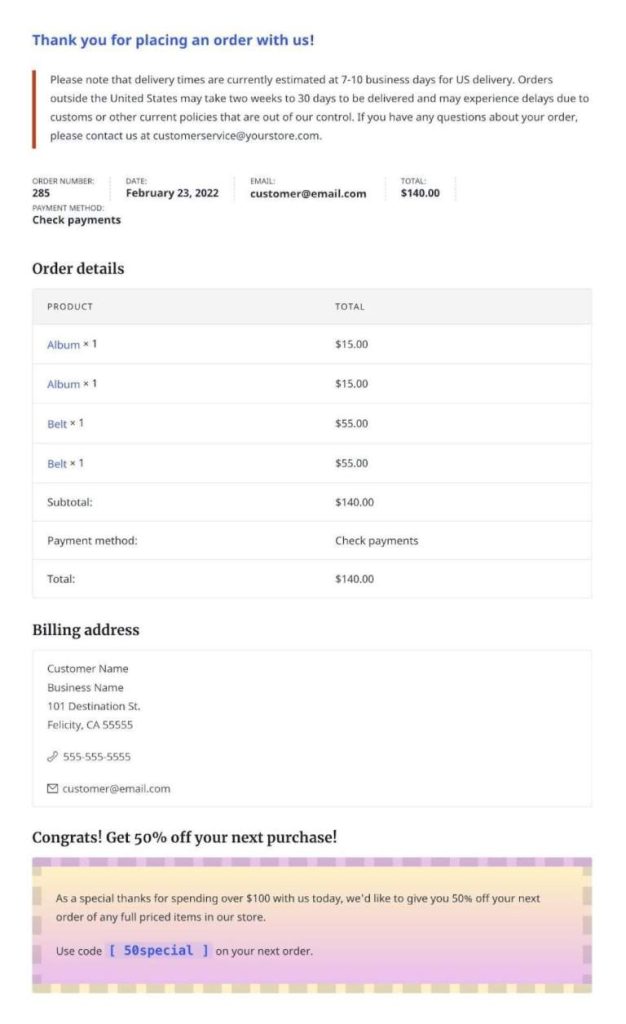
You can tweak the code based on your requirements.
2. Plugin Method
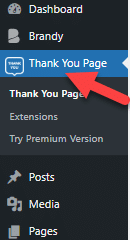
If you do not need to get your hands dirty with code, there is a plugin method available. Using the Thank You Page Customizer for WooCommerce, you can edit the template without any hassle.
After activating the plugin, you will see the plugin’s settings on the left-hand side.
Now, enable the option and open the design option.
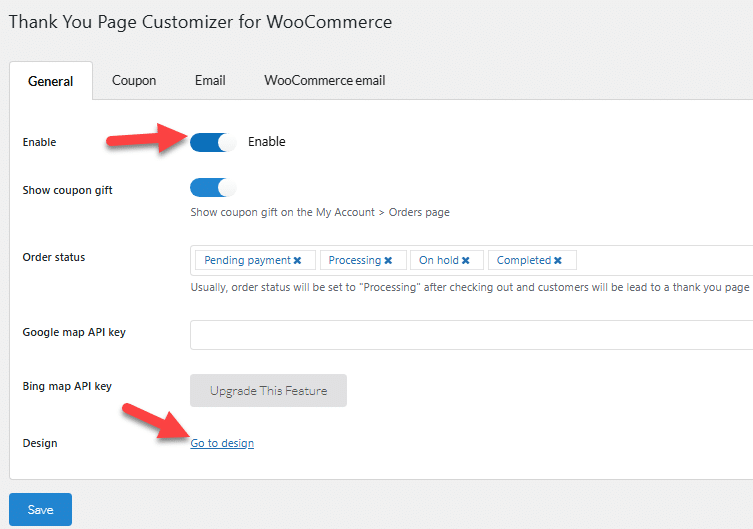
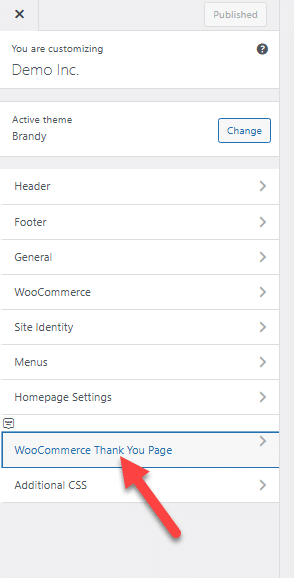
You will be redirected to the WordPress customizer page. There, you can see the thank you page customization option.
Now the page will show a bunch of customization options you can do:
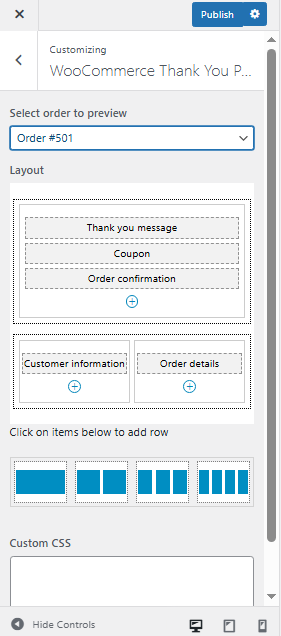
As you can see in the image, you can
- Select an order to preview
- Tweak the layout
- Add custom CSS
And so on.
After making the necessary changes, you can save the updates. From now on, the users will see the newly designed thank you page.
That’s it!
This is how you can customize your WooCommerce thank you page. As you can see in this article, the customization process is simple, and it won’t take that much time.
Best Practices to Follow While Customizing Your WooCommerce Thank You and Success Pages
When you customize your WooCommerce thank you page, you create an opportunity to build stronger customer relationships and increase engagement. Following some best practices ensures your custom thank you and success pages deliver the right impact.
- Keep the design clean and user-friendly: A thank you page for WooCommerce should be easy to navigate, highlighting order confirmation details without overwhelming customers.
- Add custom messages that feel personal: Replace the default thank you page in WooCommerce with custom content that thanks customers in a warm, engaging way.
- Highlight related products or offers: Use page customization to showcase upsells or recommendations directly on your confirmation page.
- Optimize with a page builder: Create a custom WooCommerce thank you page using a template or a WooCommerce thank you page customizer plugin to simplify design.
- Ensure mobile responsiveness: A custom thank you and success page must display correctly across all devices for a smooth customer experience.
- Consider multiple pages for personalization: Show different thank you messages or create custom pages per product to deliver a personalized experience.
- Test and track performance: An effective thank you page is essential, so regularly measure results and optimize your WooCommerce page for conversions.
Frequently Asked Questions
Now, let’s see some of the popular frequently asked questions and answers regarding this topic.
You can customize your thank you page for WooCommerce using a plugin that allows drag-and-drop editing. A WooCommerce thank you page customizer or a page builder lets you add custom text, related products, or personalized messages to create a custom WooCommerce thank you page that goes beyond the default WooCommerce thank you page.
Yes, you can redirect buyers to a new custom URL instead of showing the default WooCommerce thank you page. This helps store owners create a custom WooCommerce thank you and success page, such as a purchase confirmation page with promotions or a personalized thank you page.
A customized thank you page in WooCommerce should include key order details like product names, prices, and payment status. You can use custom content blocks to make the confirmation page more effective, ensuring customers always have easy access to their purchase confirmation page.
Yes, you can use plugins to display related products directly on the WooCommerce thank you page. This turns the confirmation page into an engaging thank you page, encouraging upsells and helping optimize your thank you page for more sales.
Yes, some WooCommerce plugins allow you to create thank you pages based on product categories or specific products. With these tools, you can show different thank you messages and related content, creating specific thank you pages for different types of orders.
The easiest way is by using a WooCommerce custom thank you page extension. It provides page customization options, a thank you page template, and even pre-designed layouts. You can create a custom WooCommerce thank you page directly from your WordPress dashboard using these tools.
Although thank you pages may seem like a small detail, customizing WooCommerce thank you pages can positively impact customer experience. A personalized thank you page is a great place to display custom messages, special offers, or links to future sales, helping WooCommerce store owners boost engagement and retention.
Conclusion
Customizing your WooCommerce thank you page is one of the most effective ways to enhance the post-purchase experience and strengthen customer relationships.
Instead of relying on the default WooCommerce thank you page, creating a custom design allows you to share engaging thank you messages, highlight related products, and provide order details in a more meaningful way.
A personalized thank you page can also help you build trust, encourage repeat purchases, and showcase the unique value of your brand.
Whether you want to add custom content, redirect to a specific page URL, or simply create a more engaging thank you and success page, taking the time to optimize this step can significantly boost your WooCommerce store’s long-term growth.
How else would you customize your WooCommerce store?
Let us know in the comments.