WooCommerce order confirmation email is one thing that you should never overlook when it comes to boosting sales and improving store branding. It is the first thing your customer receives after placing an order via your WooCommerce website.
So you have to send reliable emails, including order details, order status changes, and other useful resources. With this thoughtful means of communication, your customers will remember your brand and know where to find you when they need a particular product.
In today’s tutorial, I’ll guide you step by step on how to customize WooCommerce order confirmation emails sent out by WooCommerce standard workflow.
- Method 1: Using the built-in customization options in WooCommerce
- Method 2: Manually modifying the WooCommerce email template files
- Method 3: Using a WooCommerce email customizer plugin
- Overview of a popular email customizer plugin for WooCommerce
- Customize order emails with the YayMail free plugin
- Preview and test the customized email
- Add targeted product upsells in purchase receipt email
- Set global header/footer WooCommerce order confirmation email
- Change email text link color
- Send dynamic email content with conditional logic
- Final thoughts
The first section is a non-plugin solution, which is very basic and merely relies on default options. If you want advanced design options, hop on to the with-plugin solution in which we’re using the YayMail builder to customize all WooCommerce transactional emails.
Method 1: Using the built-in customization options in WooCommerce
By default, WooCommerce provides some basic options in WooCommerce order email settings, which is quite sufficient for newly opened stores.
Global settings
It allows you to add your own store logo and choose a color profile to match your brand. These settings will be applied to all emails and not template-specific.
To edit the default template background color and such, go to WooCommerce > Settings > Email section.
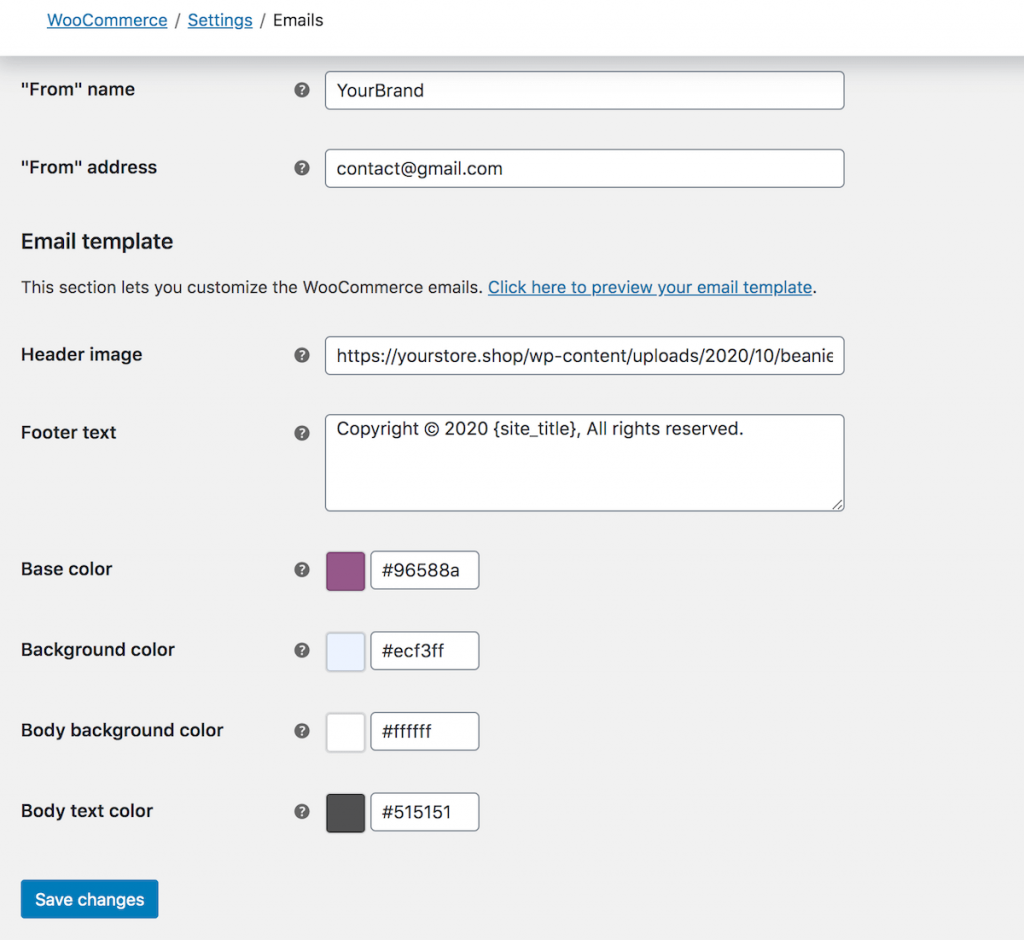
Here, you can set the “From” email address and its display name, i.e. your store name or from whom the emails are sent.
What else can you customize?
- Base color: the color that fills your heading’s background, linked text, etc., which should reflect the tone of your website’s primary color.
- Background color: the full-width area that lies outside of the email template.
- Body background color: the background color for the email’s main text/paragraph.
- Body text color: the color for email text content.
As for the general email template appearance, you can add your brand image/logo by pasting its file URL once it’s uploaded to WordPress media library. Please note that basic WooCommerce email customization options won’t allow you to resize your logo. That’s why you should prepare the right image dimension before adding it to the email templates.
After fine-tuning the email design, you can click on the link Click here to preview your email template to preview the customized email sample in a new tab.
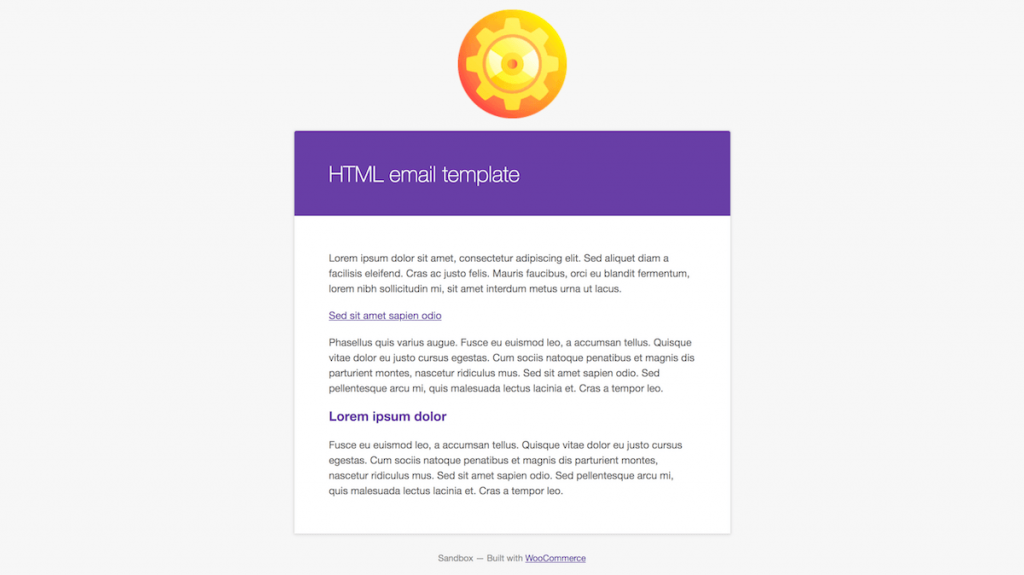
This is just a mockup view of your WooCommerce emails with dummy text. To edit the content of a certain email, you have to find each email and choose to manage it. This will be demonstrated in the next step.
Email template settings
It’s possible to edit order confirmation email notification content without a plugin.
To start with, WooCommerce allows you to choose email types, including plain text, HTML, or multipart. The “Password reset” email template can be plain, while the order confirmation email should be in rich HTML.
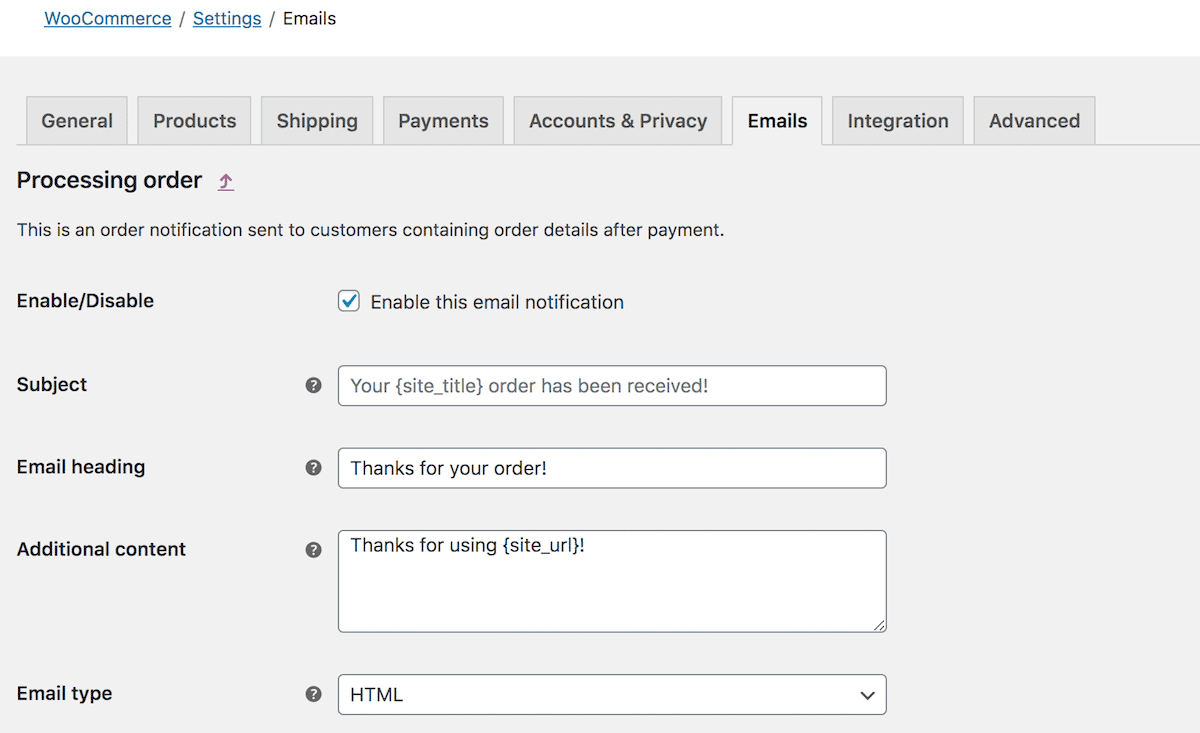
To change the subject and content of the email notifications, navigate to WooCommerce > Settings > Email, pick an email you would like to edit, then click Manage.
Based on your payment setup, the first email that your customer receives after placing the order can be “Order on-hold” if they’ve chosen “pay with bank transfer”, or “Processing order” if they’ve paid with PayPal.

In this case, I’ve picked the “Processing order” email to send to my customer to notify them about their order confirmation. Here, you can edit the email subject, heading, and additional content.
With these customization capacities in mind, I’ve found some major drawbacks of WooCommerce default:
- There is no option to preview each email’s content.
- Unable to send test emails.
- Unable to add more visuals to the email body.
Method 2: Manually modifying the WooCommerce email template files
Now, to overcome the limitation of adding extra content and visuals to WooCommerce email, you can take a more hands-on approach with custom coding.
To enhance your email templates by adding dynamic content and call-to-actions, you gotta modify the theme templates.
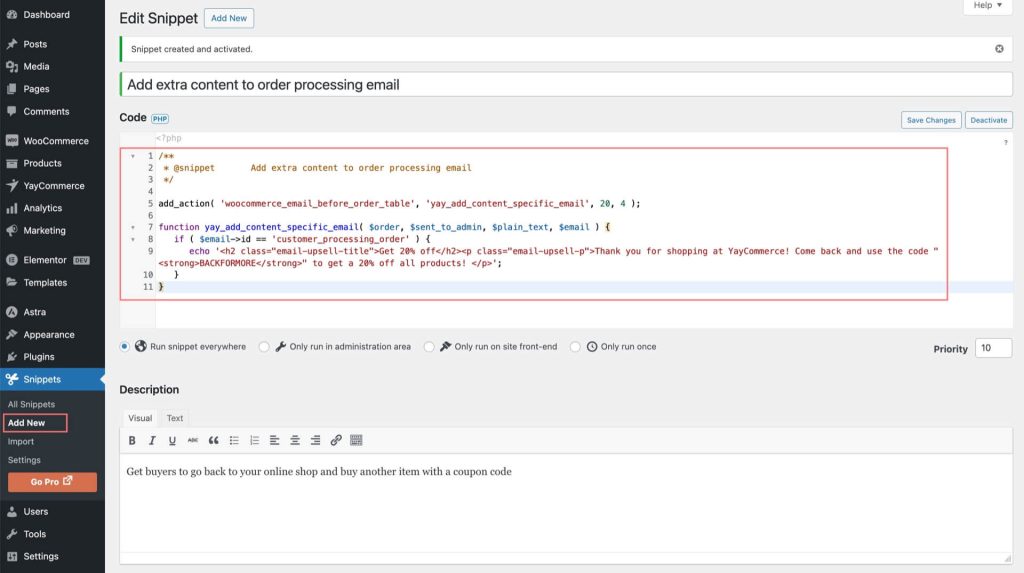
For instance, if you wish to get buyers to go back to your online shop and buy another item with a coupon code, you would need to place PHP snippets at the bottom of your functions.php file (child theme). The PHP snippet goes like this:
/**
 * @snippet       Add extra content to order processing email
 */

add_action( 'woocommerce_email_before_order_table', 'yay_add_content_specific_email', 20, 4 );

function yay_add_content_specific_email( $order, $sent_to_admin, $plain_text, $email ) {
   if ( $email->id == 'customer_processing_order' ) {
      echo '<h2 class="email-upsell-title">Get 20% off</h2><p class="email-upsell-p">Thank you for shopping at YayCommerce! Come back and use the code "<strong>BACKFORMORE</strong>" to get a 20% off all products! </p>';
   }
}
Here’s the step-by-step guide to insert a PHP code snippet to email templates.
- 1. Install and activate the Code Snippets plugin.
- 3. Select Run snippet everywhere, and add description as needed.
- 4. Then, just save changes and activate the code.
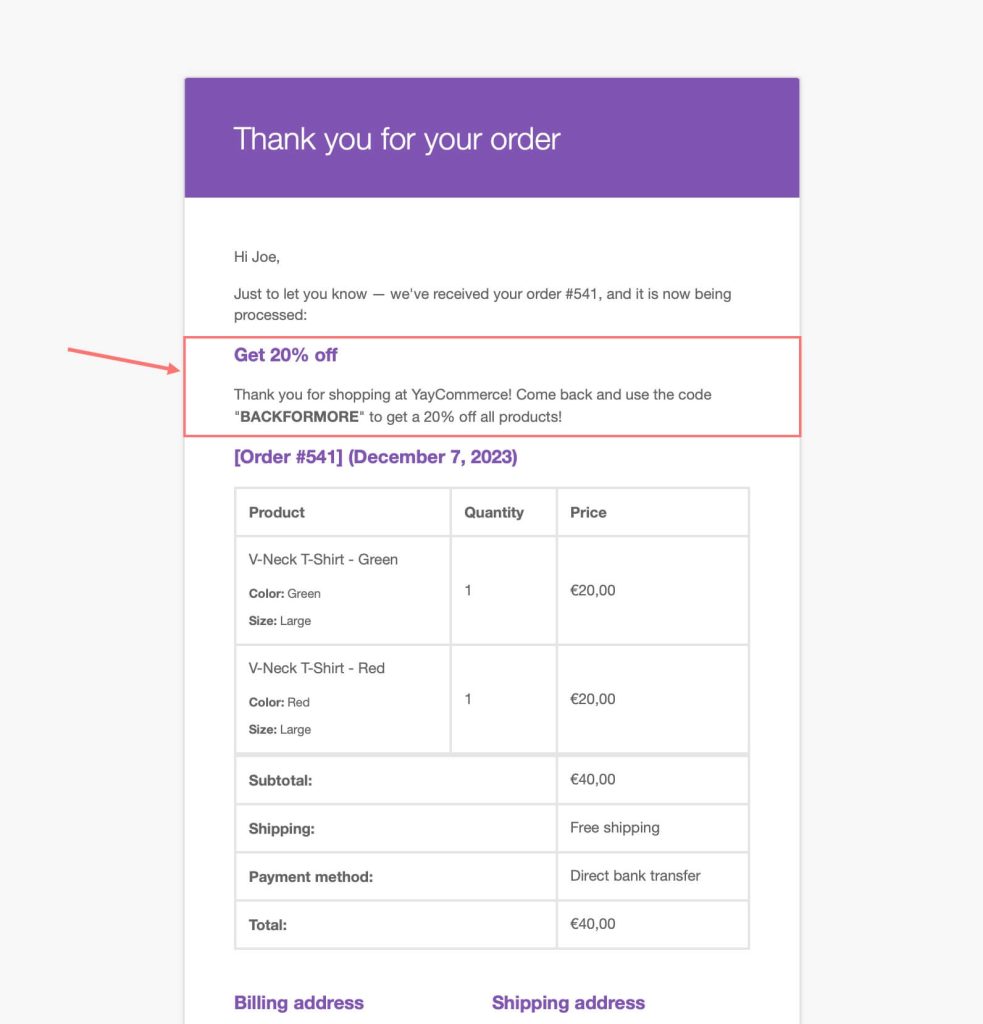
When this code is running, it will automatically add new content to the specified email template. Now you can go ahead and place a test order from the storefront. In the “Processing order”, the new content shows up according to your snippet:
- woocommerce_email_before_order_table : this adds the content above the order details table
- customer_processing_order : this adds the content inside the “Processing order” email
To add content to different positions of a WooCommerce order confirmation email, please refer to our guide: WooCommerce email hooks.
That’s it — I’ve shown you how to add rich formatted text content to WooCommerce’s Processing order email. You can use this method to insert many discount messages such as:
- “Today, get $10 off your purchase when you spend $50 or more.”
- “Limited time offer: 20% discount applies to all products in the Accessories category.”
- “Use NEXT20 coupon code at checkout to receive 20% off the cart subtotal of your next order.”
- “Buy any 3 products, get the cheapest item for free.”
However, this coding method only allows you to edit the regular text in the email template. You have no options for buttons, columns, images, or more stunning CTAs. This is where an email customizer plugin comes in to help. 🙌
Method 3: Using a WooCommerce email customizer plugin
In this section, you will get to know a no-code way to customize the content, layout, and design of WooCommerce order confirmation emails. Considering the need to create a personalized order confirmation email experience for customers, we have picked YayMail for this tutorial.
Overview of a popular email customizer plugin for WooCommerce
YayMail is a powerful WooCommerce email customizer using a drag-and-drop interface and a live preview editor.
There are actually a variety of email customizer plugins that can help design your email. However, YayMail is the most satisfactory framework because:
- It’s completely free: YayMail offers fully customizable options for all eleven standard built-in templates of WooCommerce.
- It works by drag and drop: Great for non-techies (like me!) who don’t want to modify the theme code.
- It has a live editor and lets me preview the template on desktop/mobile screens.
- Sending a test email is just one click away.
I have a bunch of other reasons, including premium-only features to go ahead. But for now, that’s just about enough to give it a go.
So, let’s fast forward to installing it to your WordPress site, then you can easily access this WYSIWYG email builder quickly.
Customize order emails with the YayMail free plugin
This plugin adds a brand new side panel where you can find advanced elements to customize all transactional emails.
These elements are organized into basic, general, and WooCommerce categories. From this sidebar, you have powerful options to make your emails prettier such as additional buttons, image lists, social media icon boxes, dividers, multiple columns, etc.
The video below clearly shows how you can customize every email block from the top to bottom.
- Header: Change the logo and adjust its size
- Text format: Tweak background color, heading color, text/link color
- Spacing: Block and content padding
Moreover, there are advanced blocks for more complicated email templates with many details. For example, if you want to display a 3-column row in the email body, you don’t have to craft HTML from scratch.
This plugin is built-in with ready elements, so you just have to drag and drop the element. Select, move, and edit it however you want.
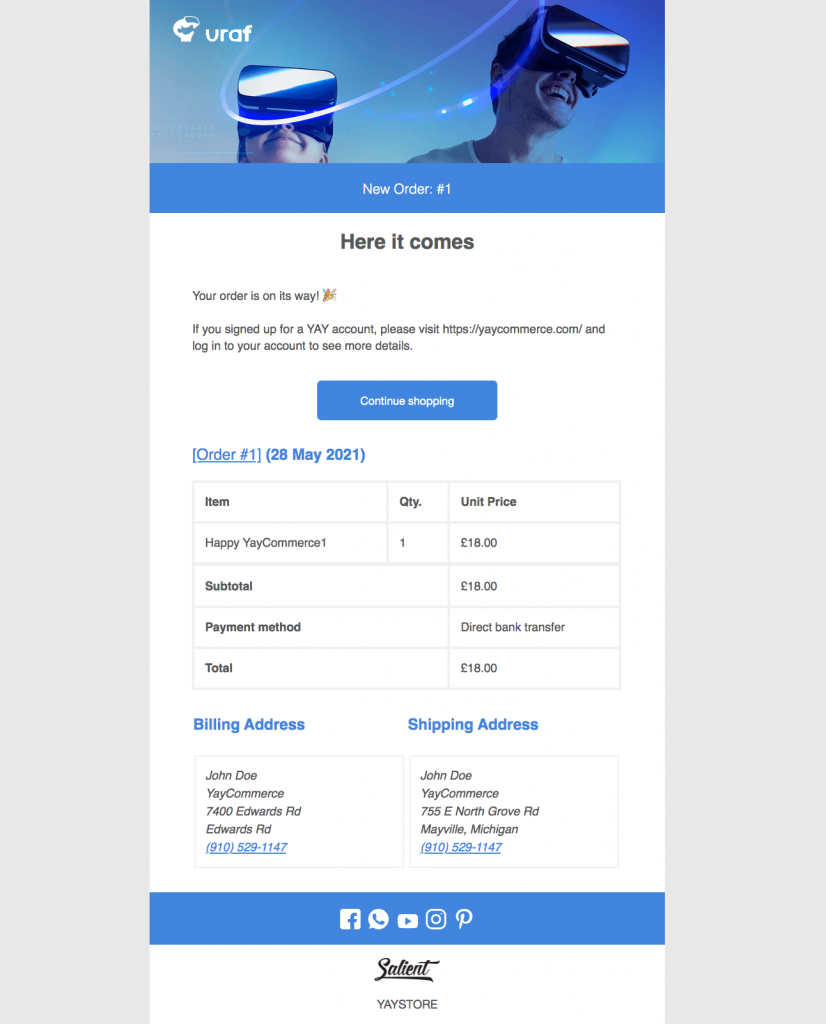
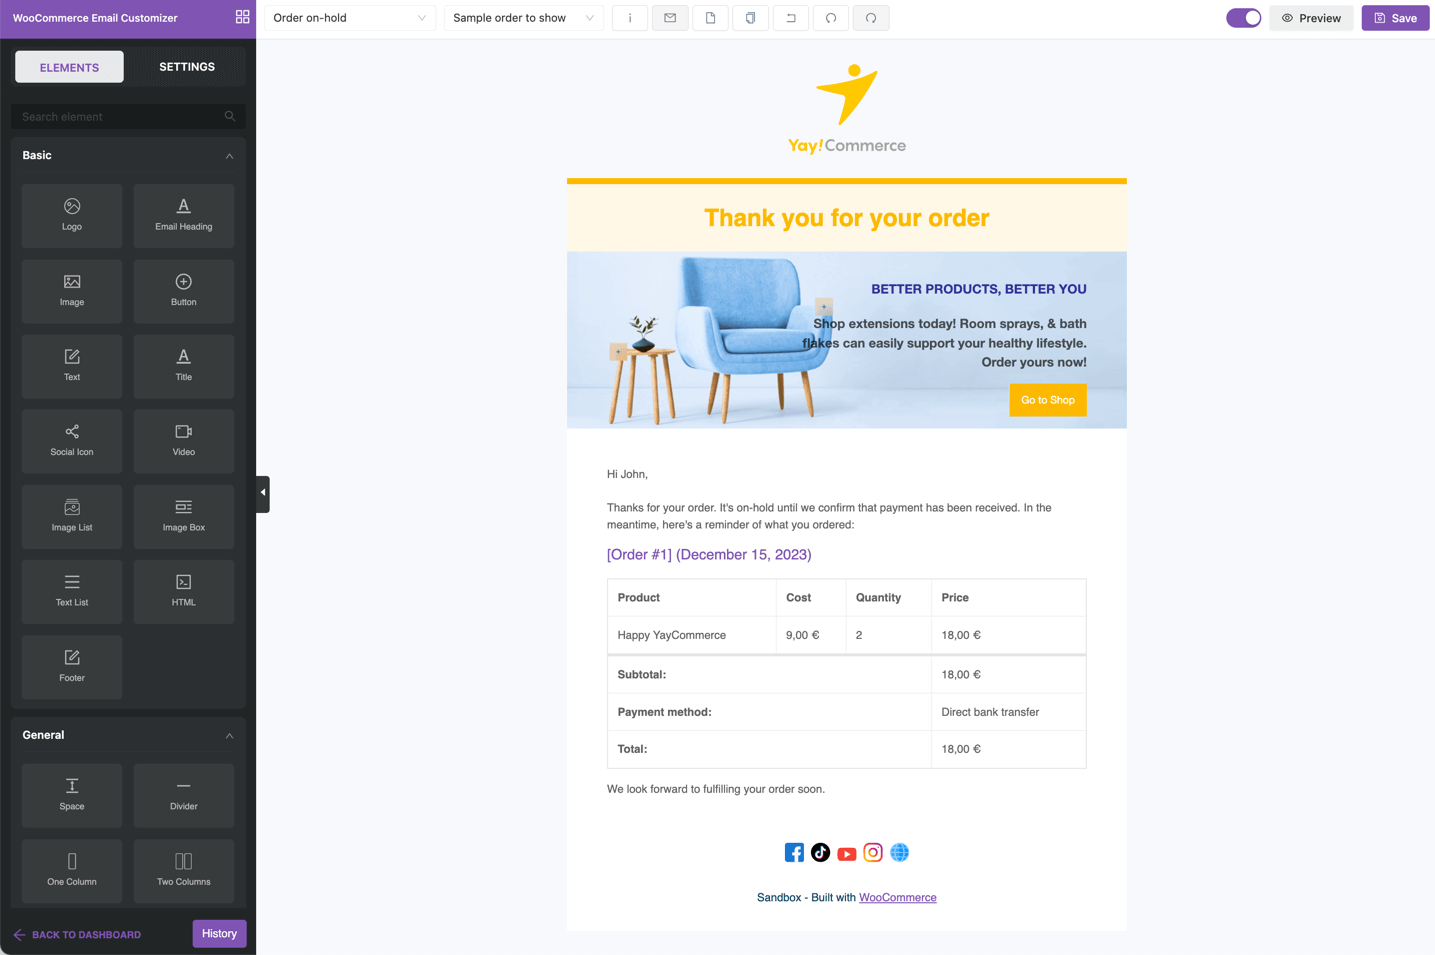
Within a few minutes, you can build a bespoke WooCommerce order confirmation email template like the sample below.
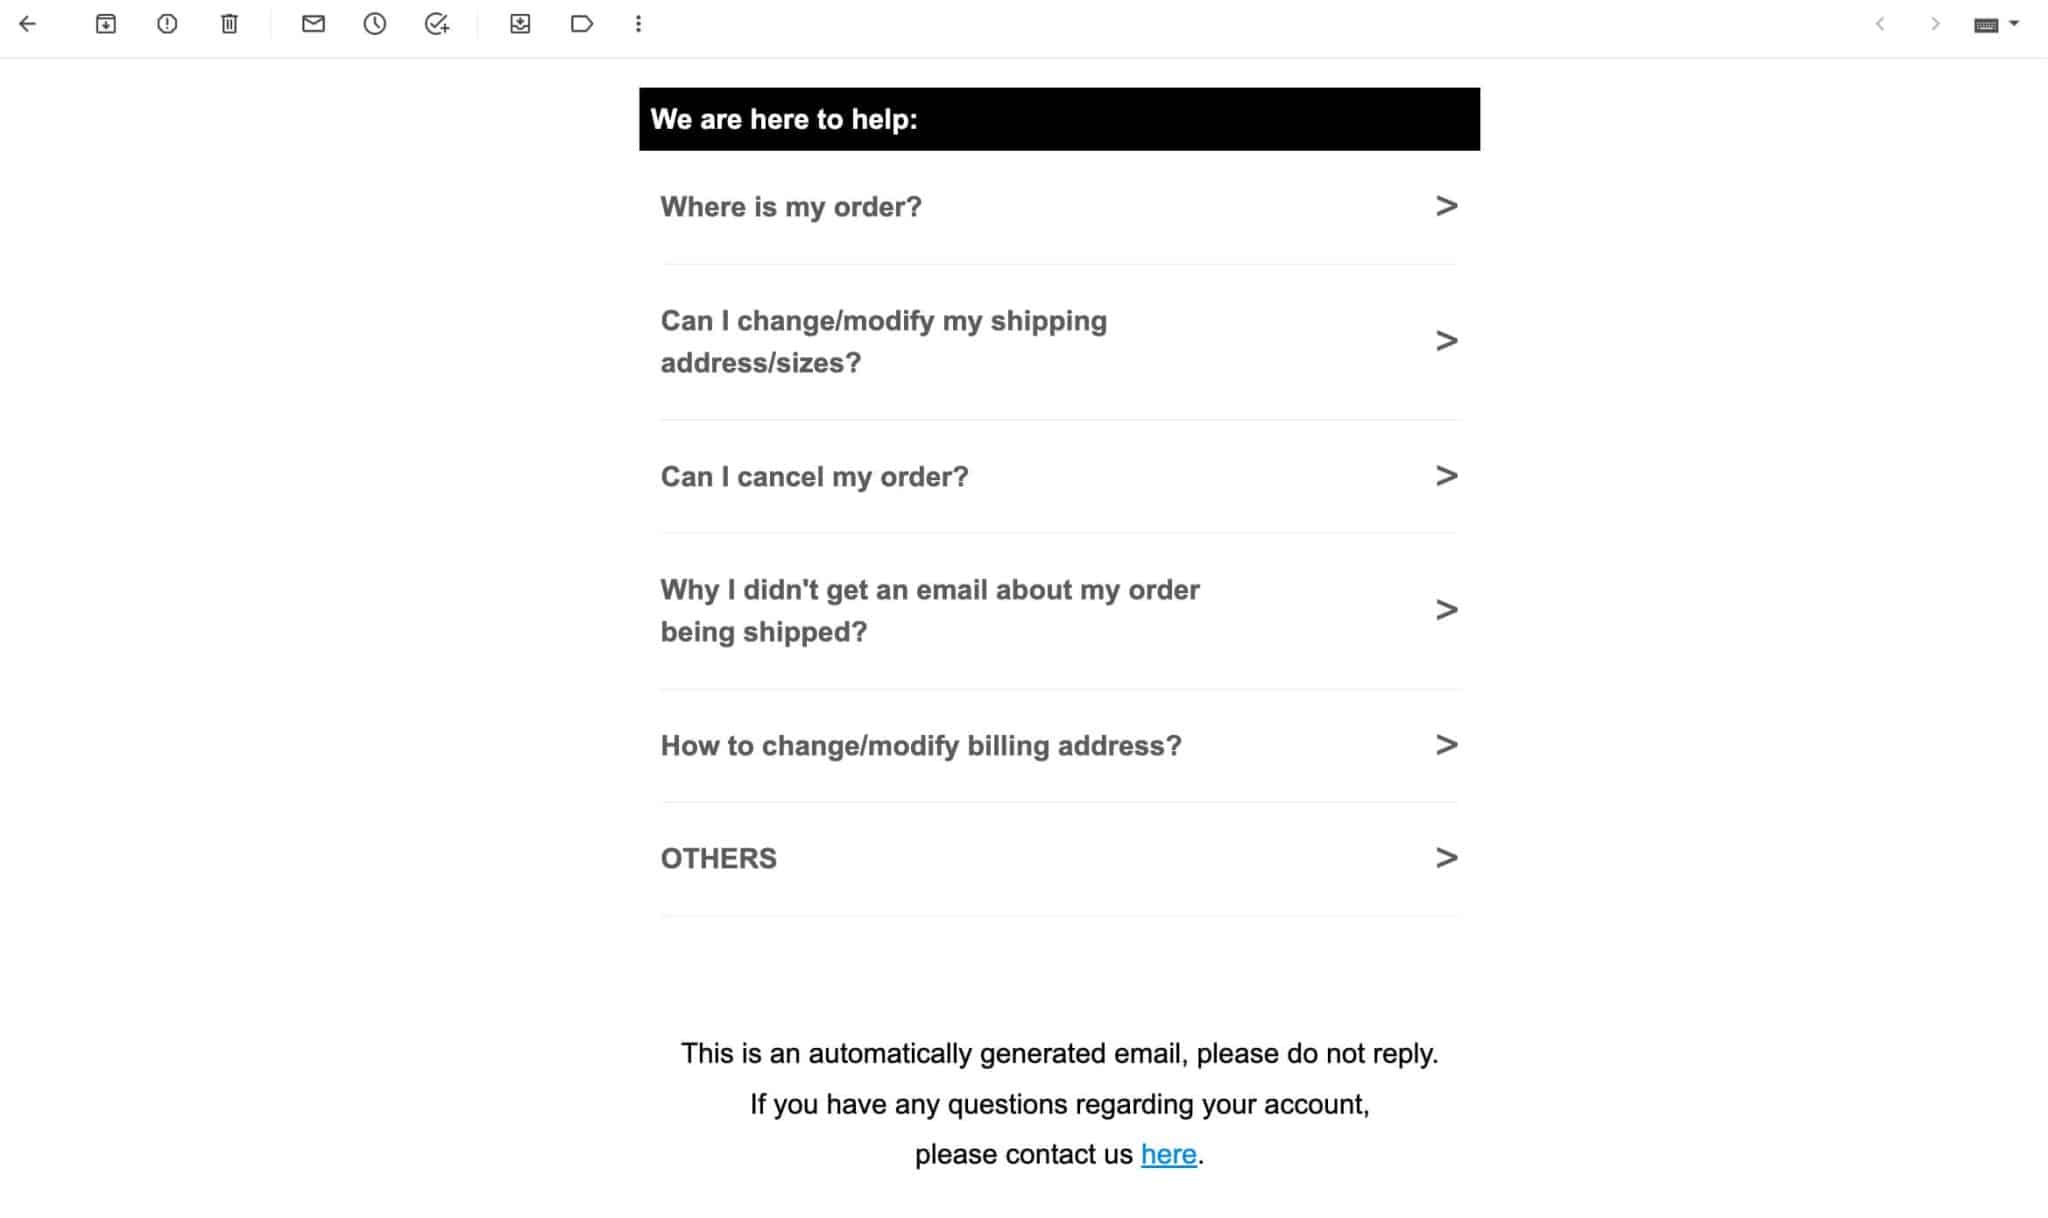
Additionally, with YayMail free version, you can add extra sections to your email. For example, a section of frequently asked questions to help your customers better navigate your store.
Below, you will find more tips and tricks to design email templates.
Preview and test the customized email
As the only email customize plugin that comes packed with comprehensive features, YayMail allows you to see live previews with real-time changes. Furthermore, it’s built with mobile responsiveness testing options.
Hence, there are three ways to preview and test your customized emails:
- Switching previewer to a placed order: From the order list dropdown, you can pick any existing order to view its actual order data and customer values.
- Sending a test email to your own email address: You can send the mockup preview email or a real order email to your mailbox. This helps ensure compatibility on different email clients and devices.
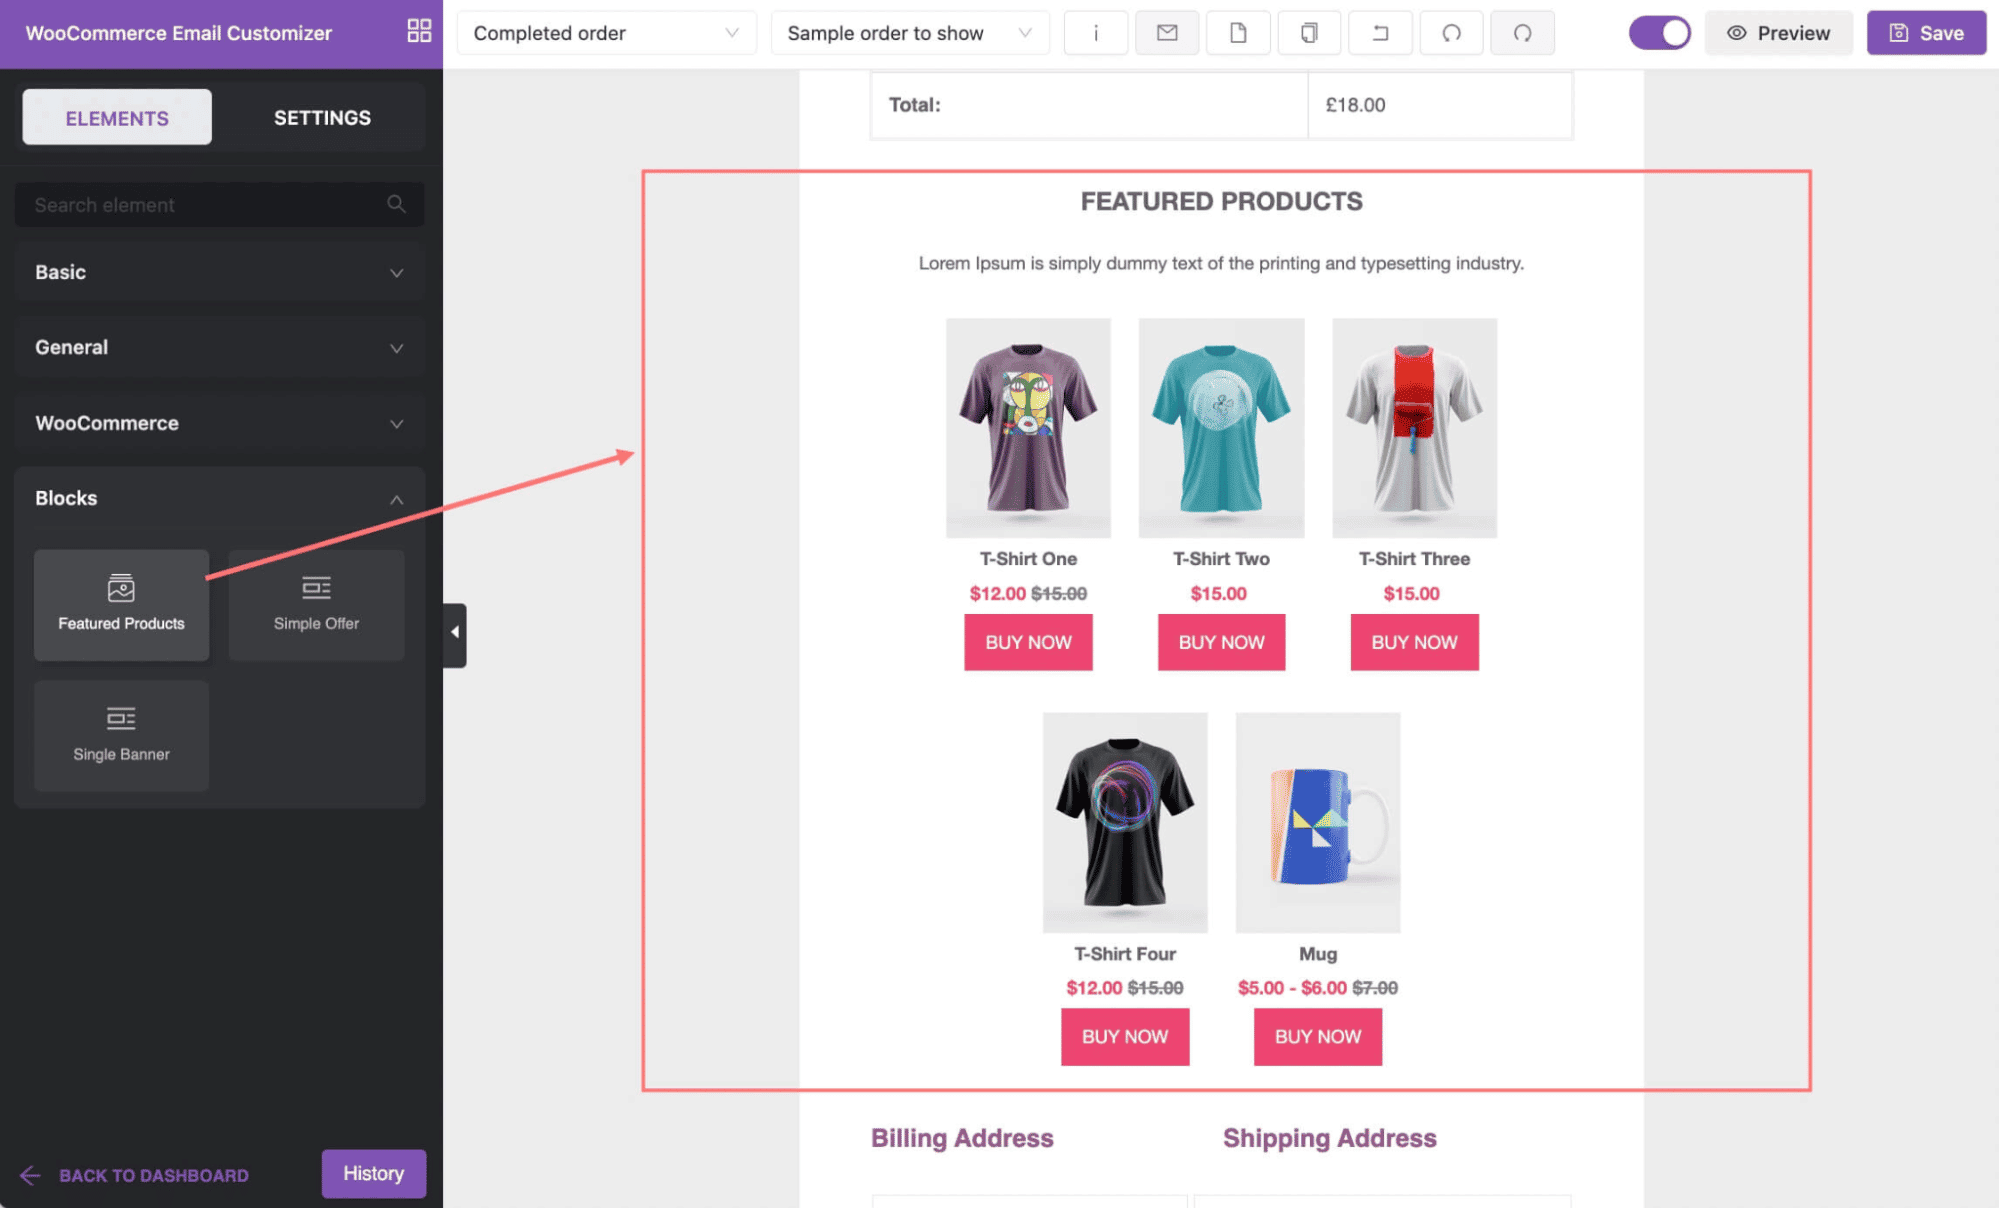
Add targeted product upsells in purchase receipt email
Want to bring customers back again? Why not recommend some similar products based on the purchased item?
Thanks to YayMail’s premade blocks, you can add a grid of featured products, best-sellers, related products, or new arrivals to the email receipt without any required HTML or coding knowledge.
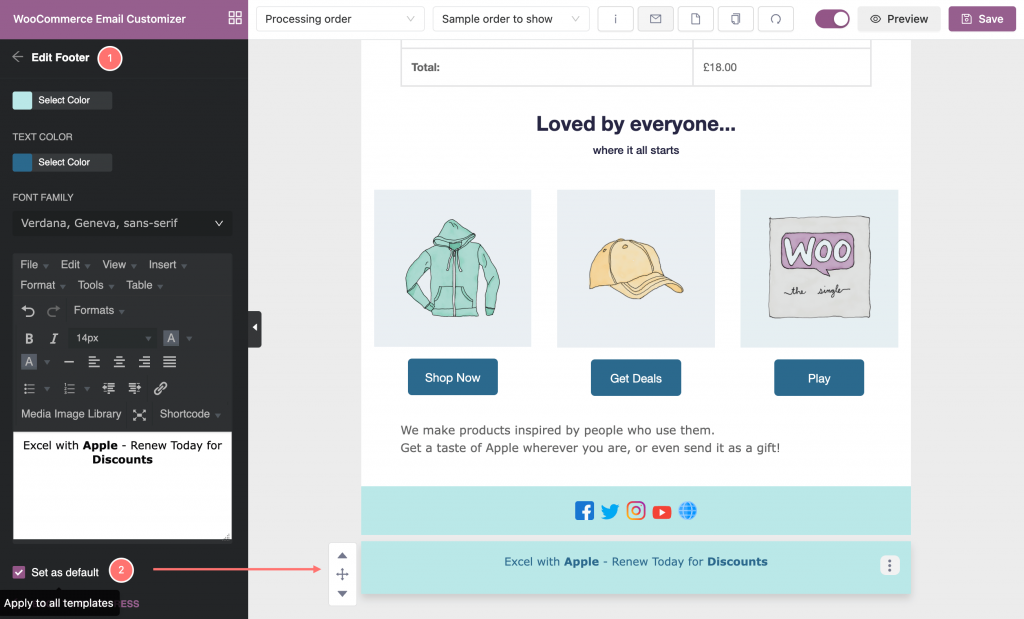
Set global header/footer WooCommerce order confirmation email
For reusable elements like header logo and footer, you can keep it consistent across all templates by setting it as default.
Once you finish customizing the content and design, choose Footer block, scroll down, and tick Set as default. This helps make all other email templates in your store share the same content/design of header logo and footer.
Alternatively, you can also choose to copy this footer block only to those templates that you wish to put in use.
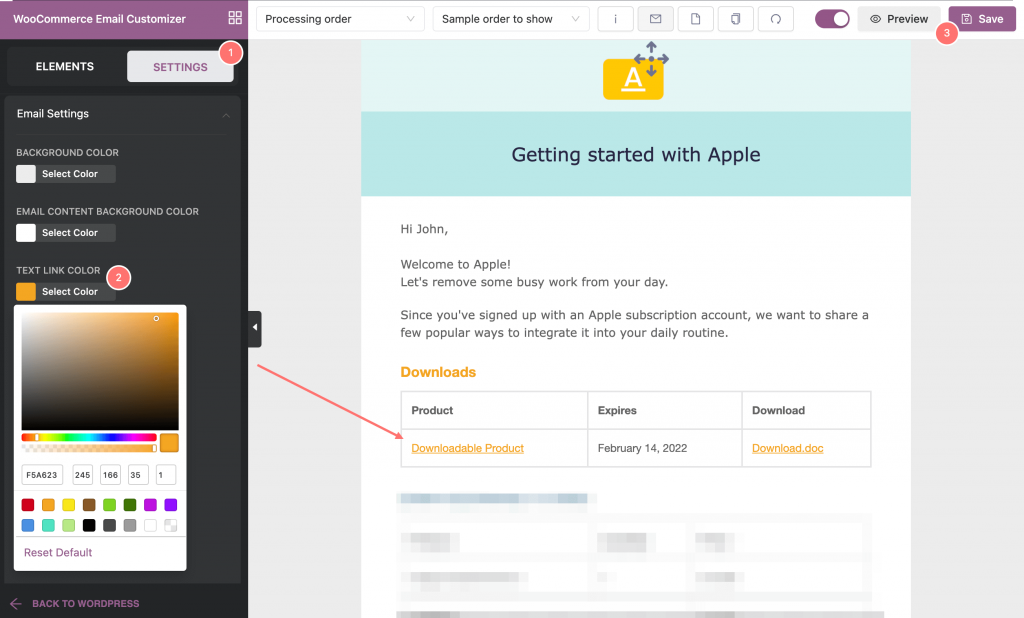
Change email text link color
You can customize every aspect of the email template such as making the link color match your color schemes.
For instance, to turn the default link color of purple to orange, simply follow these steps:
- Select Settings (i.e., global settings) and expand Email Settings.
- Choose the Text link color and pick the new color. Once you choose a new color, it will automatically show in the email editor on the right.
- Then, just click Save to keep the changes you’ve made.
Send dynamic email content with conditional logic
YayMail Conditional Logic enables email template creators to insert extra content into their emails, meaning that the email content can change based on certain conditions or actions. This powerful addon can be used to create highly personalized and targeted emails.
Below is a detailed step-by-step video tutorial to help you send dynamic email content through WooCommerce order confirmation email.
To get further insights and more scenarios, check out our article on why you should send WooCommerce custom emails per product.
As a growth hacker, you can ensure that the message conveyed in the transactional ecommerce email is always relevant to the recipient. This conditional logic plugin allows you to show/hide each email content block based on your own rules, to name a few:
- When the order total is less/greater than a specified amount.
- When the billing country is in the USA, Canada, or Japan, etc.
- When the products in the purchase belong to a specific category.
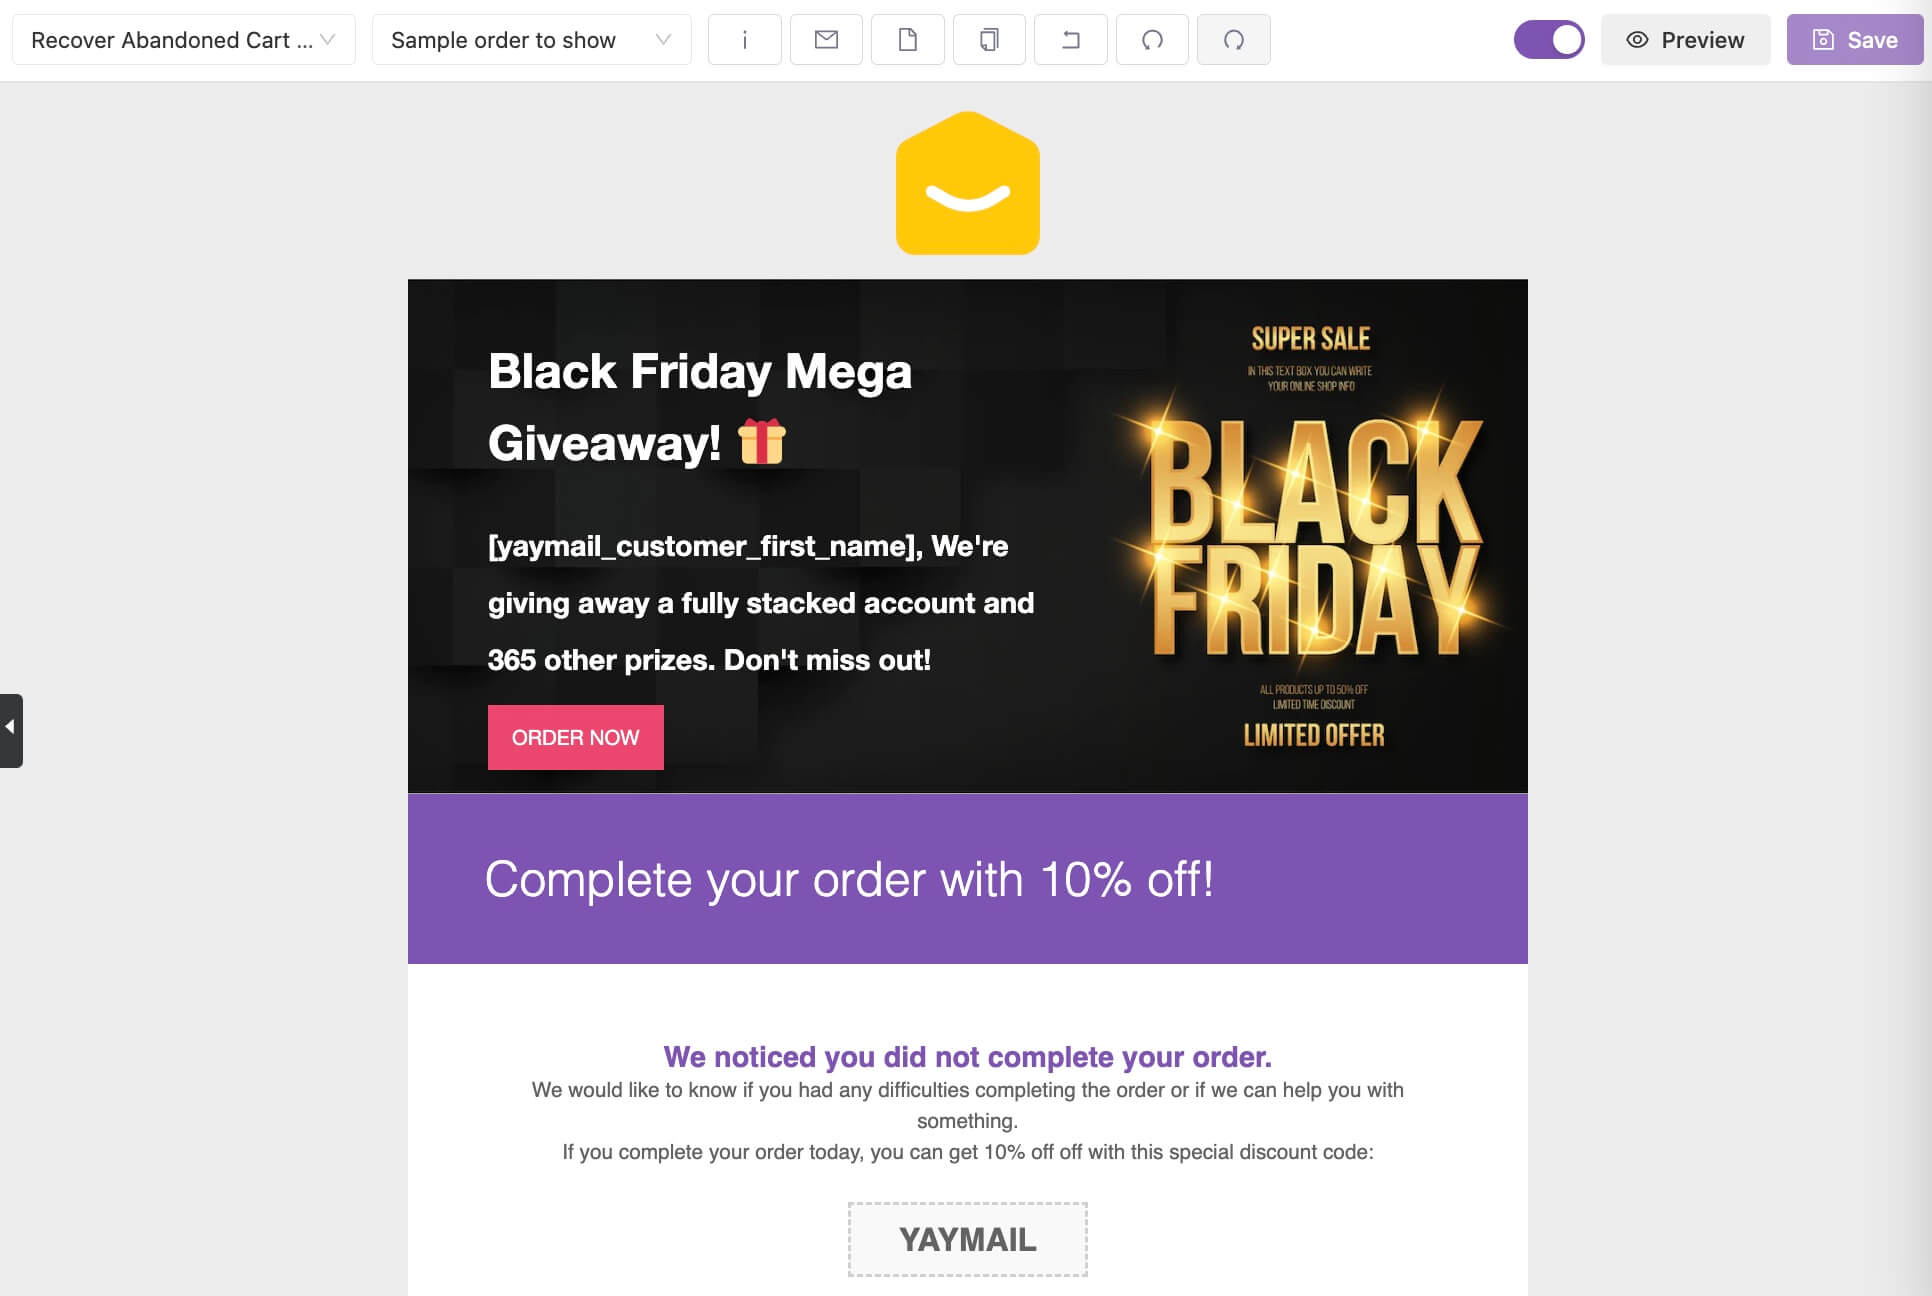
Below are some of our designs for the WooCommerce order email template built up with YayMail.
And a recover abandoned cart email during Black Friday campaign…
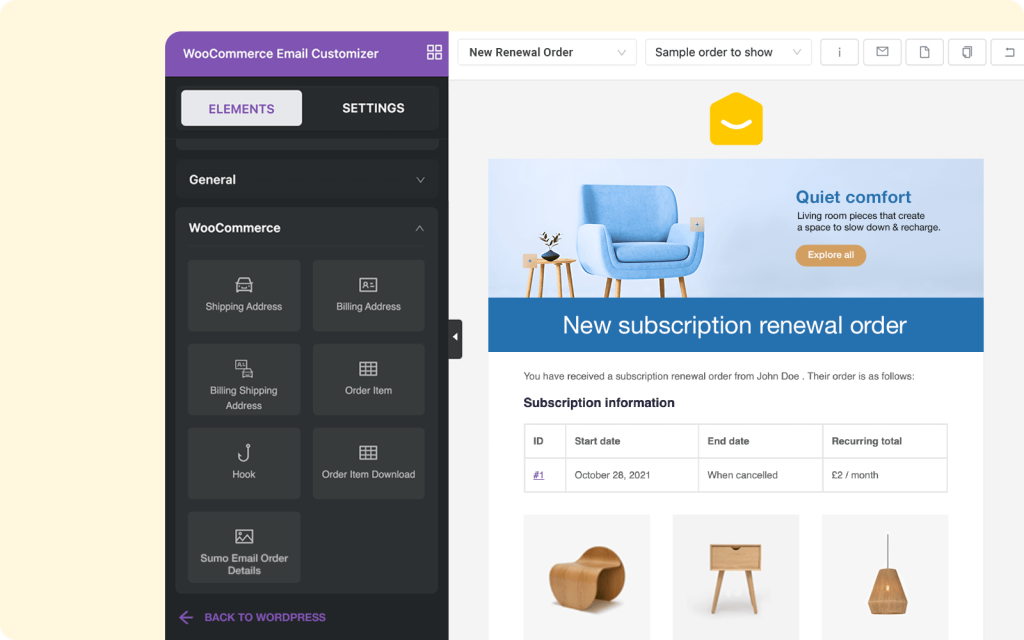
And maybe a subscription renewal reminder email?
Final thoughts
Customizing WooCommerce order confirmation emails used to be hard. You would have to edit by custom coding into things directly inside the templates. And it was really easy to mess up the files.
So it’s great to see you’ve got an option like the YayMail – WooCommerce Email Customizer! It enables you to design different aspects inside WooCommerce order confirmation email and custom email templates.
The whole process becomes easy with YayMail, so get it for free now.
Things to consider when editing WooCommerce email templates
You can be an excellent designer by nature. However, it is not recommended that you override every email block aspect with your own creativity. Since the email recipients use various email clients/software to read emails, many elements like text font, font family, padding, etc. might not show correctly on their end as seen on your end.
To send out the order confirmation emails that look good on most devices and clients, make sure to send test emails! That said, it’s been a must to choose an email editor/customizer that comes with a handy Send a test email button, just like what’s featured in YayMail. Make sure your chosen plugin has your back!
Recommendation
If you use one of the extensions mentioned below on your WooCommerce site, we recommend an upgrade to the YayMail Pro version for full compatibility. The premium version allows you to add lots of variables, shortcodes, custom text, order tracking information into the WooCommerce order confirmation email template.
- Shipment Tracking by WooCommerce
- Checkout Field Editor by WooCommerce
- Order Status Manager by SkyVerge
- Admin Custom Order Fields by SkyVerge
- Advanced Shipment Tracking by Zorem
- YITH WooCommerce Order Tracking
- Flexible Checkout Fields by WPDesk
- Custom Order Status by TycheSoftwares
- WPML | WooCommerce Multilingual
- Polylang
- TranslatePress
If you use third party WooCommerce extensions that add extra email templates to their workflows, such as AutomateWoo, be sure to look for some YayMail Integration Addons to support them.