So you’re using a WooCommerce plugin to add checkbox to checkout, or adding custom field in WooCommerce checkout page programmatically? If you’re looking for a guide to displaying these custom fields to WooCommerce emails, here’s the guide for you!
As a user of YayMail, you can add custom fields quickly by using the built-in shortcodes in your email editor.
Add WooCommerce custom checkout fields to emails – What are the benefits?
In the admin dashboard, WooCommerce order is a custom post type to record all the information and events related to the placed order. When you create a custom field in the order post, it may not show during the checkout process or in the confirmation emails. Without proper email notifications, your customers will be unsure if they have used the right coupon code or whether the order has been shipped or not.
To keep customers informed about any other event which emails the user, you should add custom field values in their emails.
In the next sections, I’m showing you how to add fields and values that present additional information about the order. The process is really simple and doesn’t require any programming knowledge.
Insert shortcode for the used coupon to email template
Here’s how to display the WooCommerce coupon that was used in the order.
- Open shortcode list
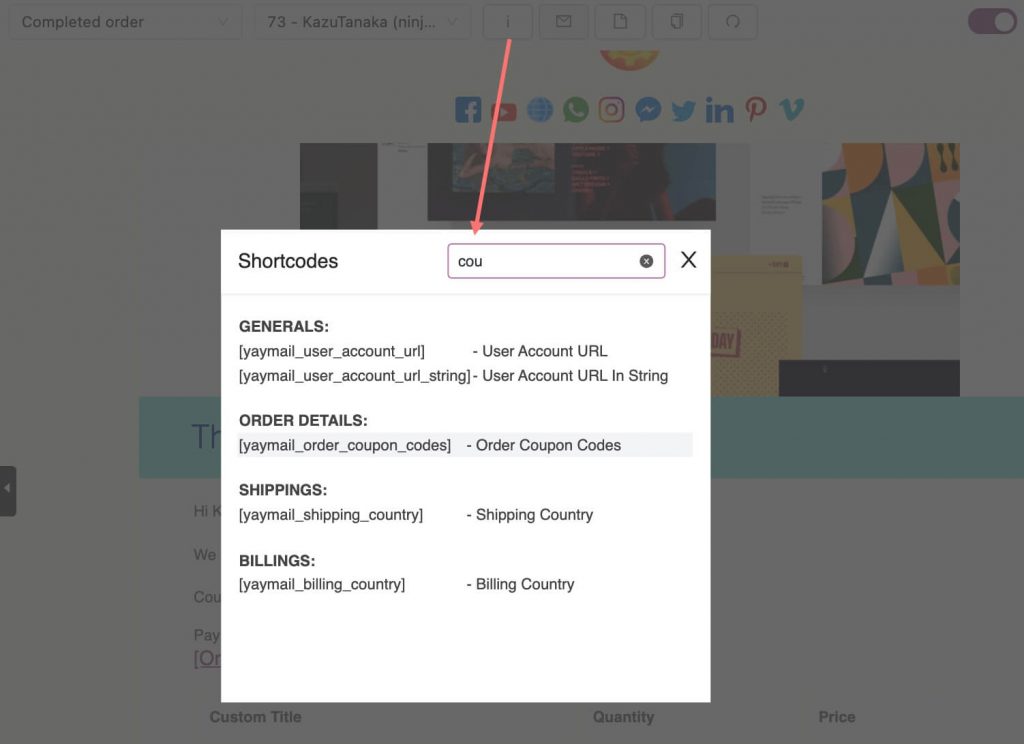
In the email editor, click on the (i) icon on the top toolbar to open a categorized list of shortcodes.
- Search and copy shortcode
Look for the shortcode name you want to use by using the search box.
- Paste the shortcode to your email text block
Copy the shortcode and paste it onto the text editor.
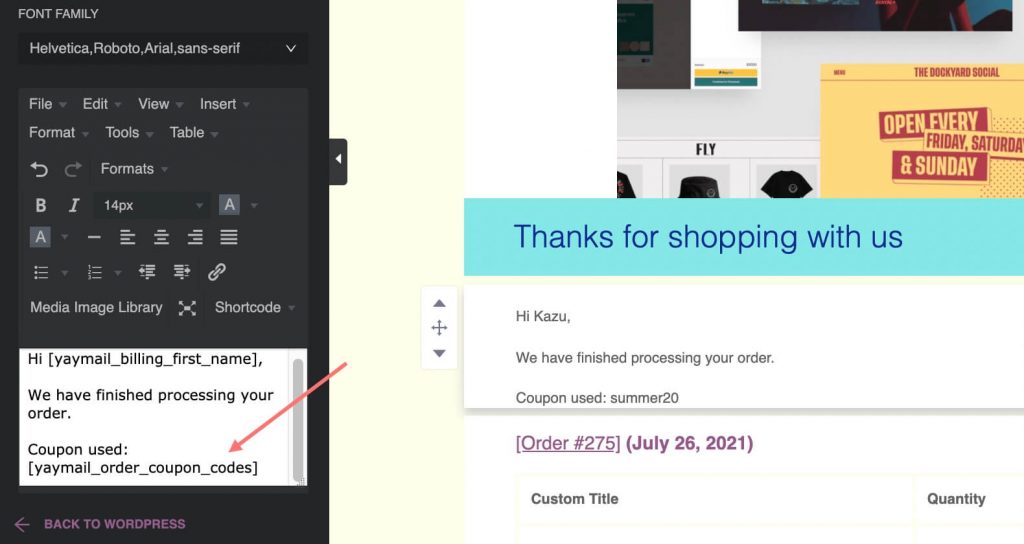
The shortcode will return the coupon code that has been used in that specific order email, which is SUMMER20 in the above case.
Display flexible checkout fields in WooCommerce emails
Pretty much the same as how to add the coupon shortcode, you can add the checkout fields to the email templates easily. In the next steps, I’m using Flexible Checkout Fields to create the custom fields.
- Look for order meta
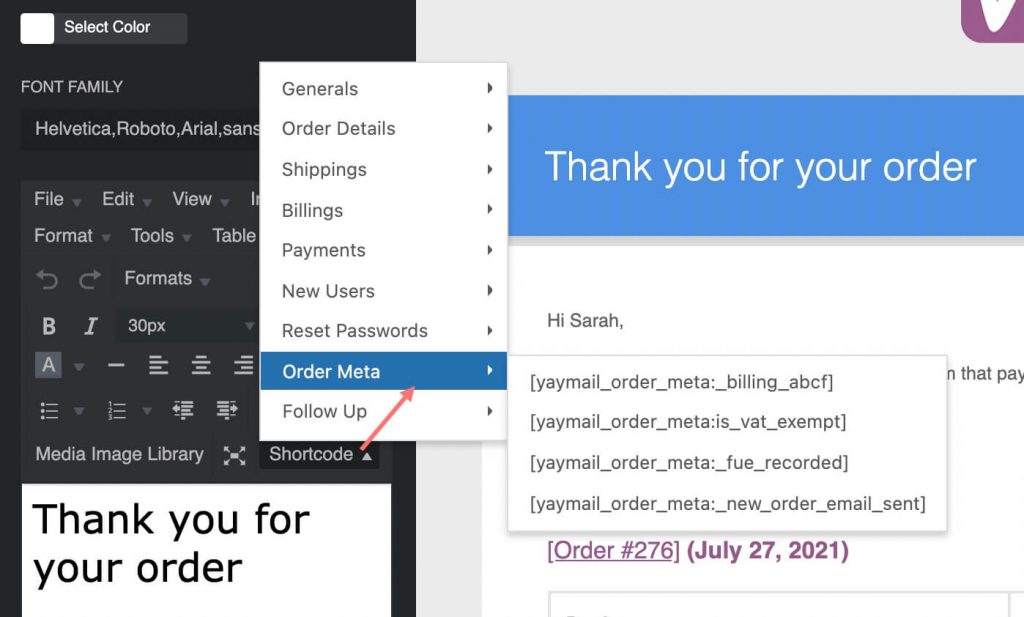
From the email editor, there’s another place to find the list of shortcodes. Click on Shortcode > choose Order Meta, you will see a list of checkout fields.
Please note that you have to create those custom fields and have orders placed with them first before inserting them into the emails.
- Add shortcode to email
By clicking on the piece of shortcode, you have inserted this shortcode into the current email heading block.
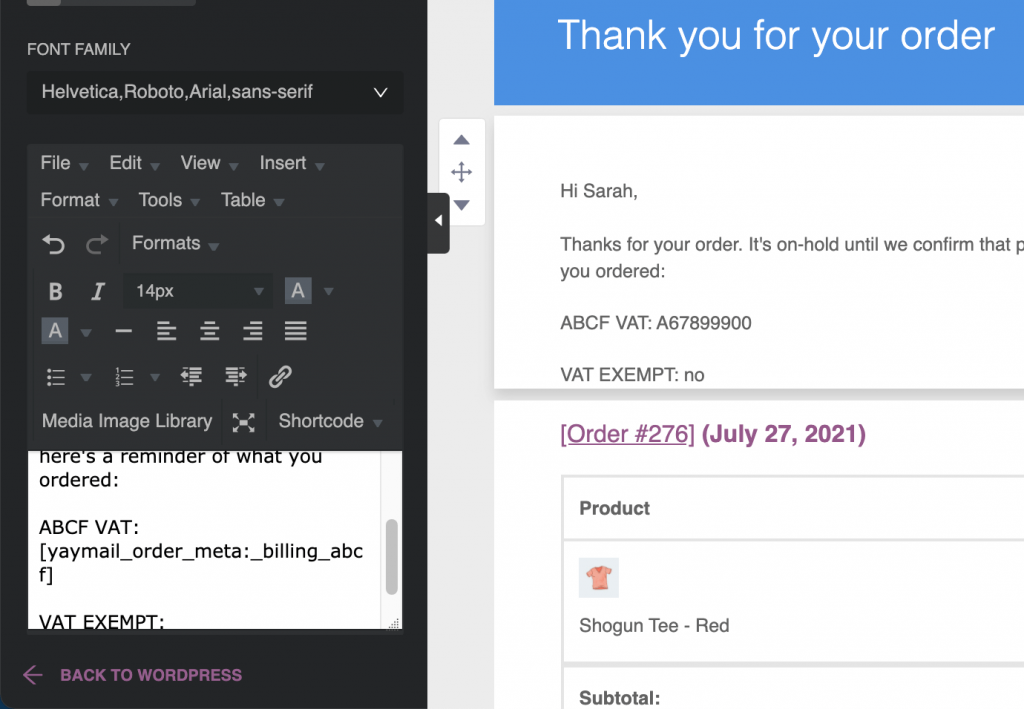
[yaymail_order_meta:_billing_abcf]- Preview custom field value
In the real email template, the shortcode will return the value that the customer fills in the custom field. Which is ABCF VAT in this case.
Add shipment tracking fields to WooCommerce emails
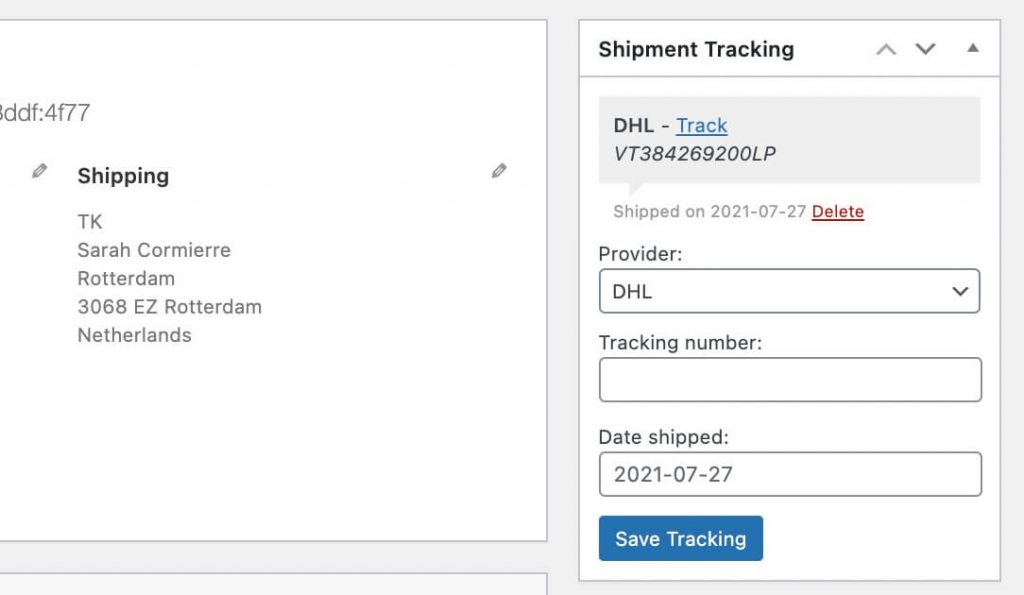
Before adding shipment tracking information to the processing order/order has been shipped emails, you have to create it in each order.
In this tutorial, I’m using Shipment Tracking extension developed by WooCommerce. For other shipment tracking plugins, the steps are almost the same.
So go to WooCommerce > Orders > Edit order to add the information like the shipping provider and tracking number. If you are not sure how to do it, please learn more about how to add shipment tracking info using the WooCommerce Shipment Tracking extension.
In order to get the shortcode for shipment tracking info, you can go to YayMail email builder > select a Text block > Shortcode > Order Meta and pick the order meta shortcode. This will automatically insert a shipment tracking table into the customized email template.
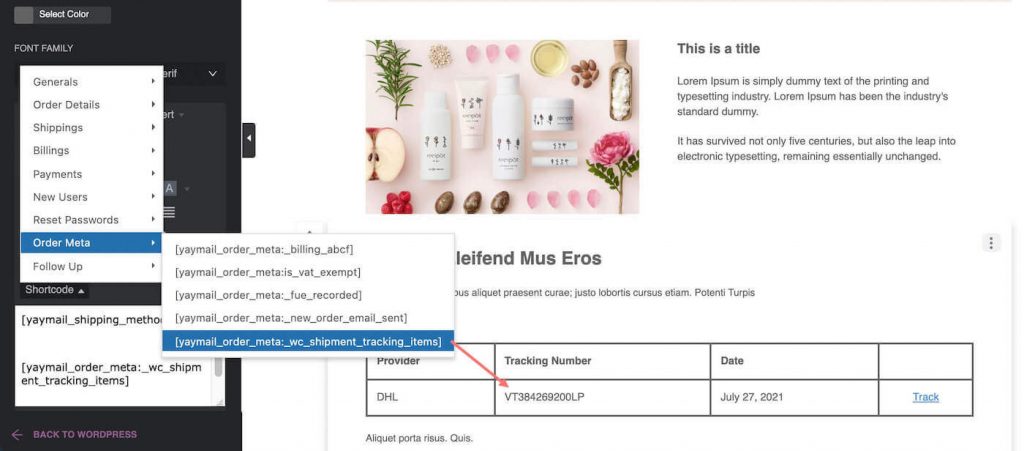
Easy peasy, right?
Over to You
This article has walked you through the very basic steps of adding checkout fields in WooCommerce emails.
The captured screenshots in this article are from a WooCommerce store using YayMail Pro – Email Customizer for WooCommerce. You can get it from the links below.
I hope you have found the solution for adding custom fields and other attributes to your transactional email templates in a beautiful manner.
If you have issues inserting WooCommerce additional checkout fields into WooCommerce emails, please let us know via the chatbox below.
