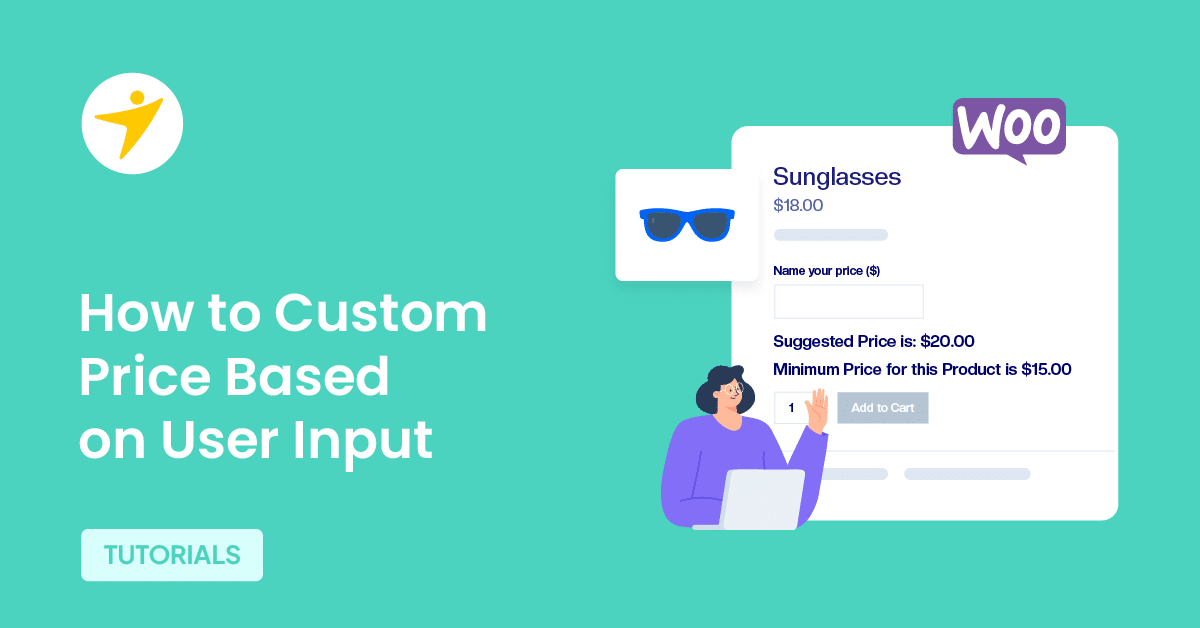
Do you want to set up WooCommerce custom price based on user input? If you are looking for a step-by-step tutorial, keep reading this article. Here, we will show you how to add this function to your WordPress website.
When running an online store, you should develop multiple strategies and optimize your website for better performance. The price of the products is one of the significant factors determining the conversion rate.
Have you ever considered setting up WooCommerce custom price based on user input?
Keep reading this article if you don’t know how to do it. We’ll show you the most straightforward method for setting up a WooCommerce custom price based on user input.
But before going further, let’s see why you should add WooCommerce custom price based on user input.
Why You Need to Set Up WooCommerce Custom Price Based on User Input
Setting up WooCommerce custom price based on user input can significantly enhance your online store’s functionality and customer experience.
This feature allows your customers to input their preferred price for a product, giving them more control over their purchase. Here are some reasons why you should consider setting up WooCommerce custom price based on user input:
- Increased Customer Satisfaction: Allowing customers to set prices can lead to higher satisfaction rates. It gives them the freedom to choose a price they’re comfortable with, which can increase the likelihood of a purchase.
- Flexible Pricing Strategies: You can implement various pricing strategies with custom pricing. For example, you can set up a “pay what you want” model, where customers can pay any amount they choose for a product. This can be particularly effective for donation-based products or services.
- Boost Sales: Custom pricing can encourage customers to buy more. If they feel they’re getting a good deal, they’re more likely to add more items to their cart. This can lead to increased sales and revenue.
- Competitive Advantage: Offering custom pricing can set your store apart from competitors. It shows that you value customer input and are willing to accommodate their needs, which can attract more customers to your store.
- Better Engagement: Custom pricing can also lead to better customer engagement. When customers can set their prices, they may feel more invested in the product and the store. This can lead to repeat purchases and positive word-of-mouth.
- Easy to Implement: Setting up custom pricing in WooCommerce is relatively straightforward. Various plugins are available that can help you implement this feature quickly and easily.
Now you know why you need to set up a WooCommerce custom price based on user input. The next section will provide a step-by-step guide to enabling this feature.
How to Set Up WooCommerce Custom Price Based on User Input
By default, WooCommerce doesn’t come with this feature. So, we need to use a third-party plugin. We will use the WooCommerce Name Your Price plugin for this tutorial. It is one of the best tools available to give users access to product pricing.
1. Installation and Activation
Name Your Price is a premium plugin, so you must get it from the official WooCommerce repository. Once you have completed the purchase, you must install it in your store.

After the installation, activate the plugin.
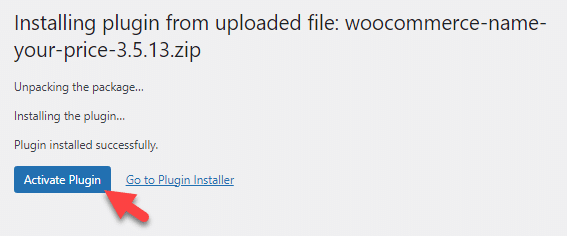
Now, you can go to WooCommerce Settings > Name Your Price to see the plugin’s settings.
2. Configuration
You won’t see any complex configurations there; you can only change the text of individual fields.
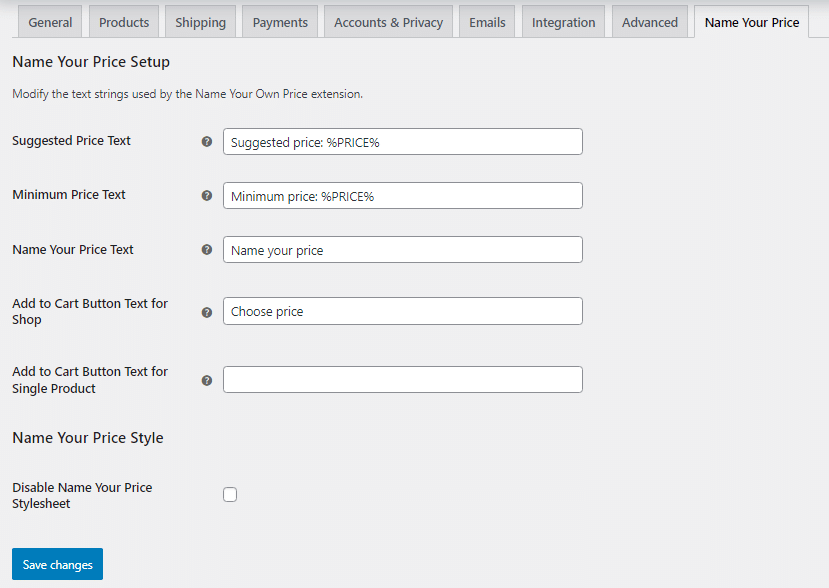
Once you have configured the text for fields, you can start adding the name-your-price function to your WooCommerce products. You need to go to the product options to allow users to name their prices.
Under the product data section, you can choose the type of product. By default, there are only two options.
- Virtual
- Downloadable
However, after activating the Name Your Price plugin, you will see one more option—Name Your Price. You have to select that option.
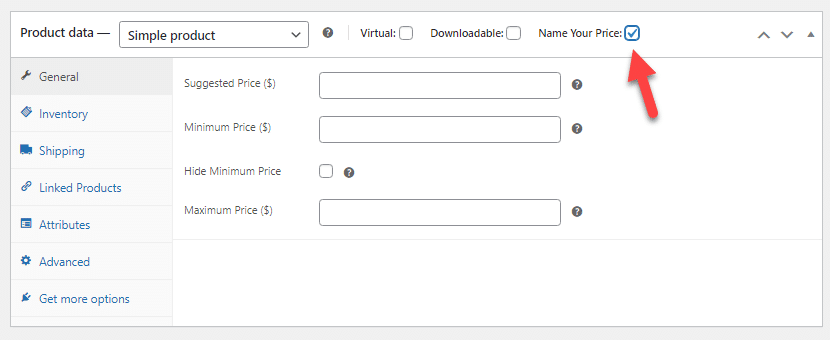
You can see three fields there:
- Suggested Price
- Minimum Price
- Maximum Price
Let’s take a closer look at each option.
- Suggested Price: If you need to suggest a price for the product, use this field.
- Minimum Price: This option allows you to mention a minimum price instead of users lowballing your products or services. This way, amounts above this value will be processed.
- Maximum Price: This option allows you to add a maximum price for the product. You can leave this option blank if you do not need to add a maximum price cap.
Enter the values according to your preferences. In our case, we have configured the option like this:
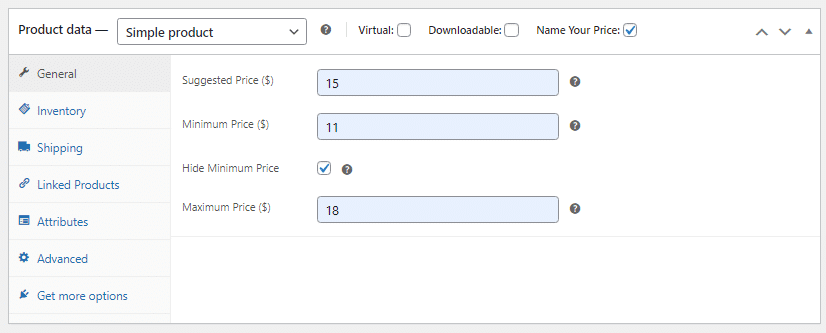
Once you have completed the modification, you must update the product. After updating, you must check out the product page on the front end.
3. Testing
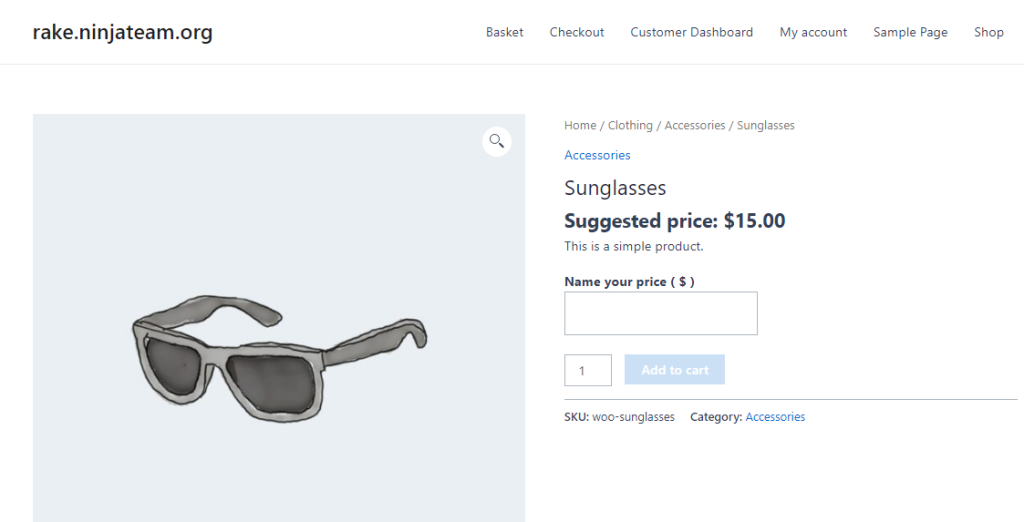
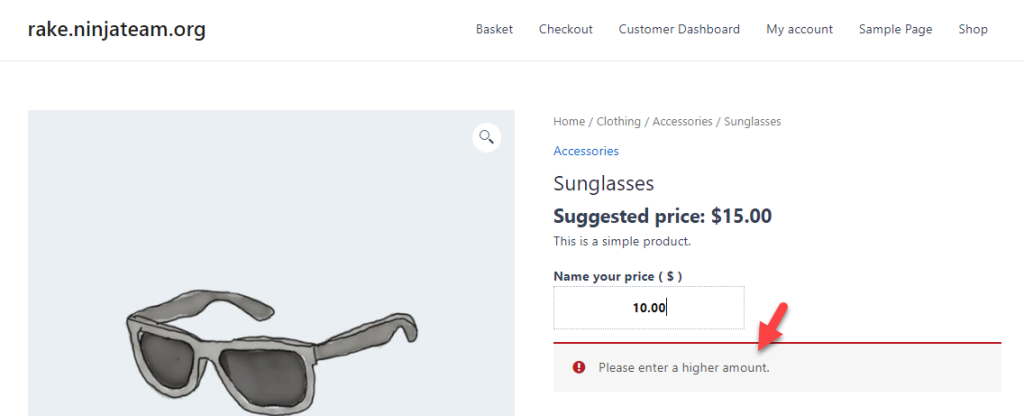
As you can see in the screenshot, the product will ask for custom pricing instead of a regular pricing model. In our case, we chose $11. So, any value under $10 will be marked as unacceptable.
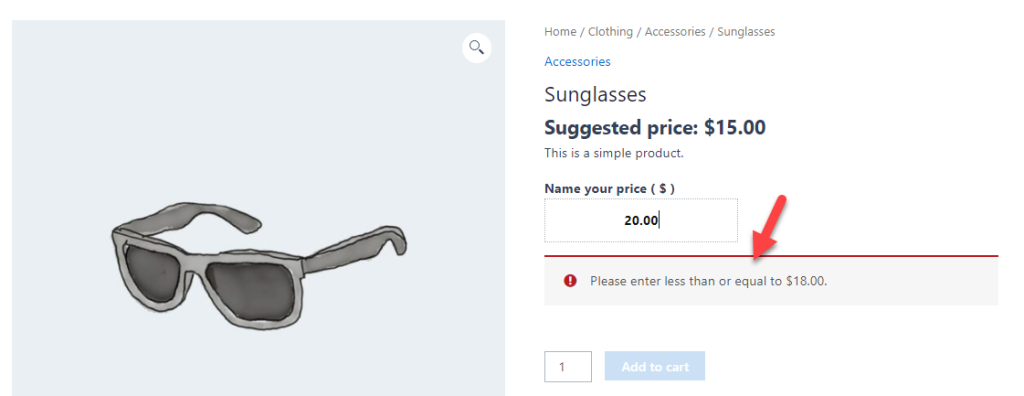
Similarly, if you enter an amount that is higher than the max limit, the page will show you an error.
Once the user enters the right amount between the minimum and maximum price, they can add the product/service to the cart and complete the payment.

That’s it!
This is how to set up WooCommerce custom price based on user input. As you can see in this guide, the process is simple, and you do not need to deal with any coding process.
Conclusion
In conclusion, setting up WooCommerce custom prices based on user input using the Name Your Price plugin can significantly enhance your online store’s functionality and customer experience.
This feature allows your customers to input their preferred price for a product, giving them more control over their purchase.
Overall, the Name Your Price plugin is a powerful tool for enhancing the flexibility and customer satisfaction of your WooCommerce store.
By allowing your customers to choose their prices, you can create a more engaging and personalized shopping experience that encourages customer loyalty and repeat purchases.
How else would you customize your WooCommerce store?
Let us know in the comments.
