Do you want to set up WooCommerce shipping cost by weight? This article provides a step-by-step guide for doing so on your WooCommerce store.
When running an online store, shipping will be an area you need to focus more on. To optimize the shipping process without affecting your profits, you should collect the shipping cost separately from the customer.
Shipping costs will be low for small products but high for electronic items like refrigerators, TVs, etc. To optimize the shipping cost better, you can calculate it by weight.
WordPress doesn’t have this feature by default, so we must use a third-party plugin.
You will learn that today. We will show you how to set up WooCommerce shipping by weight using a plugin.
But first, let’s see why you should set up WooCommerce shipping cost by weight.
Why Set Up WooCommerce Shipping Cost By Weight
Setting up WooCommerce shipping cost by weight can be a beneficial strategy for your online store for several reasons:
- Accurate Shipping Costs: By basing shipping costs on the weight of the products, you ensure that the shipping charges are proportional to the actual cost of shipping the items. This can prevent you from undercharging or overcharging customers.
- Improved Customer Satisfaction: Customers appreciate transparency and fairness in pricing. When shipping costs are based on weight, customers understand that they are paying for the actual cost of shipping their items, which can lead to higher satisfaction and trust in your brand.
- Cost-Effective: Weight-based shipping can help you avoid overcharging customers for small or lightweight items, which can lead to cart abandonment. On the other hand, it ensures you’re not undercharging for heavier items, which could result in losses for your business.
- Flexibility in Pricing: Weight-based shipping allows you to create different shipping rates for different weight ranges. This flexibility can help you cater to a broader range of customers with varying order sizes and weights.
Now you know why you should set up WooCommerce shipping costs by weight. The following section will show you how.
How to Set Up WooCommerce Shipping Cost by Weight
As we mentioned earlier, you can’t enable this feature by default. Since WooCommerce doesn’t have this feature, you must use a third-party plugin.
The plugin we recommend is YayPricing. It is a freemium plugin; you can download the tool’s free version from the WordPress plugin repository. The premium version will unlock more potential features, which you can purchase from the official website.
For this tutorial, we will use the plugin’s premium version.
Installation and Activation
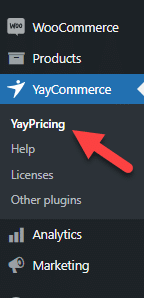
Once you have completed activating the plugin, you can see its configuration on the left-hand side.
You will see five main customization options once you have opened the plugin’s settings.
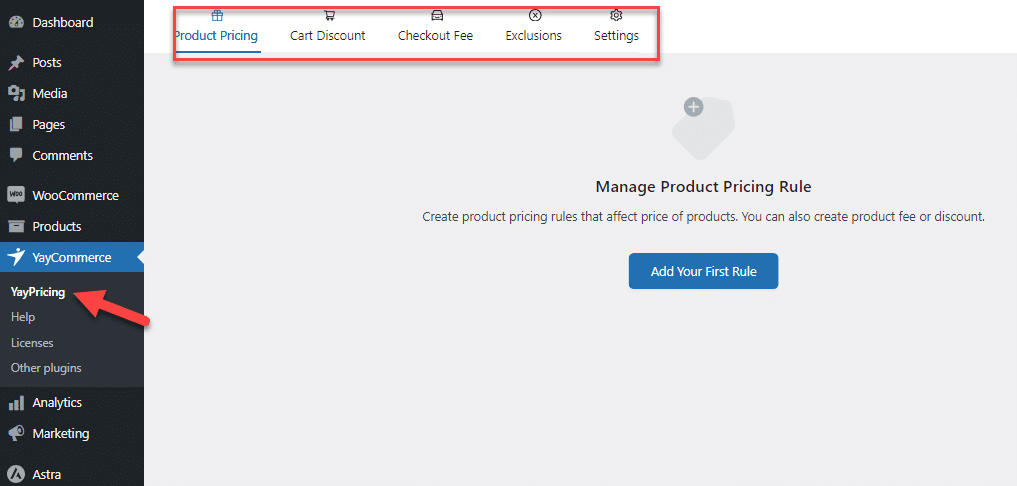
- Product pricing
- Cart discount
- Checkout fee
- Exclusions
- Settings
We will use the checkout fee option to add a custom amount based on the product’s weight.
Plugin Configuration
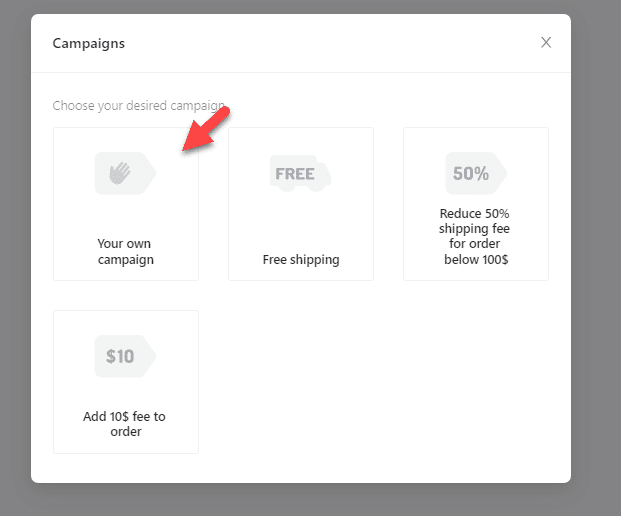
Add a new rule there.
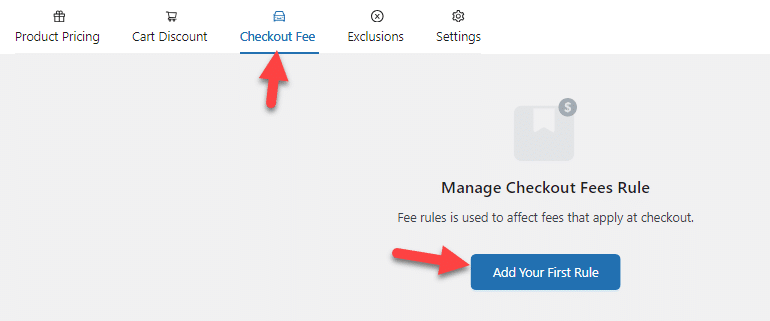
You can start from scratch.
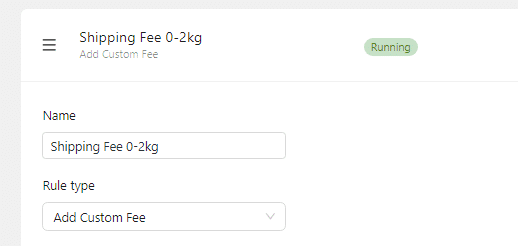
Next, you need to add a name and rule type. The name will be visible only on the website’s backend. If you have two or more rules configured, this is to identify custom campaigns. We will name it Shipping Fee 0-2kg in this case.
The rule type should be to add a custom fee.
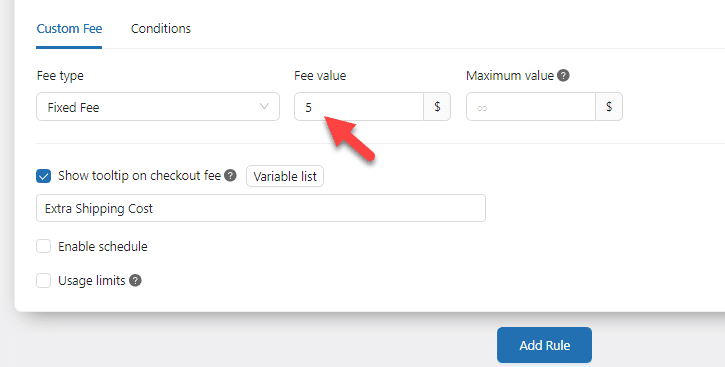
Next, you can move to the fee section and mention how much you should charge. You can also use the tooltip function to inform customers about the extra fee they will pay.
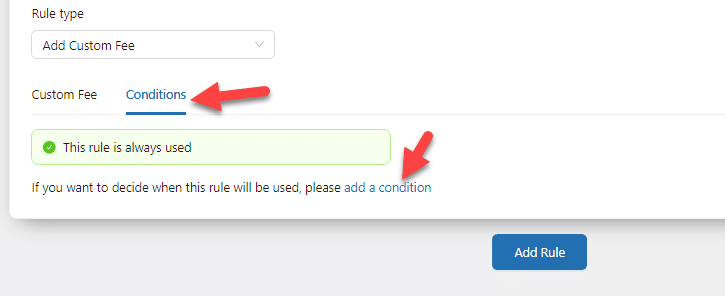
We have added the custom fee to the website but haven’t mentioned when this fee should be applied. To do that, you need to add conditions.
The rule condition you’re going to use is cart total weight. You need to add two conditions there.

The first condition will be triggered when the product is added to the cart. The second condition will be triggered when the product weighs under 2kg. Hence, this rule will be triggered when the product’s weight is between 0 and 2kg.
Once you have completed that, save the changes.
Conditional logic is a powerful feature. You can use similar conditions to add only specific products to this rule.
Adding Multiple Rules
However, we have only added the 0-2kg product condition. Let’s add conditions for more weight classes next.
We will be adding three more weight classes.
- 2.01 – 5kg
- 5.01 – 7 kg
- 7.01 – 10kg
You do not need to create custom campaigns for these values. You can quickly duplicate the first rule you have made.
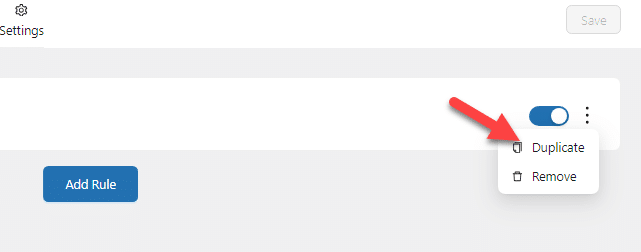
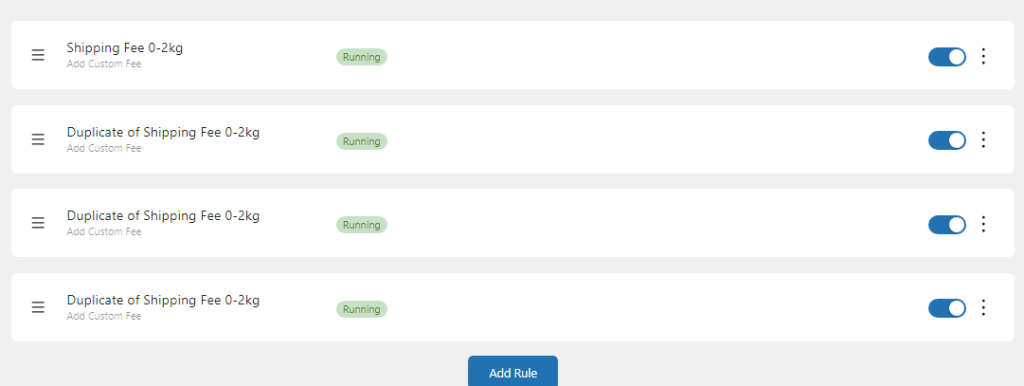
Duplicate the first rule three times, and you’ll get this:
Next, you need to rename the rules to understand them better.
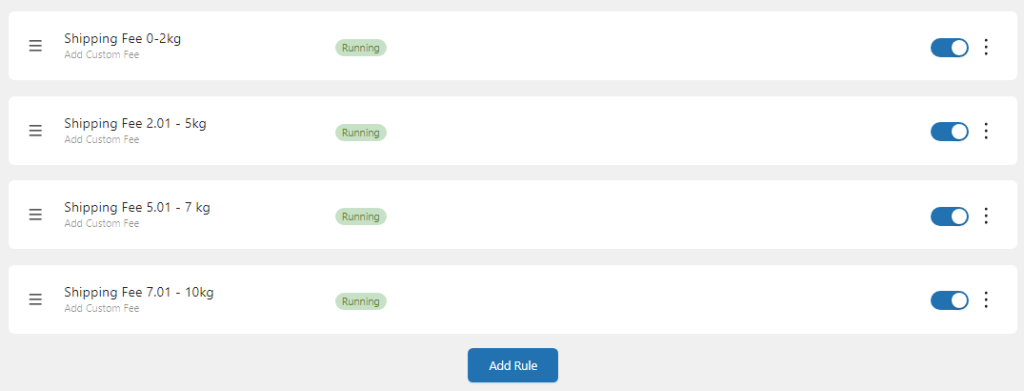
Once you have modified the rule’s name, you must also alter the shipping cost and weight in the condition. Here’s a sample of data you could take as a reference.
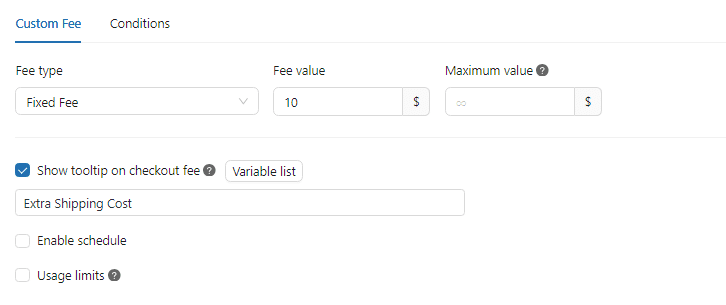
We have increased the shopping cost to $10. Nex modified the condition based on the updated weight.

According to this condition, when a user adds a product that weighs between 2.01 and 5kg, this custom fee will be added to the total price. You can save the changes once you have added the weight classes and the extra cost to the campaigns.
Adding Product Weight
If you haven’t added weights to your products, here’s how. First, go to the product editor, and you’ll see the option to add the product’s weight.
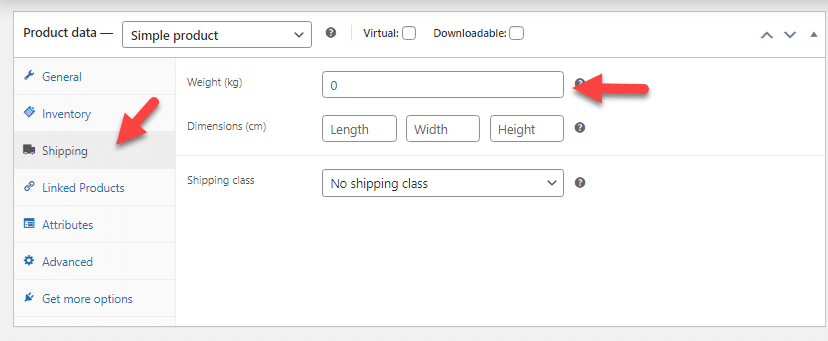
Once you have updated the products according to your preferences, add one to your cart and go to the checkout section.
Testing
You will see the extra shipping fee added here according to the weight of the product you have.
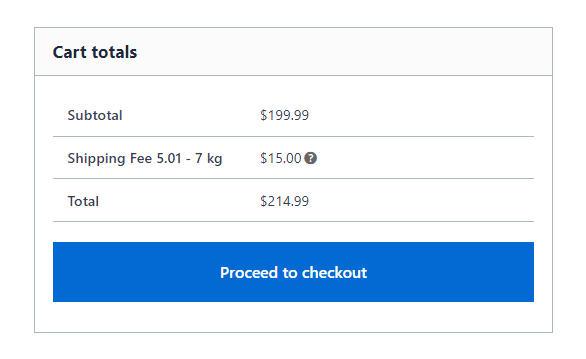
That’s it!
This is how you can set up WooCommerce shipping cost by weight.
Conclusion
You should optimize the shipping procedure if you run an online store selling home appliances or similar products. With the help of any popular logistics provider, you can deliver products worldwide.
However, shipping big products would be more expensive. As this tutorial shows, a plugin like YayPricing can help you set up WooCommerce shipping costs by weight.
The plugin’s customization options are minimal and easy to understand. Try it if you must add the shipment fee based on the weight function.
Would you add this feature to your WooCommerce store?
Let us know in the comments!
