Since 2001, the brainchild of Ben Chestnut, Dan Kurzius, and Mark Armstrong has been offering terrific mail distribution services, and by 2019 they have expanded their horizon further. Today Mailchimp offers a complete marketing platform aimed at smaller organizations.
There is no wonder that many startups and small businesses who have adopted online business and the e-commerce model view Mailchimp as a viable service to not only achieve automated email marketing but more. Integration with WooCommerce, in particular, is much demanded.
According to a recent study by Mailchimp, the average email open rate for all industries is 21.33%, with 28.77% being the highest and belonging to government-related emails.
This is closely followed by 27.74% by hobbyists and 27.62% of religious emails. On the other hand, click-through rates are concerned, and hobby-related emails enjoy a 5.01% CTR followed by a CTR of 4.62% observed for media and publishing emails.
However, the average click-through rate for all industries comes to 2.62%. Nevertheless, Millennials are the ones who top email usage.
In light of this information, here is a step by step guide that you can use to integrate Mailchimp in WooCommerce.
Download and Install the Plugin
First thing first, there are numerous options available when it comes to the plugin. This is why it is very important that you don’t confuse yourself or end up adding the wrong plugin for your WooCommerce website. Plus, WooCommerce itself is an open-source e-commerce plugin for WordPress.
Therefore to make matters extremely simple, just search for Mailchimp for WooCommerce plugin online. This plugin’s authenticity is marked by the factor that this plugin is made, delivered, and provided by people at Mailchimp, which should be a clear identifier that you are downloading the right plugin rather than a ripoff.

Once you have downloaded the right plugin available at the WordPress.Org or both Mailchimp and WooCommerce websites, you would then begin the installation process.
It is a must for the plugin to correctly work that the WooCommerce plugin for WordPress has been already installed and activated. Now to install the Mailchimp for WooCommerce plugin, do the following:
- Log into your WordPress Administration Panel.
- There on the left navigation panel, you will find the Plugins option.
- Click on it and choose Add New.
- Now click the Upload Plugin option.
- Click Choose File to select the ZIP file for the plugin, and then click Install Now.
- Once installation is complete, select the Activate Plugin option.
Connect the Two Together
Once you have completed the installation and the Mailchimp plugin’s activation, you will be taken to the Connect interface. You can also alternatively click on the Mailchimp tab on your WordPress Dashboard Sidebar.
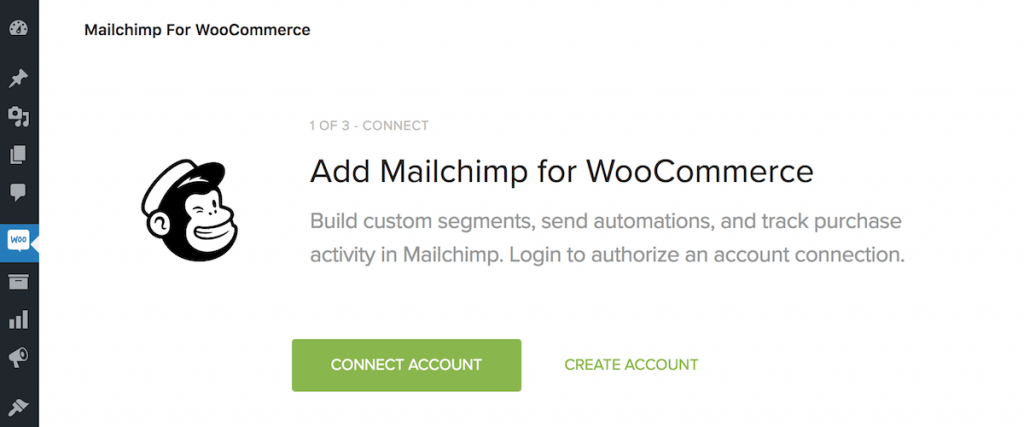
Here you will be able to link your Mailchimp account with your WooCommerce installation. In order to start the process, simply press Connect Account. This will take you to your Mailchimp account, where you will be requested to log in to your account. A new window will open with Mailchimp’s OAuth service.
Setting Up Your Mailchimp
Next up, you need to set up your Store settings. Here you will enter the details, including your Store name, address, email, city, and additional information in the correct fields.
If there are any other local settings you are particular about, they are also considered here, such as your WooCommerce currency, locale, and time zones. Furthermore, you can also set up the Permission Levels in the Optional store settings to manage Mailchimp for your WooCommerce website.
Sync Your Store Audiences in Mailchimp Audience Dashboard
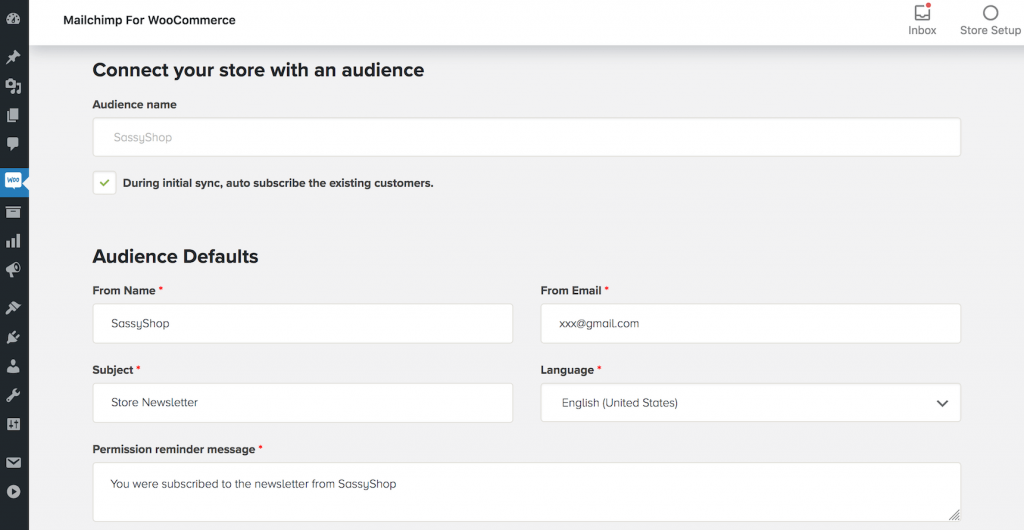
After the initial setup, you need to get your Audience Settings right. The default settings are already set for your emails, but to get maximum results, you can configure them according to your specific requirements.

Here you can also set a permission reminder. Once you are done playing with all the features, you will also be able to synchronize your audience settings with your store.
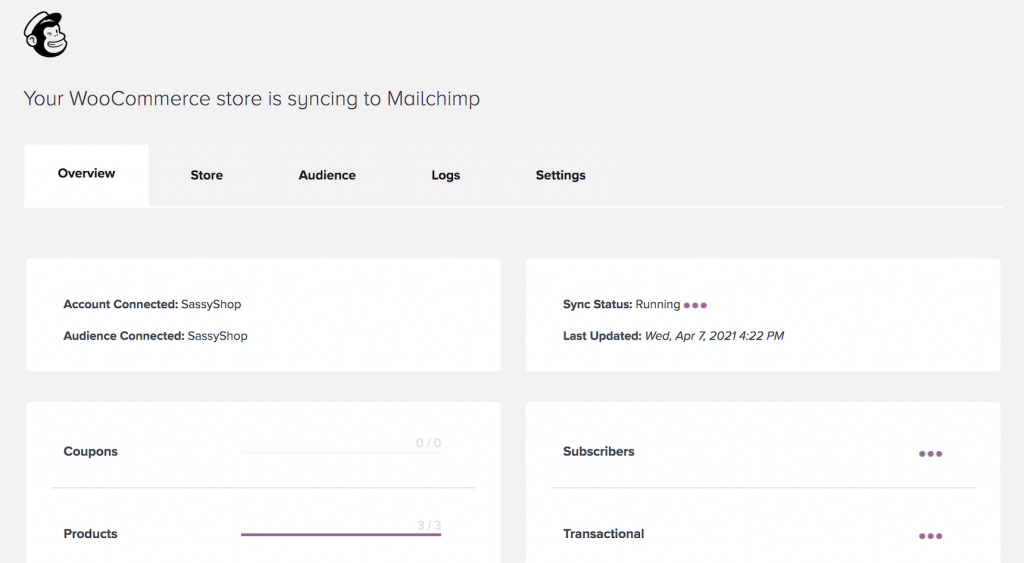
In order to create a new data set, all you need is to enter a suitable name for the audience of your WooCommerce store and then click Start Sync.
In this sync, you can also include your already existing customers and audiences as well. Optional Audience Settings offer additional sync and audience-related settings, including customizations for your Opt-in checkbox displays, newsletters, custom subscriber tags, and much more.
Mobile-Friendly Email Templates
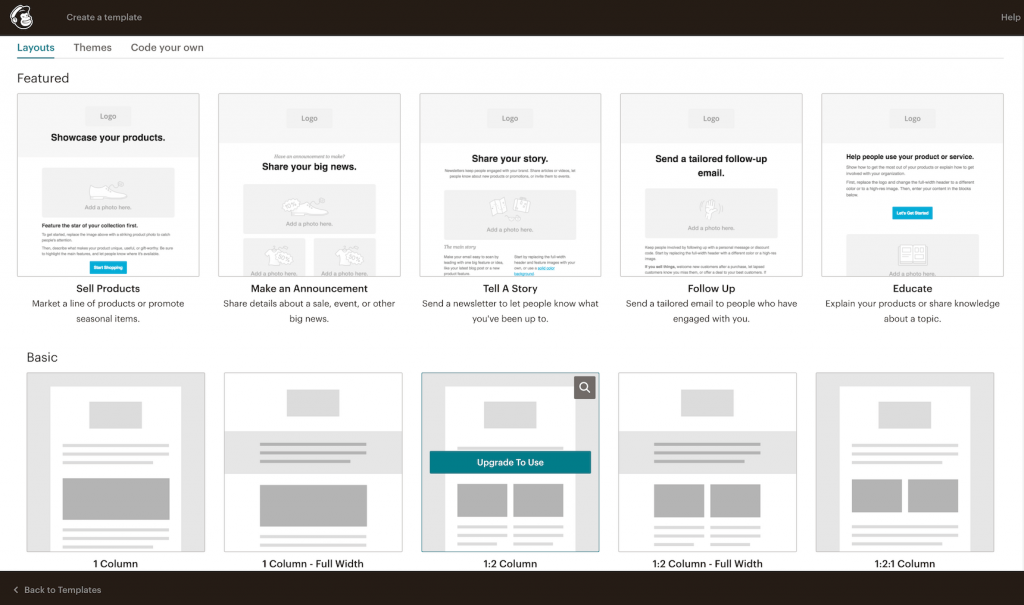
With mobile devices becoming increasingly popular and frequently use above other computing gadgets, it makes all the sense to make your email campaigns all the more mobile-friendly. Mailchimp offers you drag and drop features to create templates with various layouts and customizable mobile styles.
Types of templates include predefined templates as well as custom coded templates. Each template offers you a design layout and defined spaces to include your content that can include all types of media, such as written text, images, and even videos.
However, it is always best that you test out and preview your email campaigns before you try them out.
Perform A/B Testing Email Campaigns
A/B testing is basically a method where you essentially implement the user experience research methodology. Here you evaluate and analyze how different variants within the same experiment can generate a difference in results as well as which one is comparatively better to accomplish company-related objectives and goals.
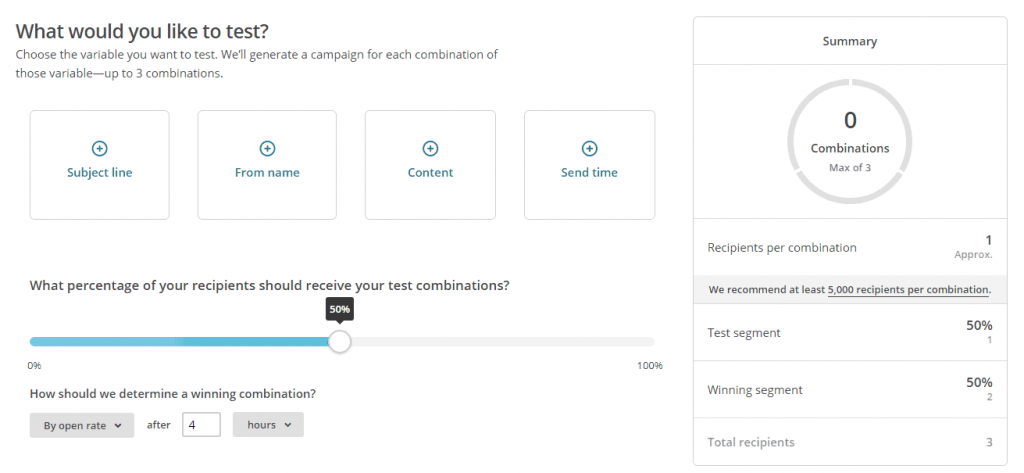
Hence, A/B Testing will offer you the best email template that you can use to run your campaigns through Mailchimp. To create an A/B Testing Campaign via Mailchimp, you need to do the following:
- Click the Create icon.
- Click Email.
- Click A/B Test.
- Enter a Campaign Name and click Begin.
You can use A/B Testing for various things such as subject lines, content, and send time, to name a few. You can also determine or set the bar for your winning combination, such as open rate, click-through rate, or total revenue, to mention a few. You also need to determine how you want to run this test.
In the end, you can view reports for your campaigns and determine a winning combination manually. Young learners who apply for a cheap dissertation writing service UK should also consider the A/B Testing technique to run their marketing campaigns in later stages of their career.
Pop-Up Forms
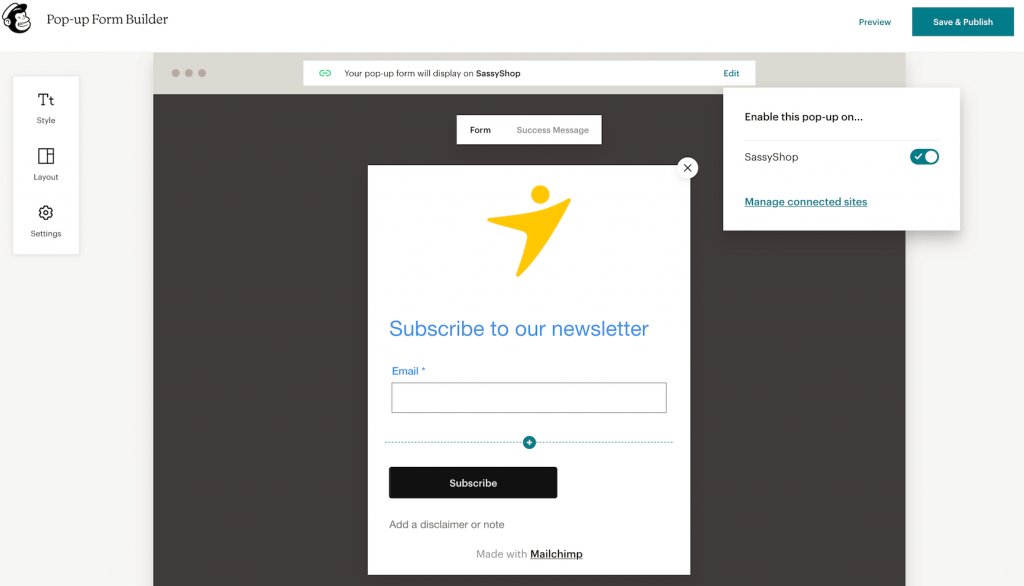
While this article has focused mainly on Mailchimp for WooCommerce by Mailchimp plugin, another free plugin is the one that the people at WooCommerce provide. One of the striking differences apart from being easy to use and integrating with WooCommerce is a simple pop-up form embedded in web pages to persuade your online visitors to become subscribers.
In fact, people on Fiverr are running gigs right now that offer services like creating pop-up subscription forms for Mailchimp on your website. Here is what you need to do:
- Click Add Block button in your WordPress Editor and search for Mailchimp.
- Now move the block while clicking and dragging it to where you would like it to go.
- In the Mailchimp Block, you can now customize your signup form and settings.
- Mailchimp also creates an embeddable signup form for your audiences in your account so that you can paste it into your website’s HTML.
- All the designing and editing of your pop-up form is conducted in Mailchimp, and when that is done, you can paste or publish the code into your site.
Product Retargeting Emails
Product retargeting emails are focused on bringing subscribers back to products on your store. Hence product retargeting emails is a great way to invite subscribers back to make a purchase.
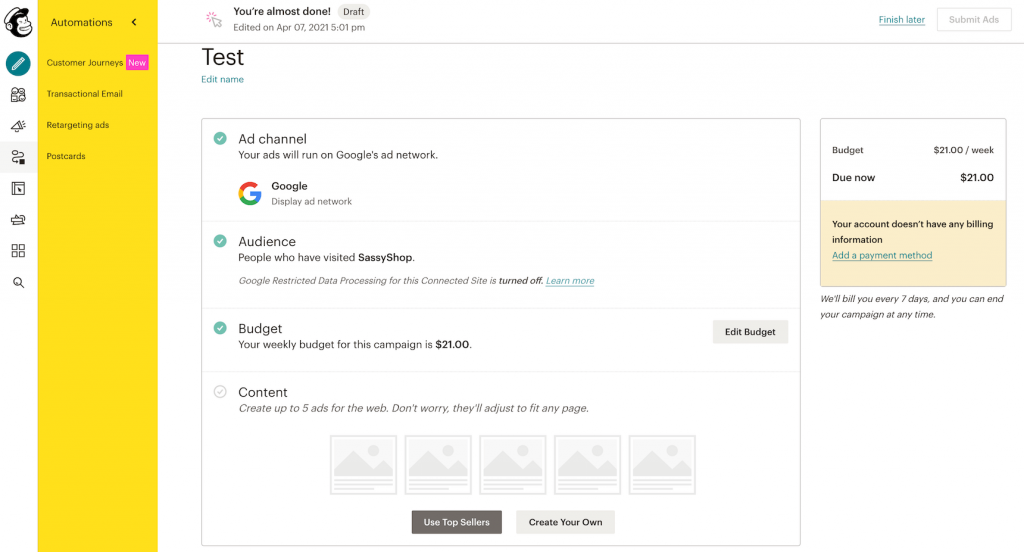
In order to this, simply do the following:
- Connect your WooCommerce store to your Mailchimp account and bring in your customer data.
- Now set retargeting rules where you can send message to people who browsed your newest products or best sellers 24, 48, or 72 hours later.
- Design your emails and include the products they liked or recommended to others. You can also add personalized offers with Mailchimp’s easy to use email designer.
- With automated emails, simply turn on the retargeting email option and watch online visitors into paying customers.
Order Notifications Automation
Mailchimp also offers you the ability to send order notifications. Hence whenever a person visits your WooCommerce store and places an order, then with the Mailchimp plugin, you can automatically send them an order notification email to their email address to inform them that their order has been placed and will be processed in due time.
This email can include all the necessary details that allow the visitor to review their order, including the entire products they have added along with their quantities and complete price breakdown. You can choose any combination of five different notifications to keep your customers updated on their purchases, namely:
- Cancellation Confirmation
- Order Confirmation
- Order Invoice
- Refund Confirmation
- Shipping Confirmation
Conclusion
The Mailchimp plugin for WooCommerce is a great utility tool that helps you sync your audience in Mailchimp with purchase data. You can also sync new subscribers to your audience and set up marketing automation to remind customers about items that they left in their cart or viewed on your WooCommerce website.
The plugin is also great for track customers and segment customers based on their purchase history as well as purchase frequency.
I hope this post was able to offer you some meaningful insights as to how you can integrate Mailchimp in WooCommerce and use it to boost your business operations. Cheers and all the best for your future endeavors!
