
So you got some guts for design?
And now you want to tweak things a little bit to bring up the look and feel that you’ve always wanted?
Hello creative Shopify merchant, you’ve reached the right place!
While there are various ways to achieve the web page layout as an apple of your eye, the basic steps remain the same.
Since the dawn of Shopify Online Store 2.0, this is the common way of adding custom CSS to your store, no matter which Shopify theme you are using.
Let’s dive in!
Log in as Shopify store admin
The Shopify admin login always looks like this: your-fancy-store-name.myshopify.com/admin
So make sure to reach this domain to input your email and password.
Navigate to your theme code
From your Shopify admin, go to Themes > Current theme > Actions > choose Edit code.
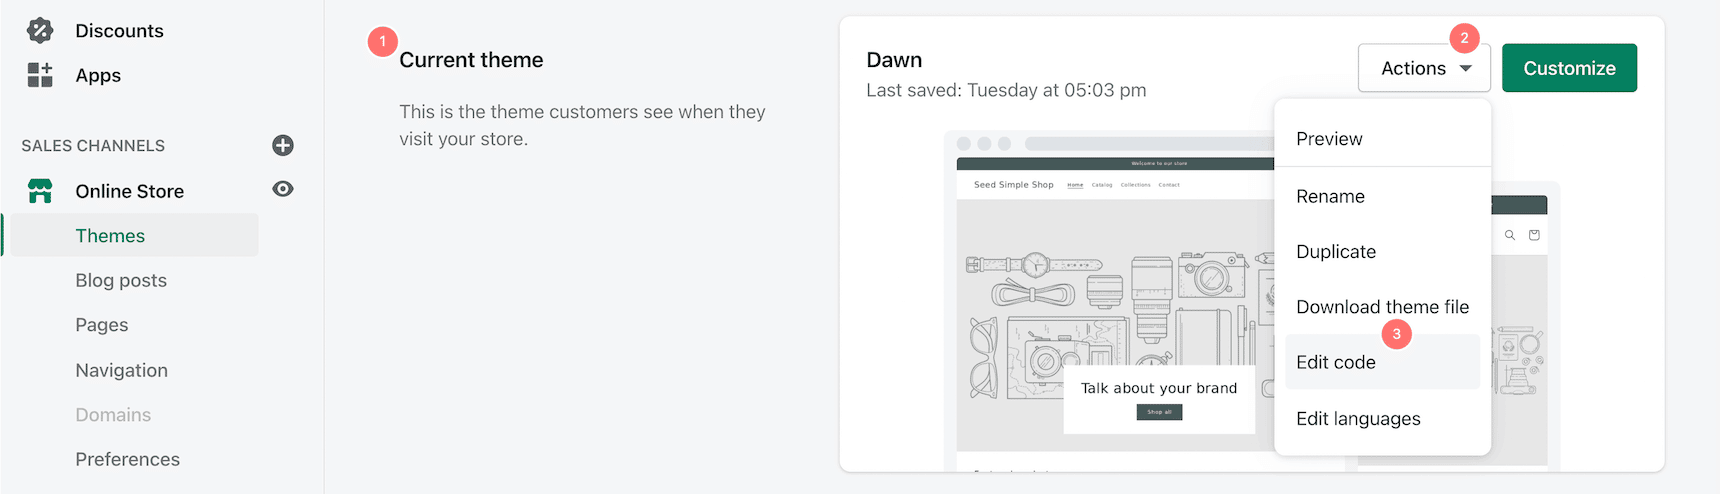
Then you will see the whole components of e-bricks and mortars that build up your online store. That’s quite a lot, right?
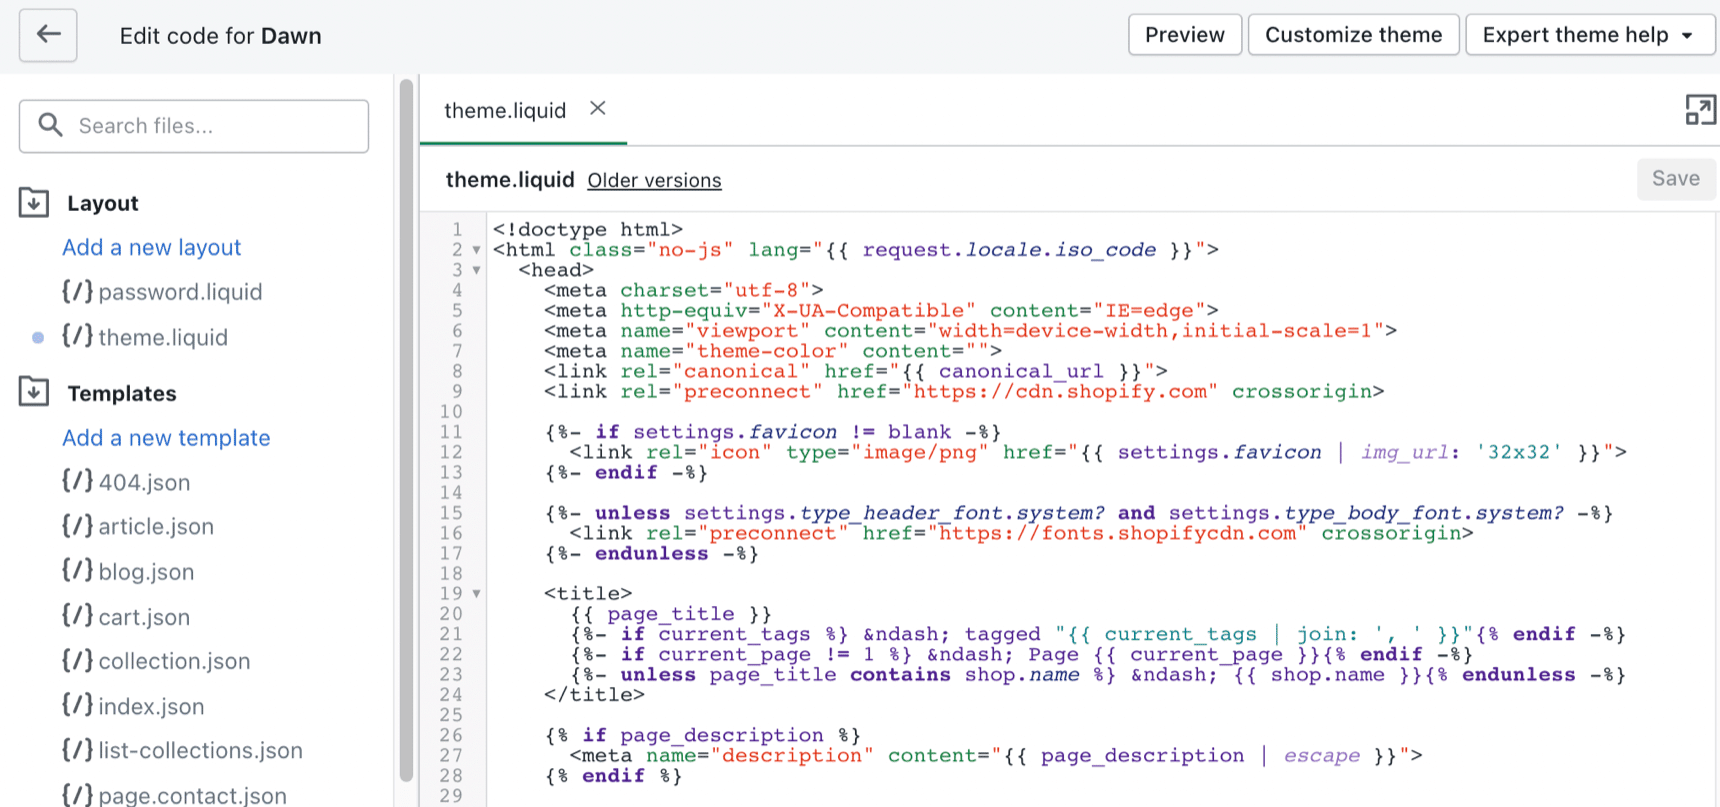
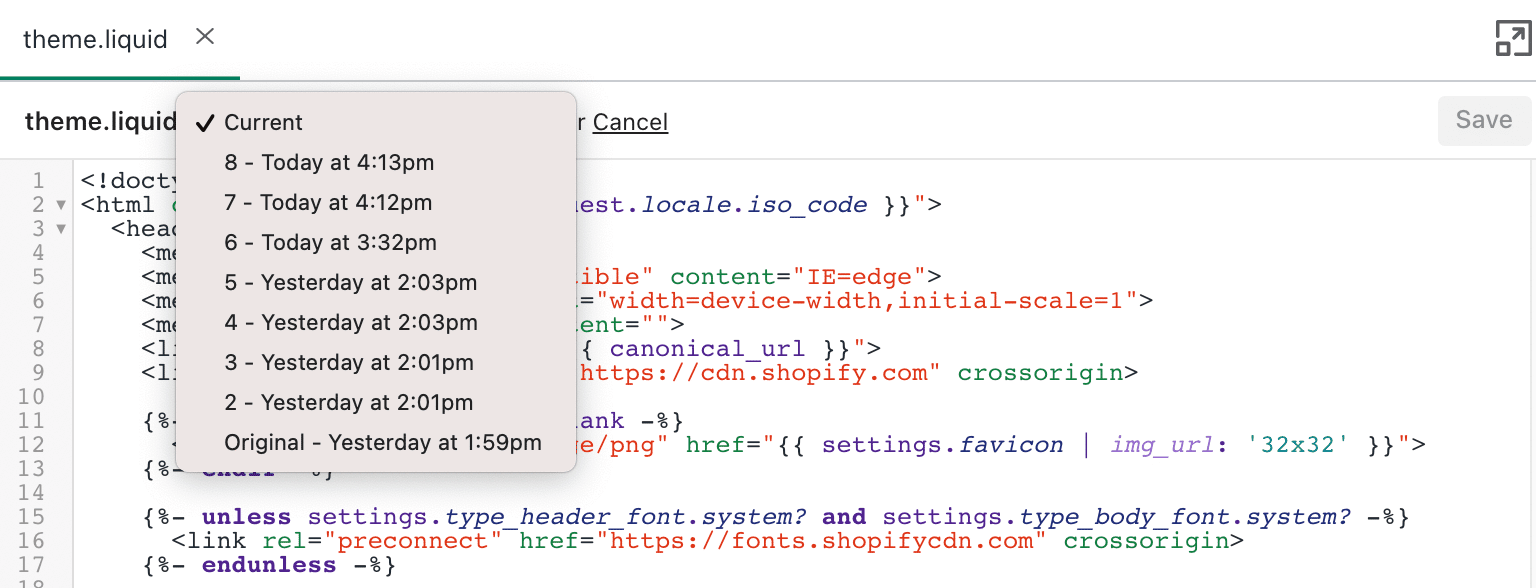
Don’t worry, if the next thing you add doesn’t work out, you can always roll back to the previous state.
By clicking on Older versions next to the code file, you will see all the edits that you’ve made.
Add CSS snippets to theme.liquid
If you want to make changes to your product pages, you can add the CSS snippets to the theme.liquid or theme.scss.liquid file.
This helps add some preferences to the existing elements which your theme or activated apps define. Meaning here you can add some padding, margin, and alignment tweaks to the existing product form, quantity selector, or variant picker on Shopify product pages.
So from the Layout directory, choose theme.liquid to open it in the file editor. Then, create <style> and </style> tags and add the CSS snippets between them.
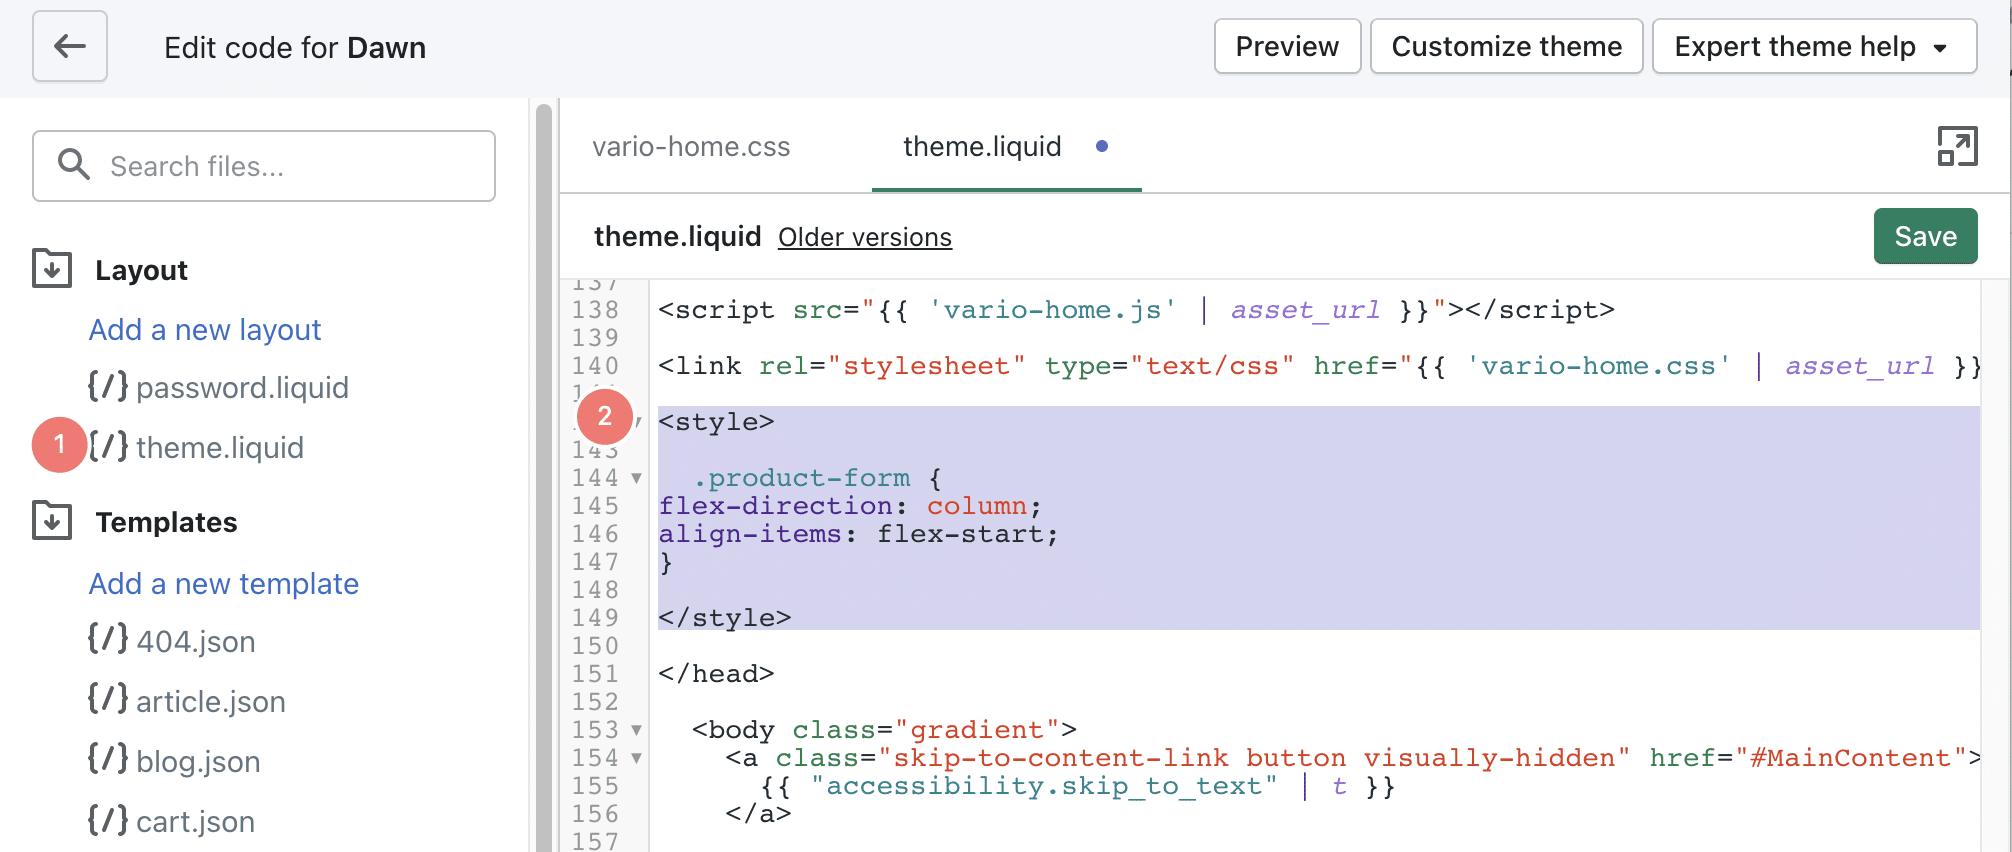
Keep in mind that this part should be placed within the <head> and </head>section. Overall, here’s what your new snippets might look like.
 <head>
    <style>

.product-form {
    flex-direction: column;
    align-items: flex-start;
}

.vario-variants:not(select) {
    justify-content: center;
}

.vario-variant {
    margin-right: 0px;
    width: calc(100% / 4);
}
    </style>
 </head>
This CSS can help improve and customize your product variant options.
Wrapping Up
I hope this tutorial has helped you find the most convenient way to add CSS to customize your Shopify themes. This article was originally published in 2021 and we’ve added new workarounds to this post in 2022.
Good or bad, we’d love to hear your ideas and suggestions. Find us on Facebook – YayCommerce.