Do you want to create product bundles for your WooCommerce store? If you are looking for a simple method, keep reading this article.
Bundle and ship products together to increase sales and conversion. Many online stores, like Amazon, are doing this.
When similar products are combined, people can get everything they need for an affordable (lower-than-usual) cost.
Keep reading this article if you’re wondering how to achieve this in your WooCommerce store. We will show you how to create hassle-free product bundles for WooCommerce.
But before going further, let’s see why you should create product bundles on your WooCommerce store.
Why You Should Create Product Bundles in WooCommerce
Creating product bundles in WooCommerce can offer several strategic advantages for store owners aiming to enhance their eCommerce operations. Here’s why you should consider implementing product bundles:
- Increased Average Order Value (AOV): Bundling products can lead to higher AOV as customers tend to purchase more than they originally intended, seeing bundles as a value proposition or a comprehensive solution.
- Improved Customer Experience: Bundles streamline the shopping process by offering pre-selected items that complement each other, making shopping quicker and more convenient. Thus, bundles enhance the overall customer experience.
- Inventory Management: You can efficiently clear out inventory by bundling slower-moving products with best-sellers. This is particularly useful for seasonal or near-end-of-life products.
- Enhanced Upselling and Cross-Selling Opportunities: Bundles are a natural platform for upselling premium products or cross-selling related items. They introduce customers to more of your offerings and increase their lifetime value.
- Price Perception: Bundles can be priced strategically to offer a perceived discount, encouraging purchases by making customers feel they are getting more for less without significant margin impact.
Now you know why you should create product bundles in your store and sell them. The next section will show you the top four methods to achieve this task.
How to Create Product Bundles for WooCommerce Store
The main four methods are:
- With YayPricing
- With YayExtra
- With Composite Products
- With WPC Product Bundles for WooCommerce
We will explain all the methods below.
1. With YayPricing
YayPricing is a freemium plugin that improves product pricing. It allows you to create and integrate custom campaigns with robust features like conditional logic.
With the help of YayPricing, you can create product bundles and help the customer get all the products at a discounted rate.
Here is how you can do it.
The first step is to activate the YayPricing plugin on your website. For this tutorial, we will use the plugin’s premium version.
Now, you need to go to YayPricing > Product Pricing.
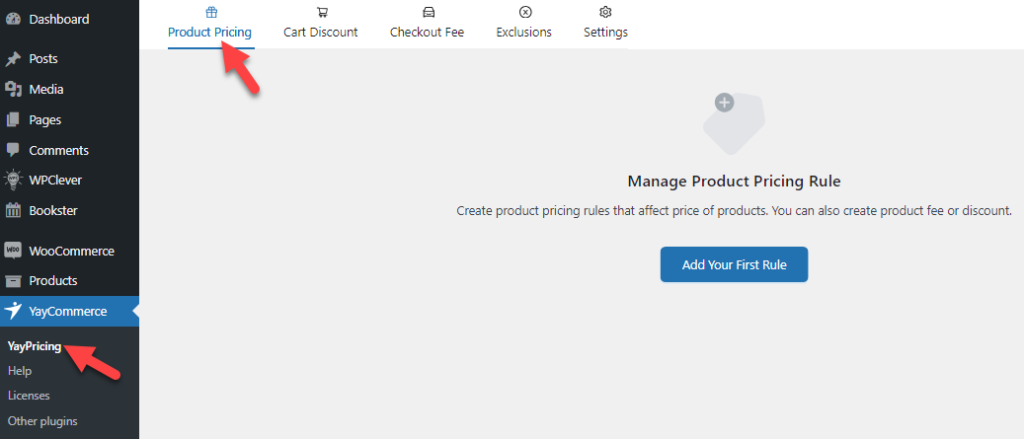
You can then add new campaigns. We will show you two methods for bundling products using YayPricing.
1.1 Add Product X to the Bundle When the Cart Contains Product Y
This is a straightforward method for bundling products and selling more. Here, you offer some products for free when a specific product is in the cart.
Here is how you can do it.
First, go to the product pricing campaign and choose the Buy X Get Y option.
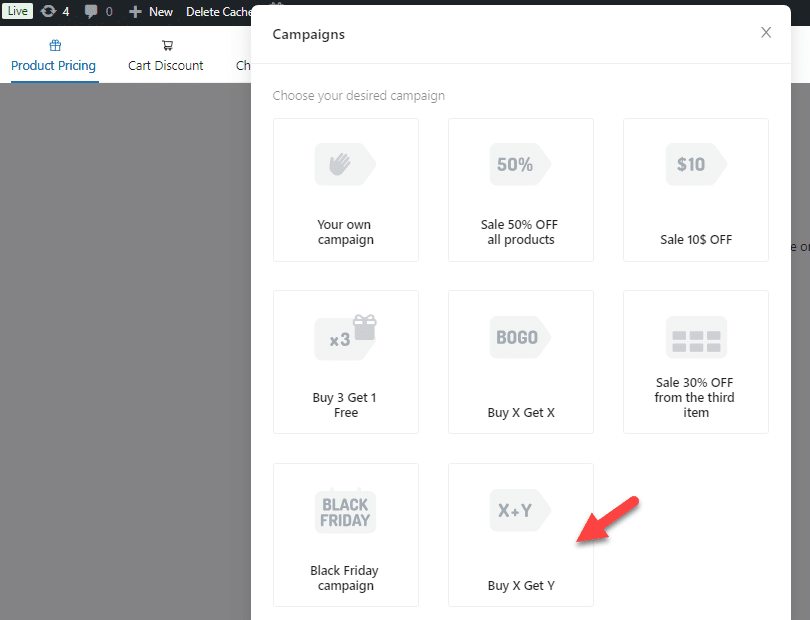
You will see a screen like this:
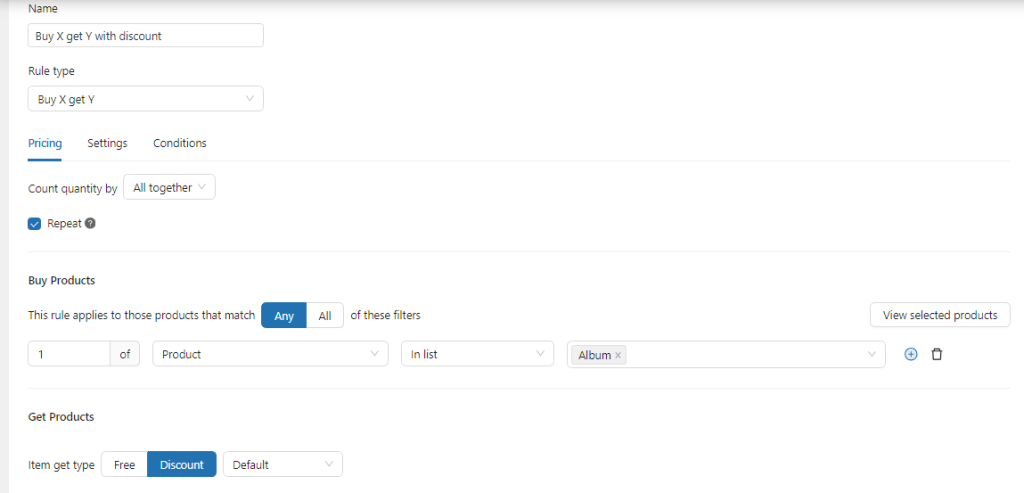
You can enter a unique name for the campaign there. The name is just for identification and won’t be displayed in the front end. If you scroll down, you will see the major configuration options.
Under the buy products section, you must choose the products that will get the customer a free or discounted item.

Now, move to the Get Products section and choose the product you need to offer.

As you can see in the screenshot, you could offer the product for free or for a discount. Now, whenever a customer adds products from both the get and buy products, the get product is 100% free.
This is an excellent choice for selling more products and increasing conversion rates.
1.2 Product Bundle for $X
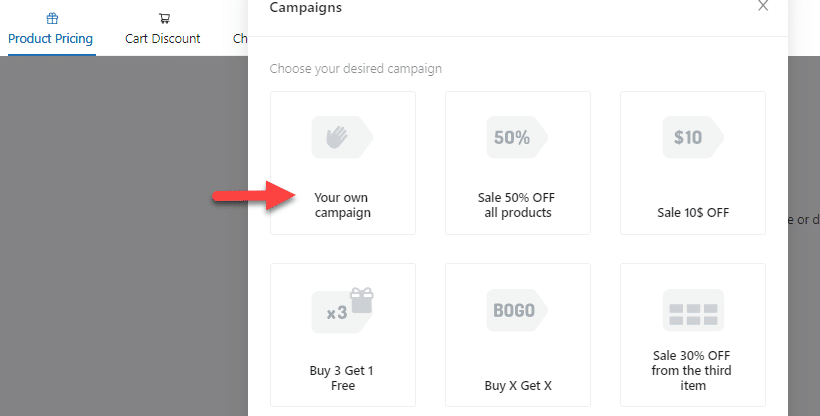
You can also create a product bundle with the YayPricing plugin. To do this, go to the product pricing campaigns and create a blank campaign.
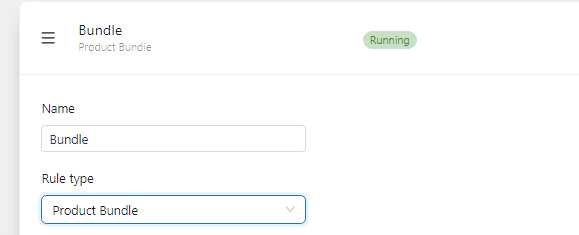
Next, you need to choose the rule name and type.
Next, choose the discount value.

After this, you can choose the products or product category from the next section.

From now on, when someone gets products from the specified category, they will get a discount on the total price.
Next, let’s see how to use YayExtra for the task.
2. With YayExtra
The YayExtra plugin helps you add extra options to your WooCommerce product pages, which you can use to create customer bundles.
For this tutorial, we will be using the premium version of YayExtra. Once you have activated the plugin and verified the license key, go to the settings. From there, you can add new option sets to your WooCommerce product pages.

We will ask the user if they would like a product bundle. This is possible with the help of a radio button field. The values we are going to add are yes and no.
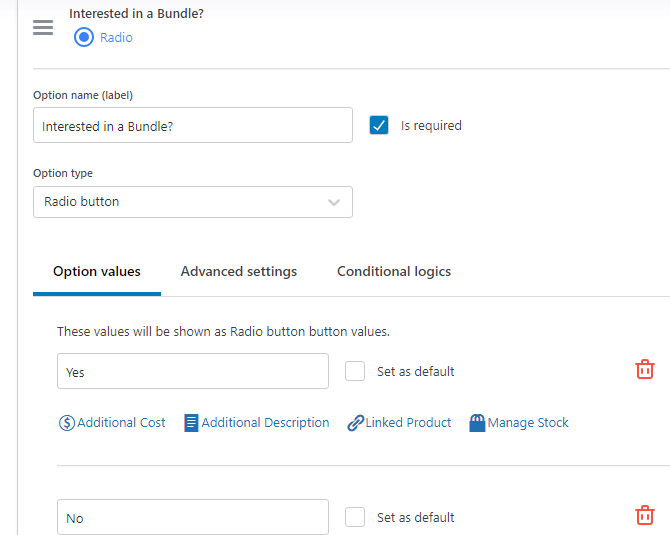
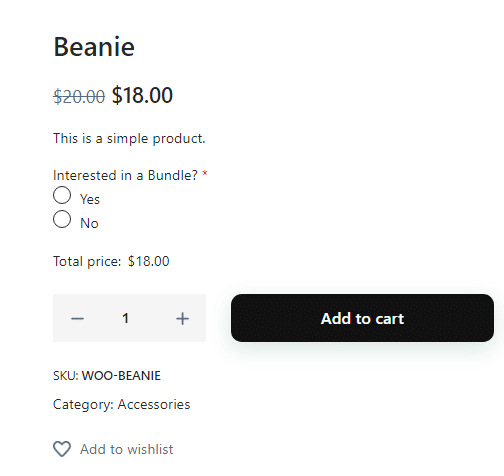
On the front end, the option will look like this:
Next, we will add the swatches (multi-selectable) option to the set.
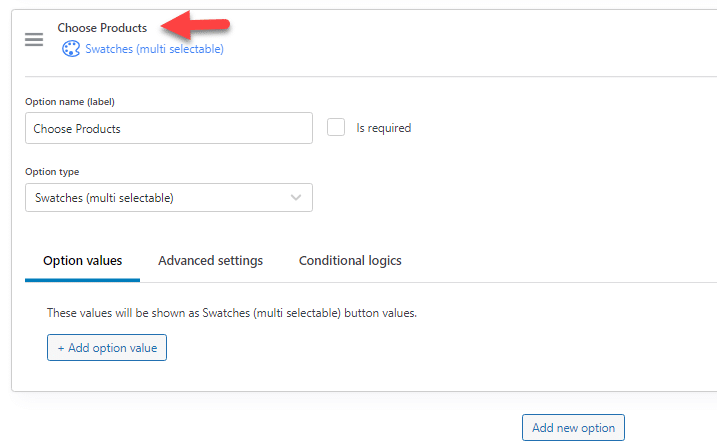
Next, you need to add the option values.
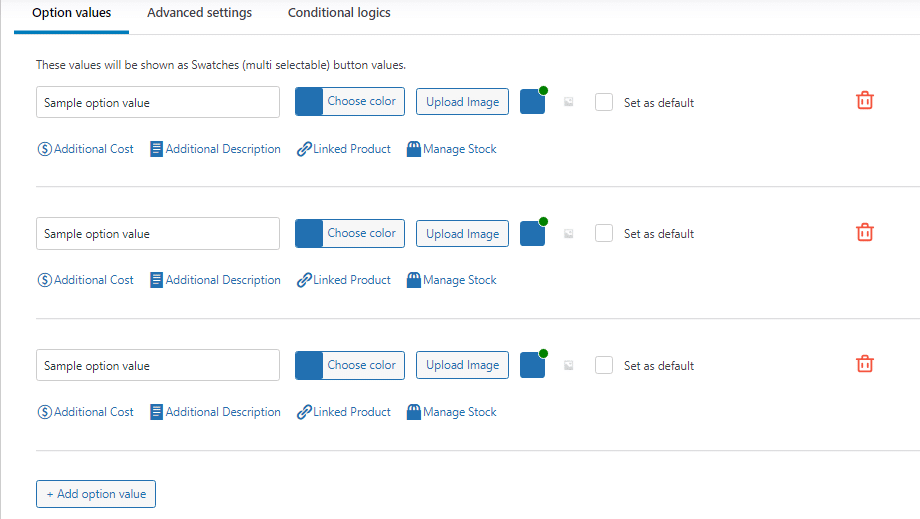
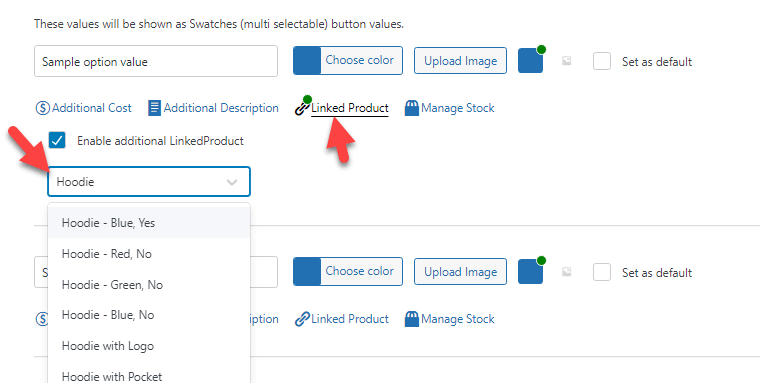
If you look closely at the options, you can see the Linked Products option. Enable it and choose the product to link to that specific value.
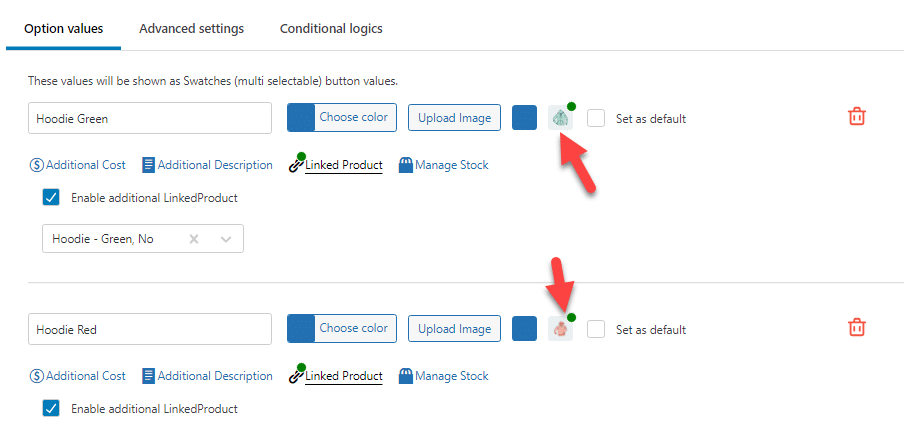
Similarly, you can edit the option values and add products to them. YayExtra allows you to add images to the values instead of showing a base color. So, use this feature to show the products you’re offering.
The next thing you need to do is add conditional logic to the option.

If you add conditional logic rules, as we displayed above, the bundle products will only be displayed if the customer chooses yes to the first question. Otherwise, they won’t be displayed.
Now, let’s check the extra options from the front end.
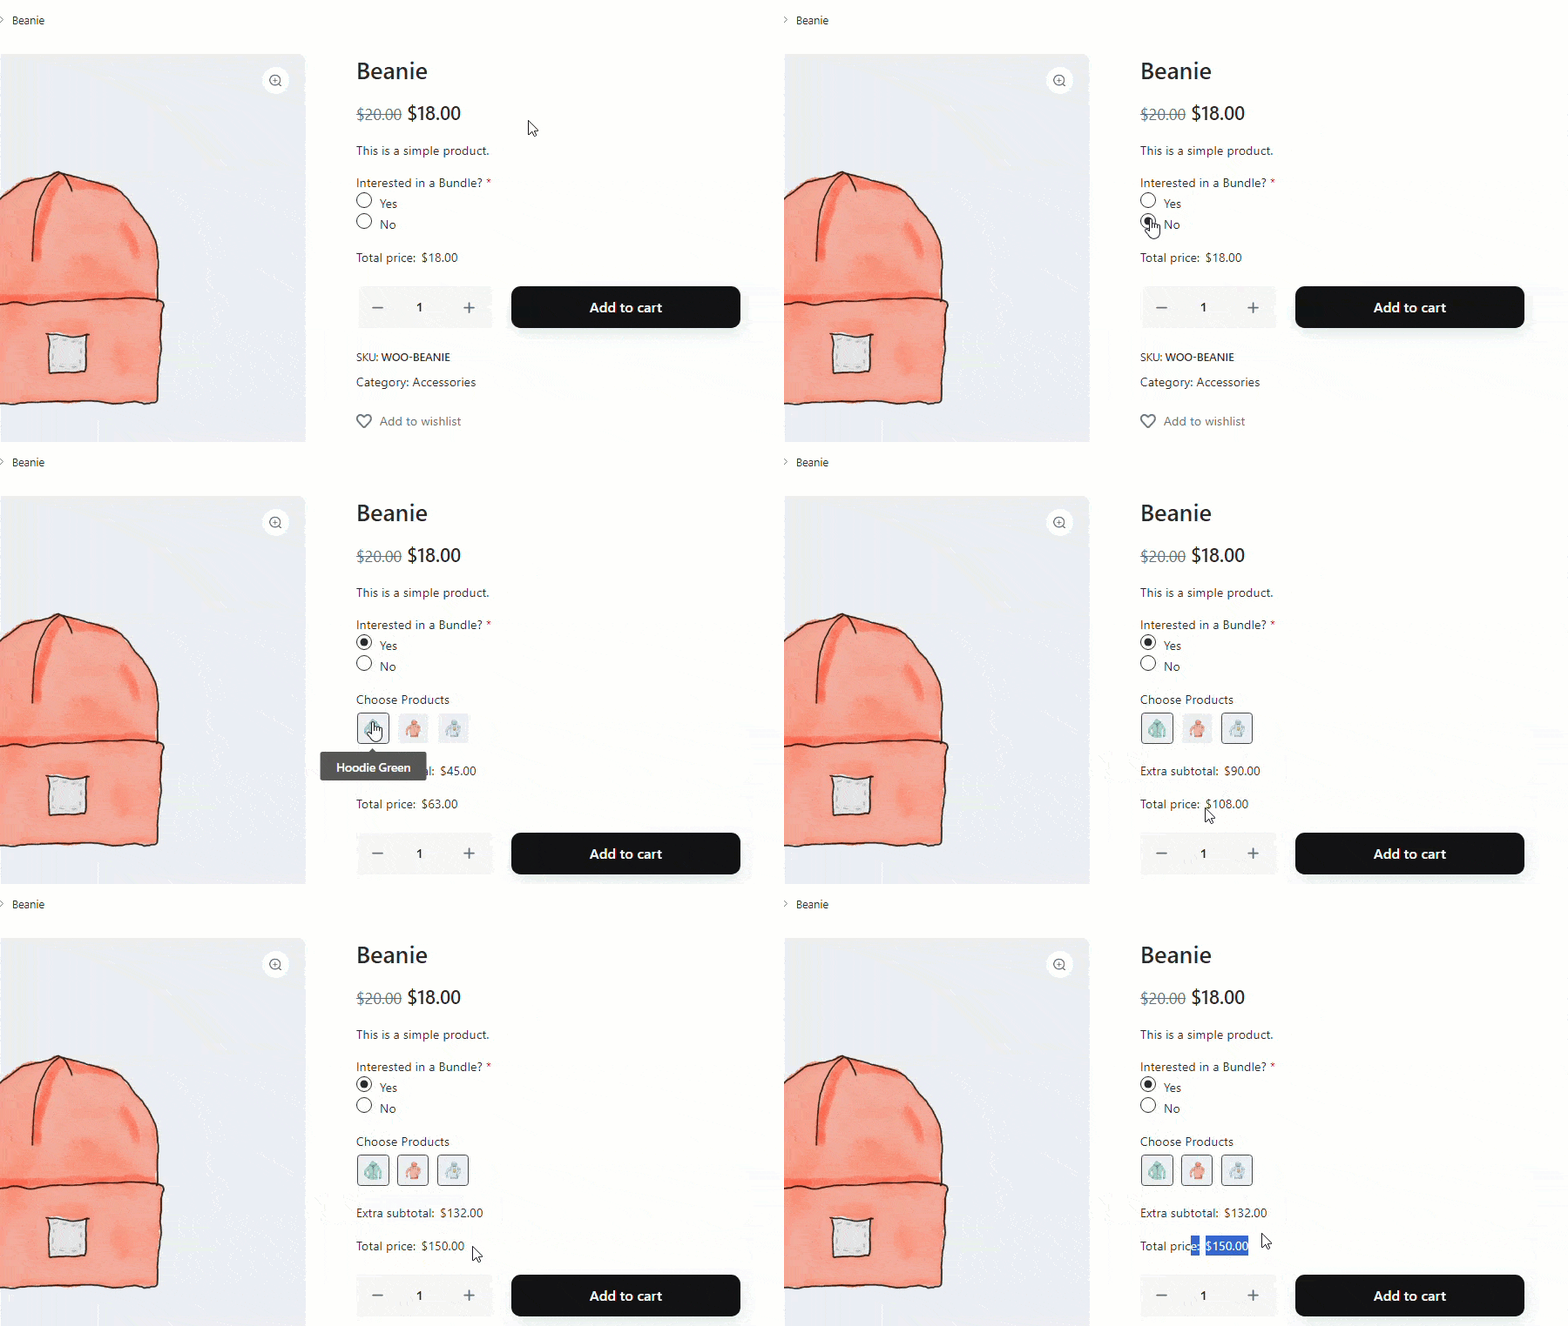
Customers can add the product to the cart and complete the bundle purchase.
That’s it. As you can see, if you need an easy option to create bundles directly from the WooCommerce dashboard, you should choose YayExtra.
3. With WooCommerce Composite Products
The next option for you is the WooCommerce Composite Products plugin.
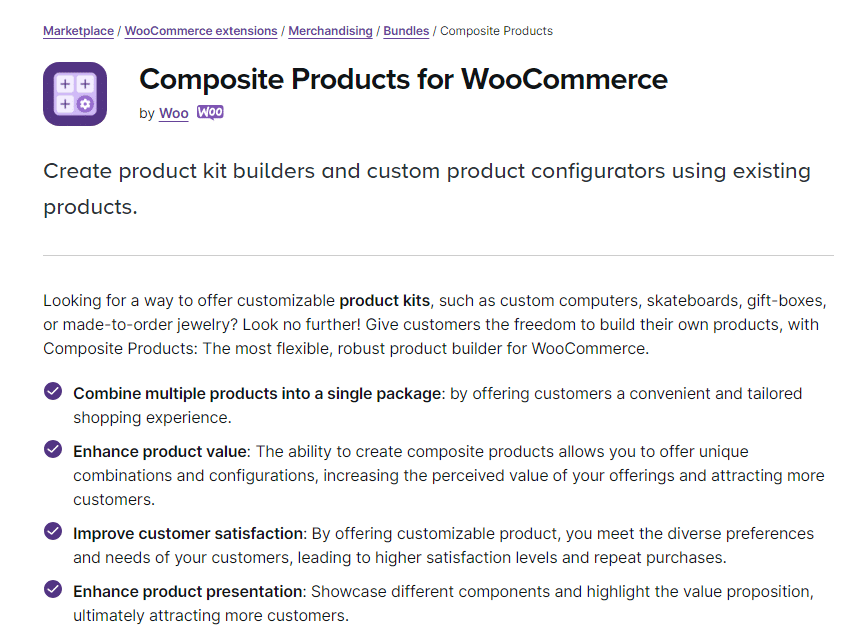
It is a premium plugin available from the official WooCommerce repository. Once you have purchased it, install and activate it on your website.
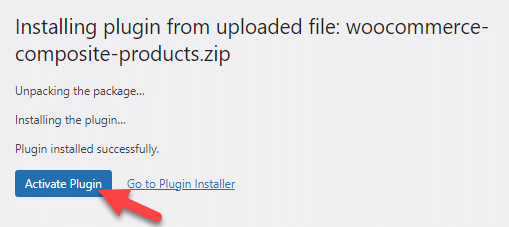
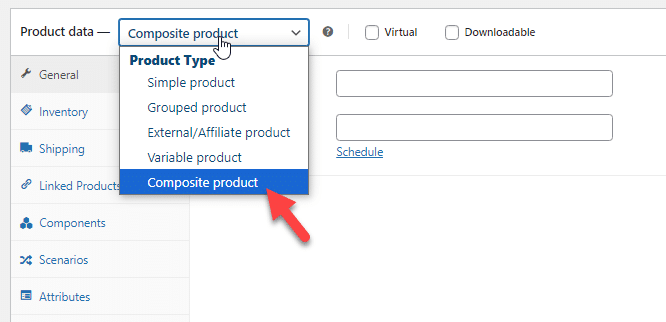
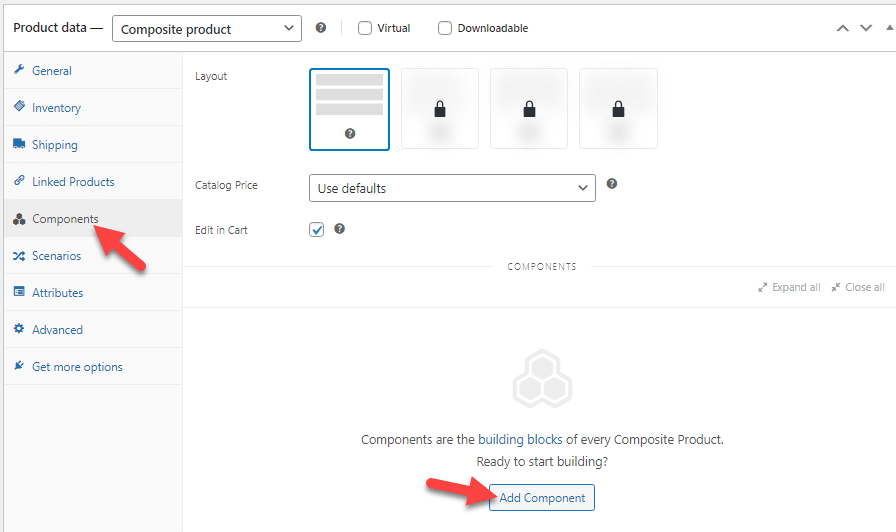
Next, go to the WooCommerce product builder and create a new product. When you choose the product type, choose composite from the dropdown.
Now, go to the Components section and add a new component there.
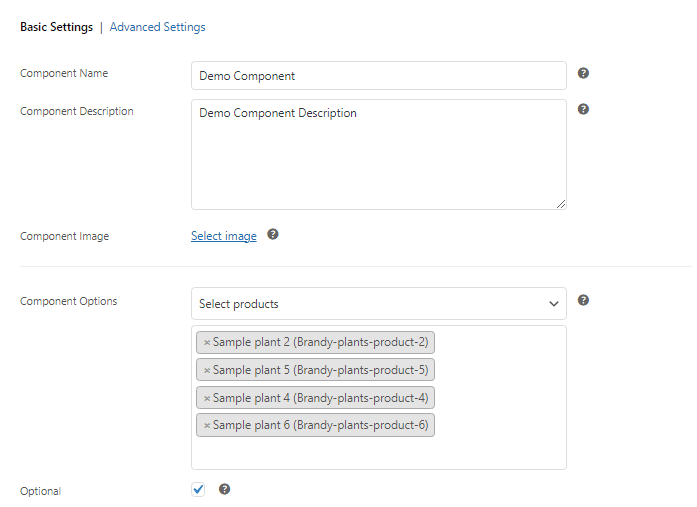
From there, you can configure the option. The configuration is simple: you can name it, add a description, and choose your desired products.
Once you are done with the configurations, update or publish the product. When you check the product page from the front end, you will see this:
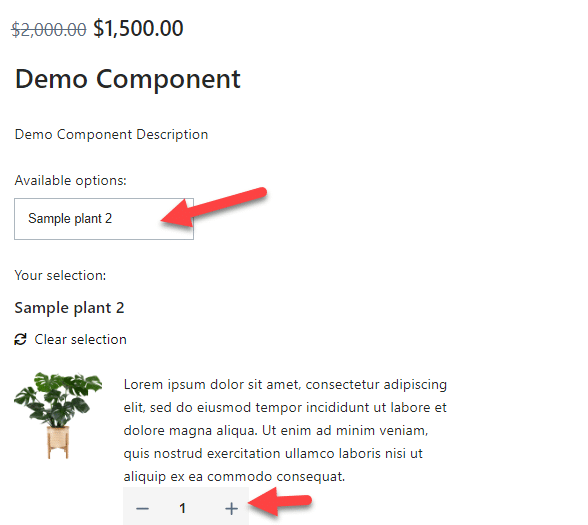
You can change the products and add them to the cart via the dropdown.
In the next section, we will show you how to create a product bundle with the help of a plugin.
4. With WPC Product Bundle Plugin
WPC Product Bundle is a free WordPress plugin you can download from the repository. So, install and activate it on your website.
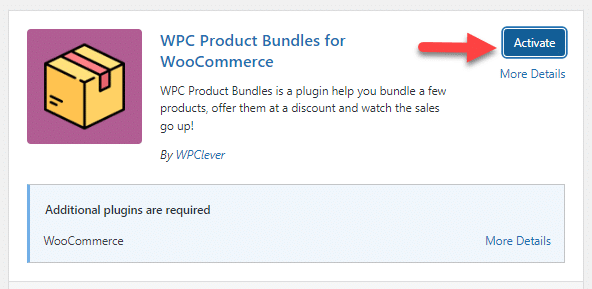
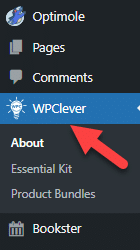
After the activation, you can see the plugin’s settings on the left-hand side.
Now, you must open the Product Bundles option to reveal the settings.
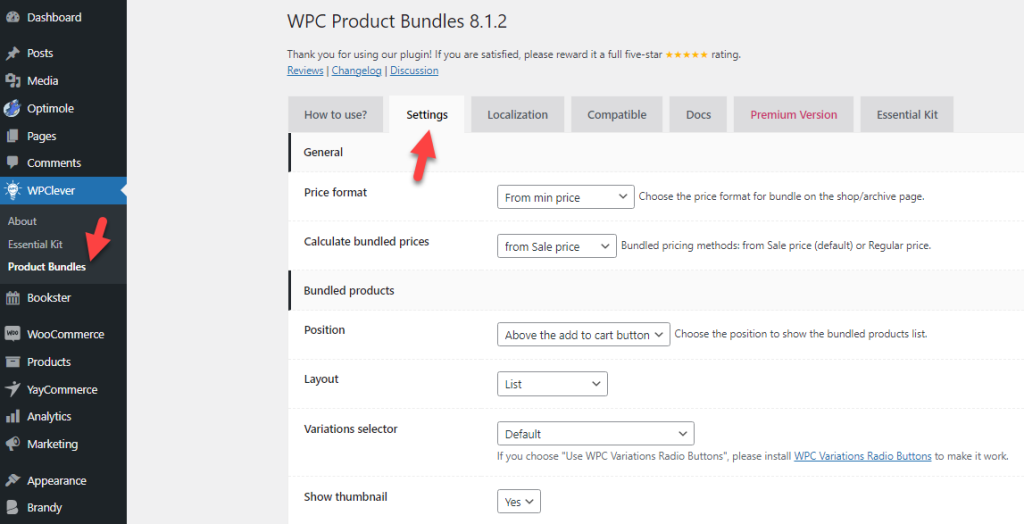
You will see several configuration options like:
- General
- Bundled products
- Bundles
- Cart and Checkout
- Search
And so on.
You can configure those options based on your preferences. After the configuration, save the settings.
Now, you need to add a new product.
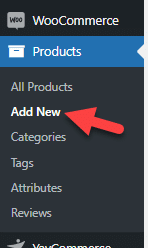
You can add the product name, description, and so on. For the product type, choose Smart Bundle.
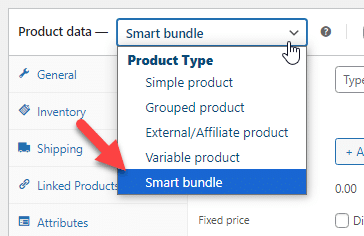
Now, you will see the data you need to enter.
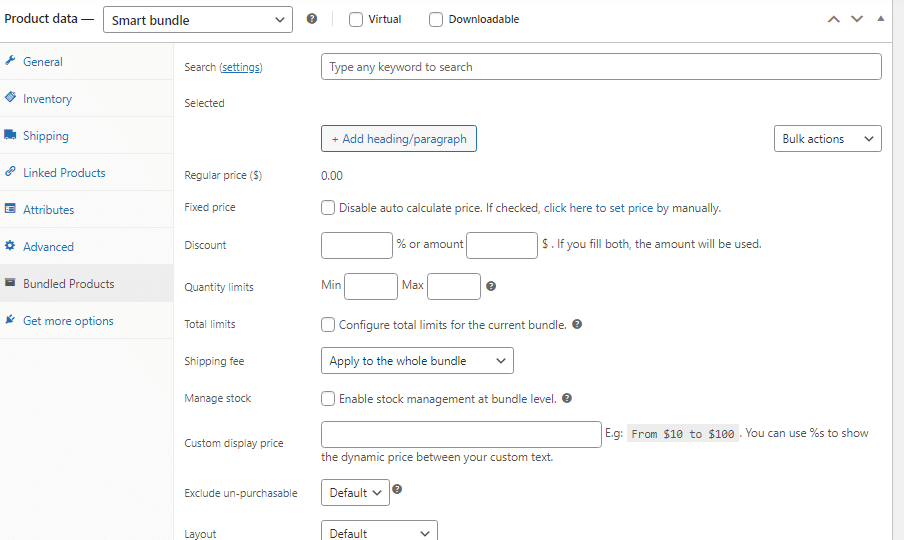
The first thing you must do is choose the products you need to bundle. You can use the search opinion to find ideal products.
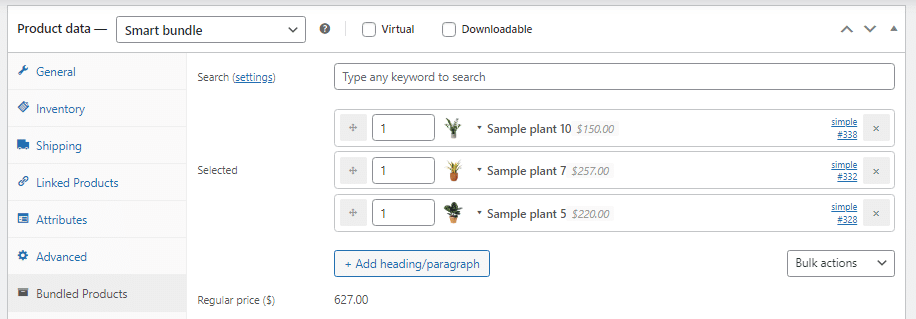
The bundle also shows the total price. You can keep that price or add a custom total amount. Next, you can also offer a discount on the bundle.

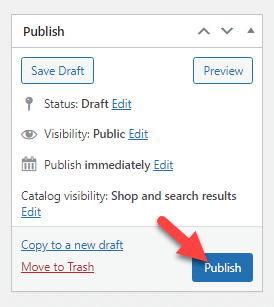
This way, you can configure the bundle. Once you are done with the customization, publish the product.
After that, you can check the bundle from the front end.

As you can see in this screenshot, the customer will see the products included in the bundle and the total price.
Customers can complete their purchases this way.
That’s it!
This article explains how to create product bundles for WooCommerce. The methods are simple and don’t require any technical knowledge to configure.
Conclusion
When customers buy a product, they might also look for similar items. For example, if someone buys a window cleaner, they might also be interested in a wiping cloth. Creating a bundle of those products would be helpful for the customer.
Similarly, you can also bundle any products you need. As you can see in this article, multiple methods are available to create product bundles in WooCommerce. We recommend using YayPricing or YayExtra when creating product bundles based on your requirements.
Both plugins offer excellent features that you can use to enhance them. So, what are you waiting for? Get started with the plugins today!
Which method are you going to try?
Check out our channel if you want more YouTube videos regarding WordPress customization.
