
It’s been twenty-eight years since eCommerce started its journey. Netscape was the first to launch the Netscape Navigator browser in 1994. In 1994, Ipswitch IMail Server also launched its software that was put on sale online and available for download. Amazon started selling books online in the same year which is considered the first and major start of eCommerce.
The growth of eCommerce is amazing. Online buyers have also increased exponentially with the eCommerce business. According to a statistic, 2.1 billion buyers are expected to take advantage of eCommerce services from 2014 to 2023.
This statistic made the entrepreneurs switch from offline to online stores. Businesses with great minds will go for the Multi-Vendor marketplace that can be created with WordPress marketplace plugins like Dokan, WCFM, WC Vendors, etc.
What Is A Multi-Vendor Marketplace?
As the name implies, the Multi-Vendor marketplace is an online shop where multiple sellers can sell their products. It is like a super shop where we get to buy all kinds of products under one roof. Multiple sellers get the opportunity to sell their products in the Multi-Vendor marketplace. Buyers do not need to surf in different stores as they find their desired products in one place.
There are different kinds of Multi-Vendor marketplaces. Amazon and Themeforest are products based, Multi-vendor marketplaces where different kinds of sellers are connected in one platform and sell their products directly to the customers. Upwork is a service-based Multi-vendor marketplace where sellers from multiple segments offer their services.
Why Multi-Vendor Platform?
A huge range of products is sold in a Multi-Vendor Marketplace. This kind of marketplace allows multiple sellers to display and sell their products. The operating cost is lower for store owners as the vendors are responsible for ensuring the inventory, shipping, product quality, etc.
The major benefit of a Multi-Vendor marketplace is drawing huge traffic.
Why DOKAN For Creating Muti-Vendor Marketplace?
DOKAN is a WordPress and WooCommerce-based eCommerce solution with 78 million downloads and 70000 active online marketplaces.
Here is why you should choose DOKAN for your Multi-Vendor Marketplace.
- Intuitive Dashboard for vendors.
- Powerful analytic tools.
- Order management.
- Sore customization features for vendors.
- Stock Management.
- Customized commission setting feature for each vendor.
- Seamless integration with payment gateways like PayPal, Stripe, and Moip Connect, Amazon Pay, Square, Authorize.net.
- Intuitive refund process feature.
- Review feature for vendors.
How To Create Multi-Vendor Marketplace With Dokan
As Dokan is based on WooCommerce and WordPress you need to have a WordPress environment and WooCommerce installed. Once you complete this, you need to install DOKAN. Let’s see the installation process of DOKAN.
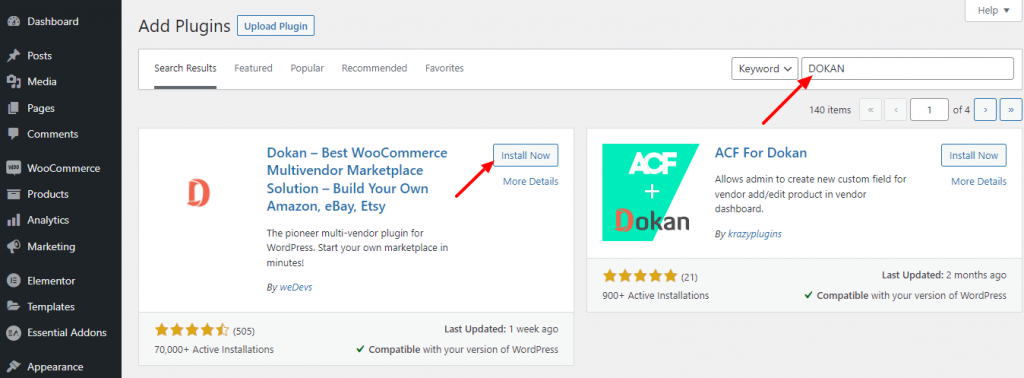
Login to your WordPress dashboard. Navigate down to Plugins > Add New. This will take you to a plugins marketplace. Type DOKAN in the search field on the top right corner. Click on Install and then activate the plugin by pressing the activate button.
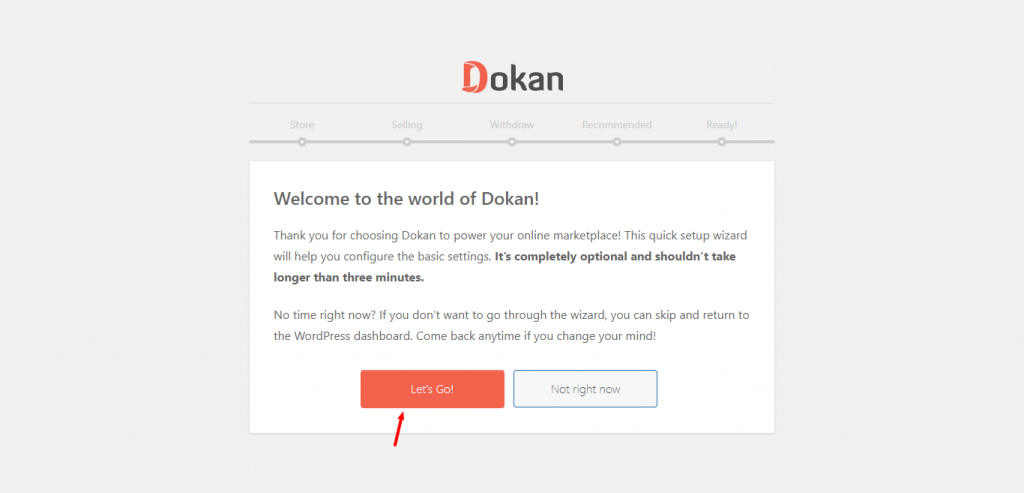
After the installation, you will be prompted by a quick setup wizard for the basic settings. Click on the Let’s Go button to start your store setup. Now you are in the first step of the store setup page. Add your vendor’s store details including the vendor’s store URL here in the field Vendor Store URL. Press the Continue button once you are done.
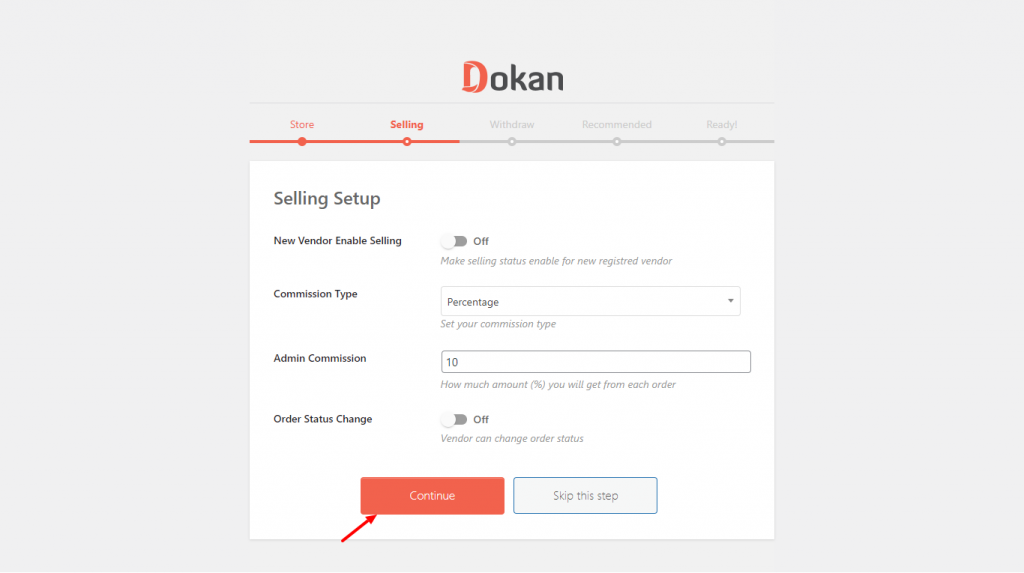
Next, you get the page to configure Selling options. Enable New Vendor Enable Setting for newly registered vendors. This feature will permit the vendors to start their activities. Then add the commission type Percentage/Flat from the drop-down. Set the commission you want to receive from each order.in Admin Commission field. You can set the option to Enable/Disable Order Status Change for your vendors. If enabled, the vendors will get access to modify the order status.
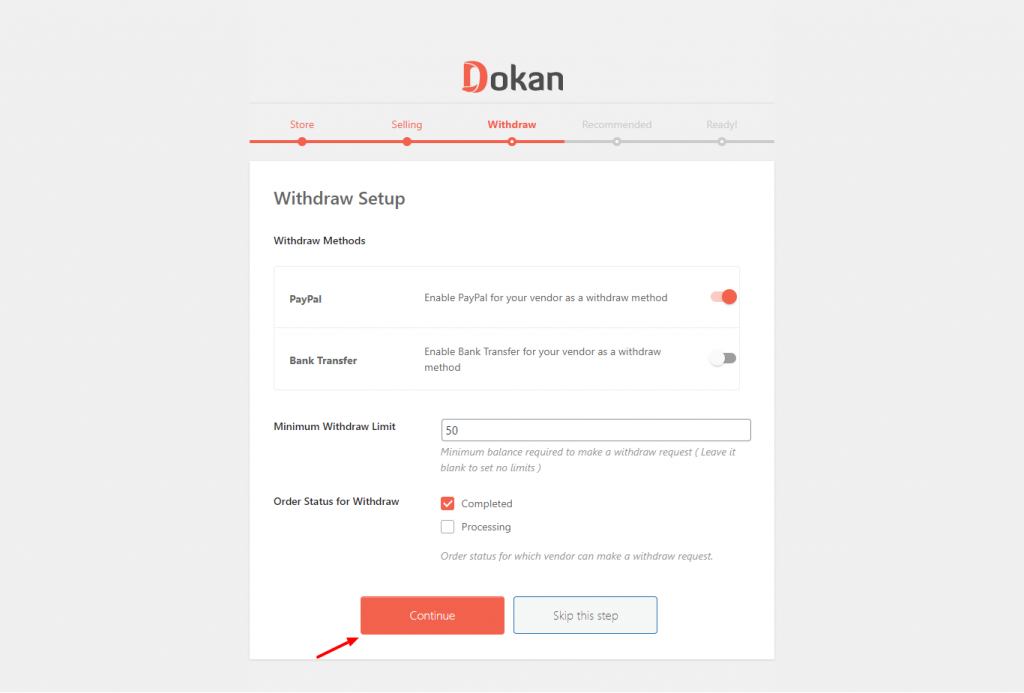
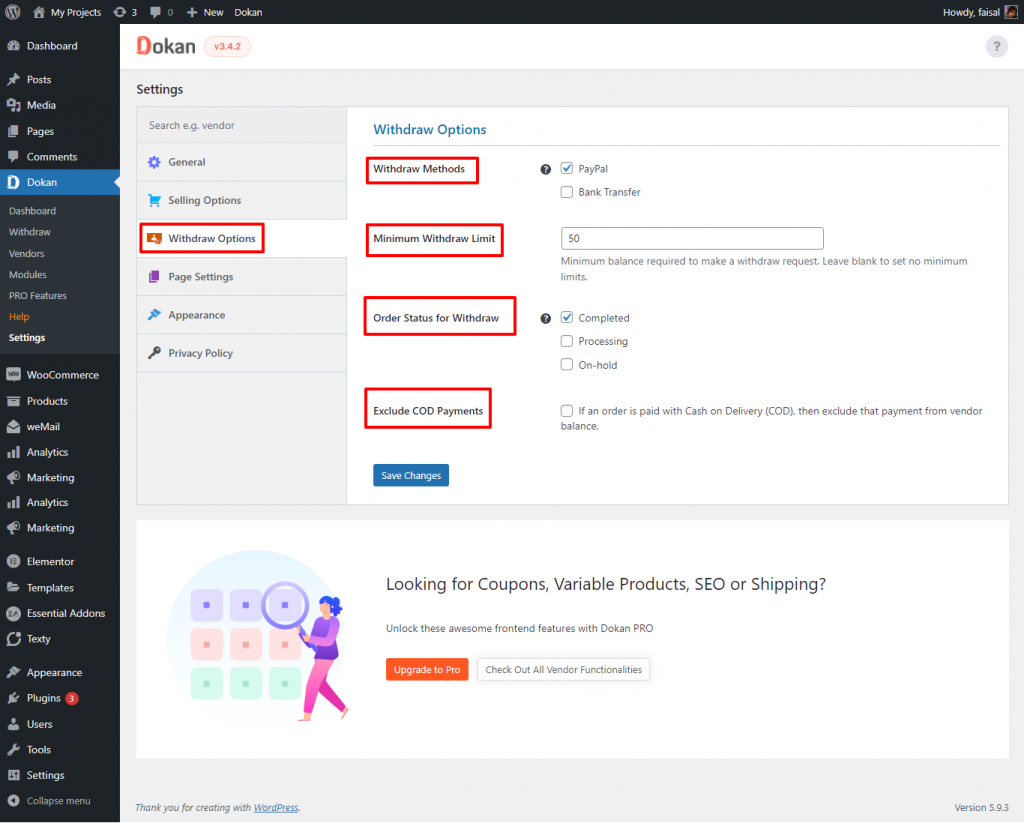
Next, you get to configure the Withdrawal options. Select your desired payment methods from PayPal/Bank transfer. You can set the minimum withdrawal limit for your vendors here. You can leave it blank if you do not want to set a limit. You can set a withdrawal status from Order Status for Withdraw as Completed, Processing or On-hold.
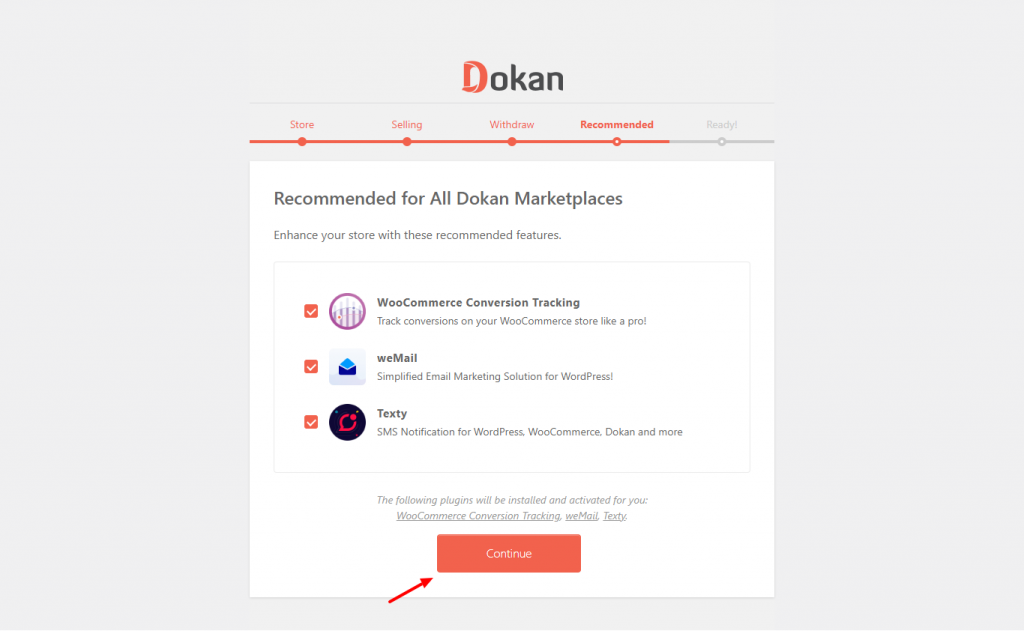
Nex you will be taken to a new page where you will be asked to install three plugins then click continue and finish your basic store settings.
Detailed Withdraw Settings screenshot
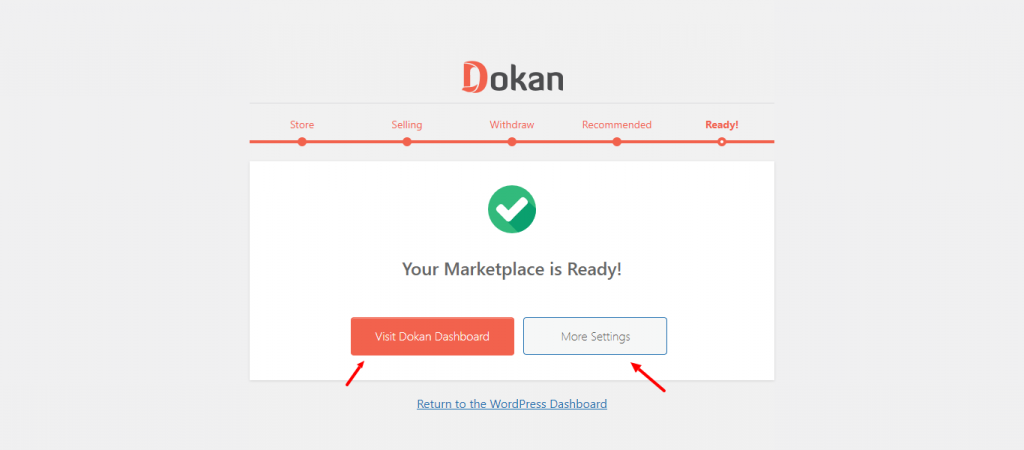
Here is the screenshot of the final step of setting up the basic store. You can go to the dashboard or choose more currency and payment settings that will allow you to add more options.
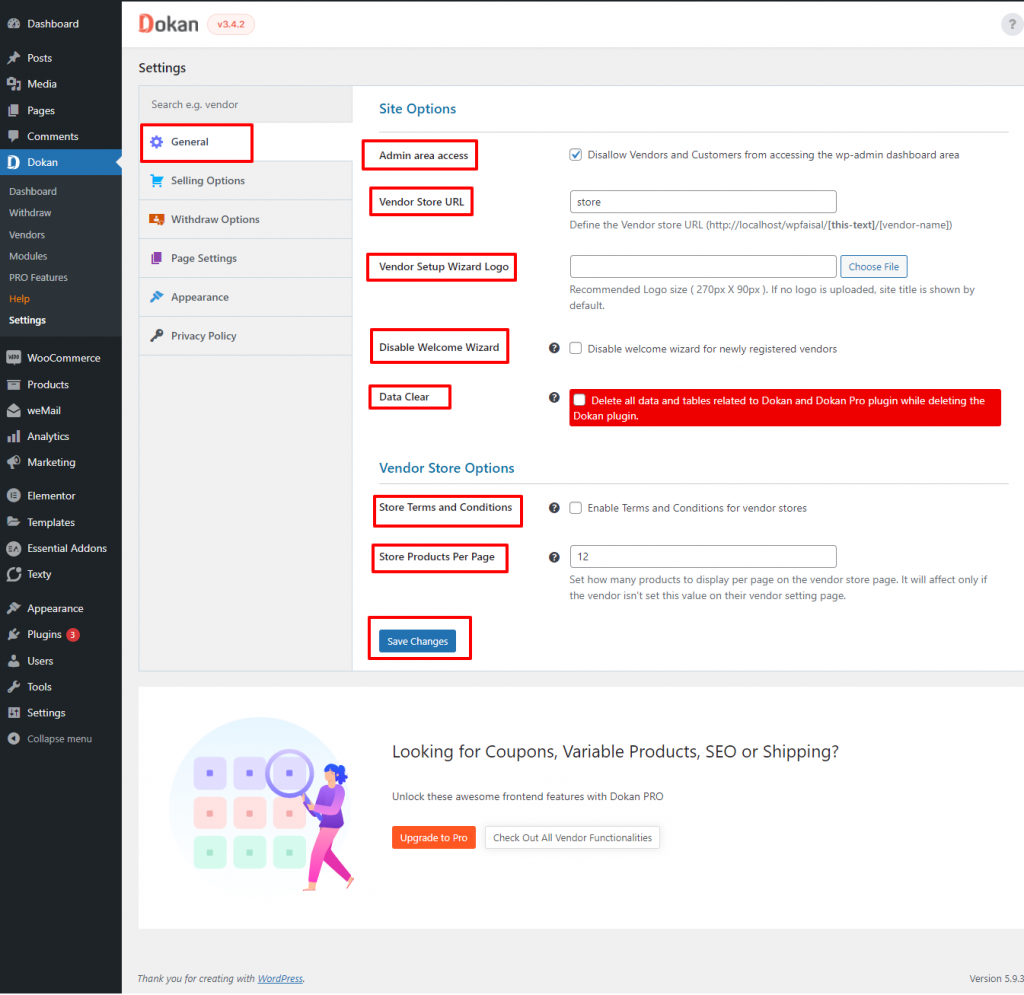
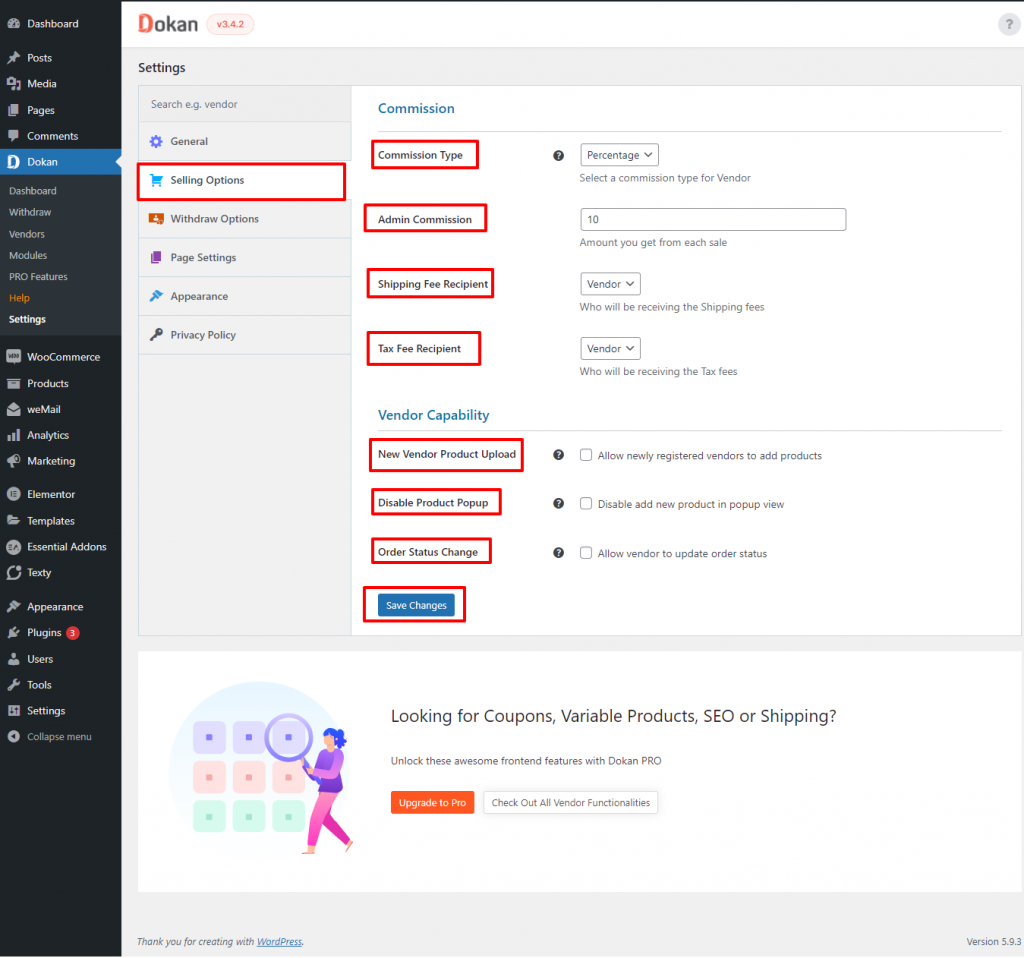
Let’s look at the detailed settings now. To do that click Settings > General. You can set Vendors Logo, Store Terms And Conditions, Store Product Per Page in General options. Once you are done, save your settings. From the Selling Options, you can add different types of commissions, Shipping Fee and Tax Fee. Vendor’s capabilities like New Vendor Product Upload, Disable Product Popup, etc can be set up here.
Detailed screenshot of Selling Options
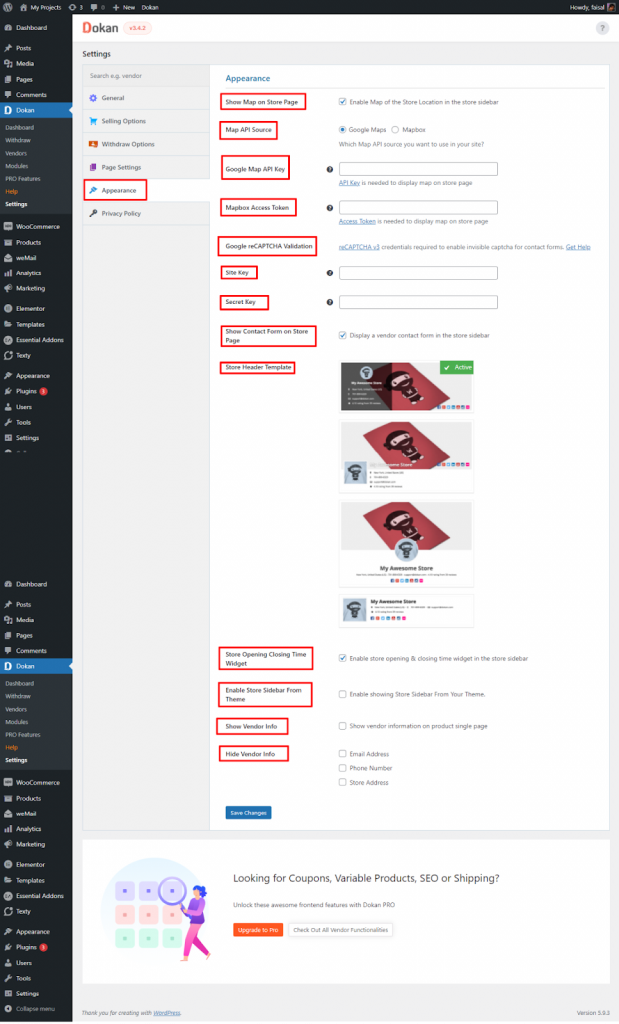
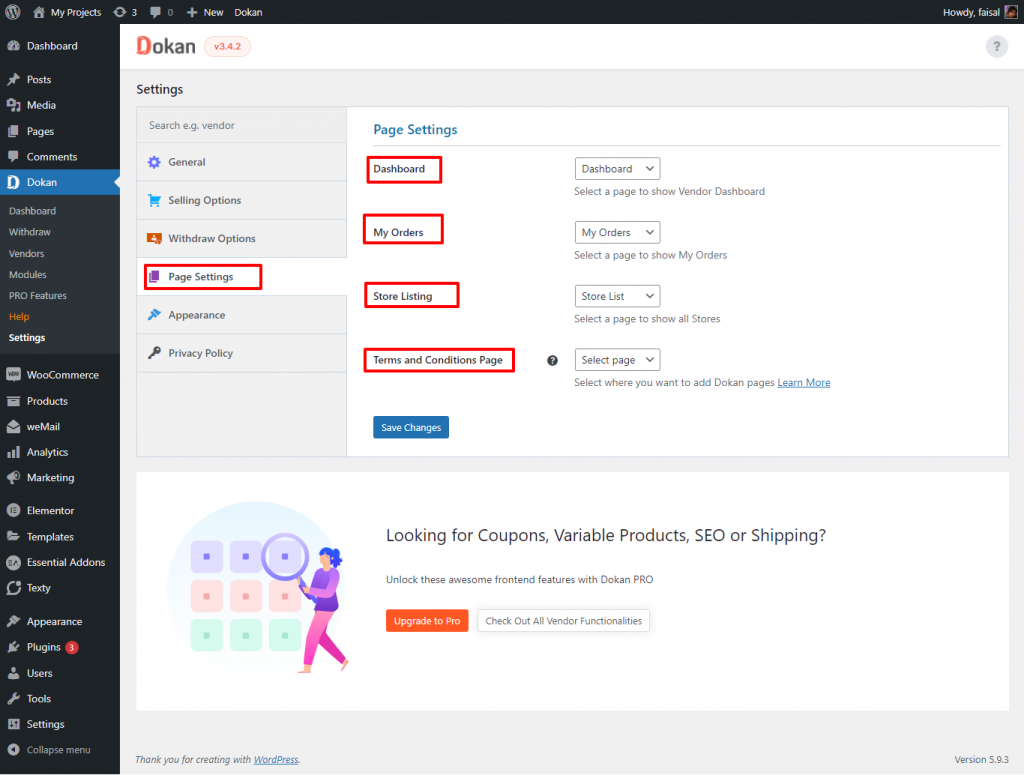
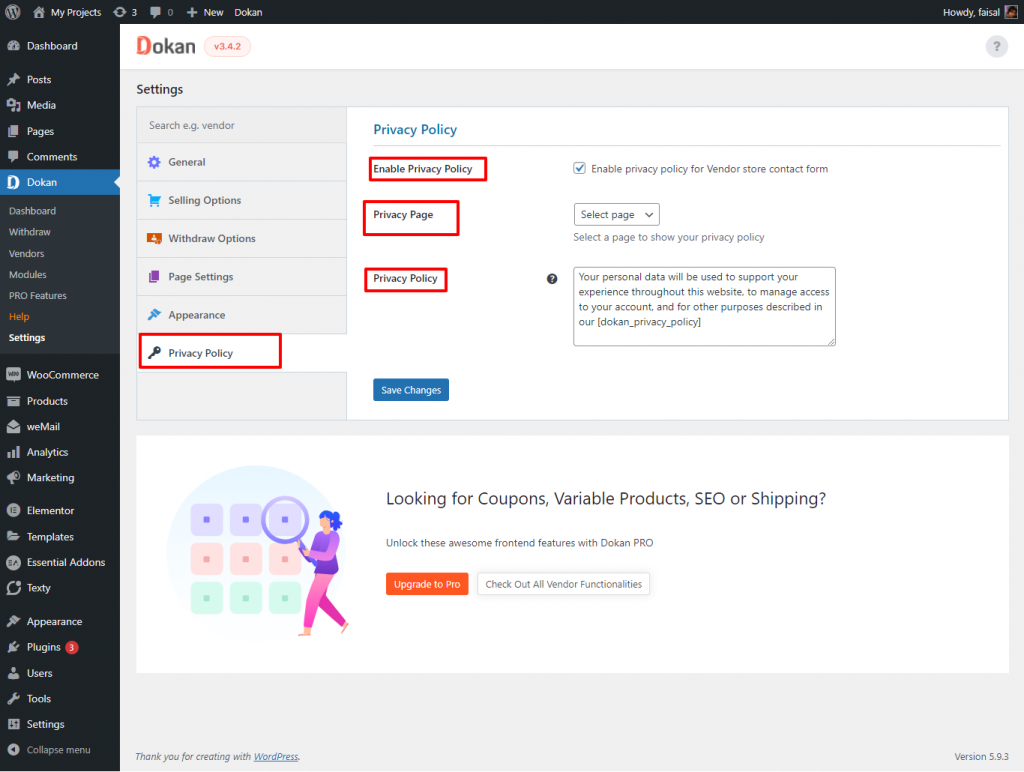
The Page Settings options allow you to set the Dashboard, Orders, Store Listing, Terms and Conditions page. From the Appearance options, you can enable the Google Map and Google reCAPTCHA Validation for your site security. You can also set the feature to Show Contact Form in the store sidebar. Options to set Store Header Template, Store Opening Closing Time Widget, etc. Set your store Privacy Policy from the Privacy Policy Options.
Detailed Screenshot of Privacy Policy
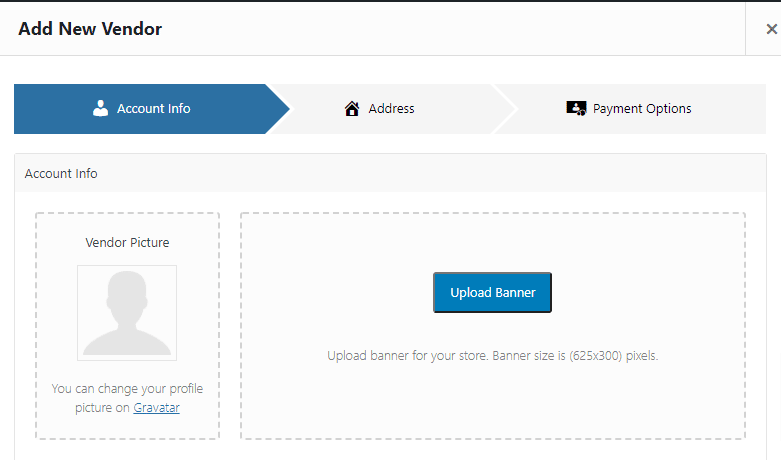
Time to add new vendors. You can do it either manually or import. Navigate down to Dokan > Vendors > Add New. Clicking on Add New will pop up a modal form window by which you can add all the necessary information about a vendor. You can also send an email once the account creation is completed. You will be able to see the vendor’s status once you are done with account creation.
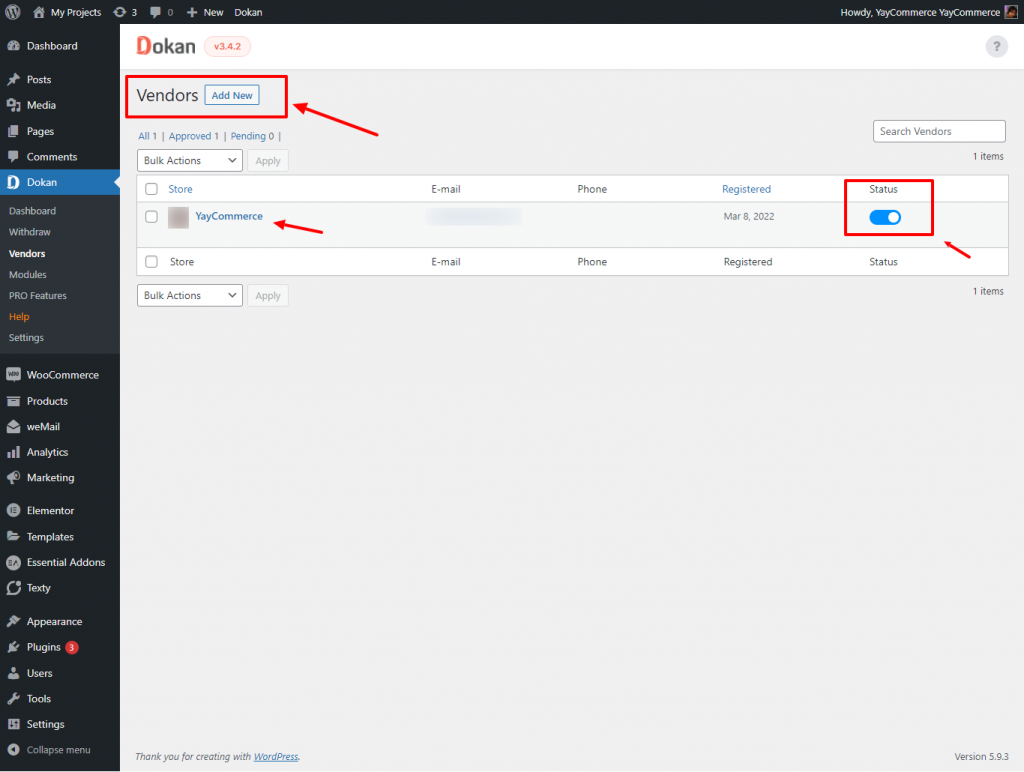
Detailed Vendors Form

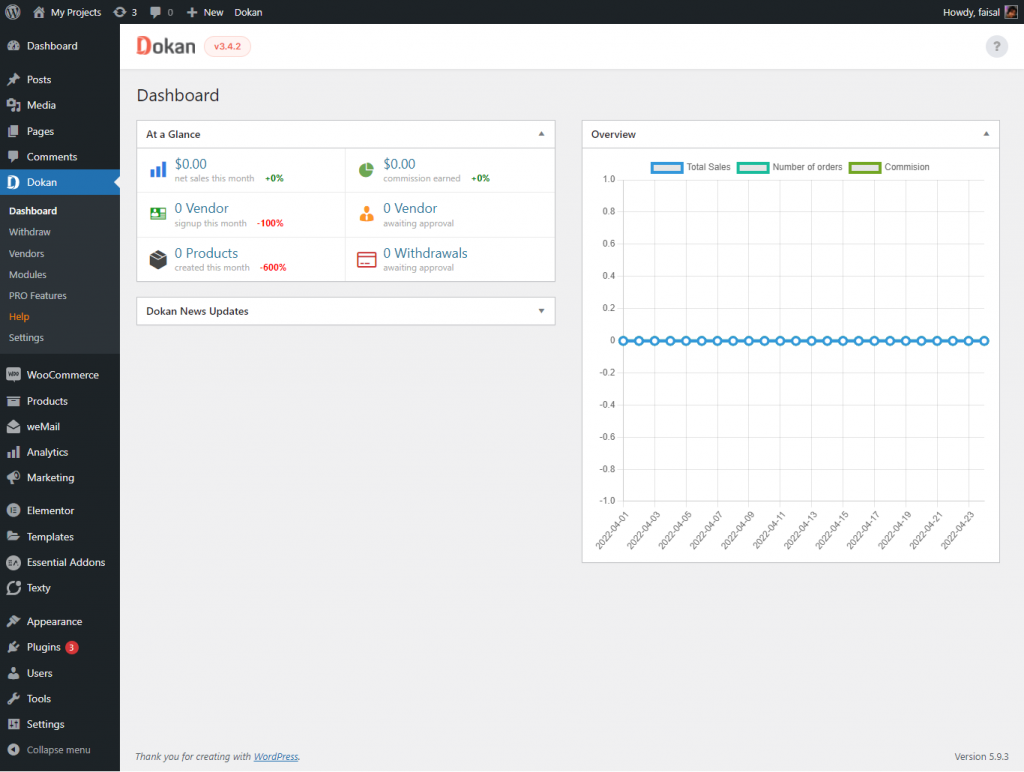
Once you are done you can navigate to DOKAN > Dashboard where you will be able to view the summary of your stores like the number of vendors, total sales, total orders, total products, total withdraw, etc.
Pricing
Dokan comes with 2 plans with 5 pricing tiers:
- Free- $0
- Starter – $149/year or $596 on lifetime
- Professional – $249/year or $933 on lifetime
- Business – $499/year or $1,746 on lifetime
- Enterprise – $999/year or $3,246 on lifetime
Keep in mind that, the highest plan Dokan provides exclusive features like vacation mode. To learn more about the multi-vendor performance and features, check out these comparison posts between Dokan and other WooCommerce multivendor plugins:
Conclusion
You need an eCommerce store like Amazon or eBay? This does not work this way. You need a proper business plan to start with the Multi-Vendor platform. DOKAN Multi-Vendor marketplace place plugin would be one of the best plugins to create a Multi-Vendor marketplace.
Alongside building a marketplace from scratch, you can also create dynamic email content for vendors and customers using this Email Customizer for Dokan. So be sure to check it out once you get the marketplace store up and running!