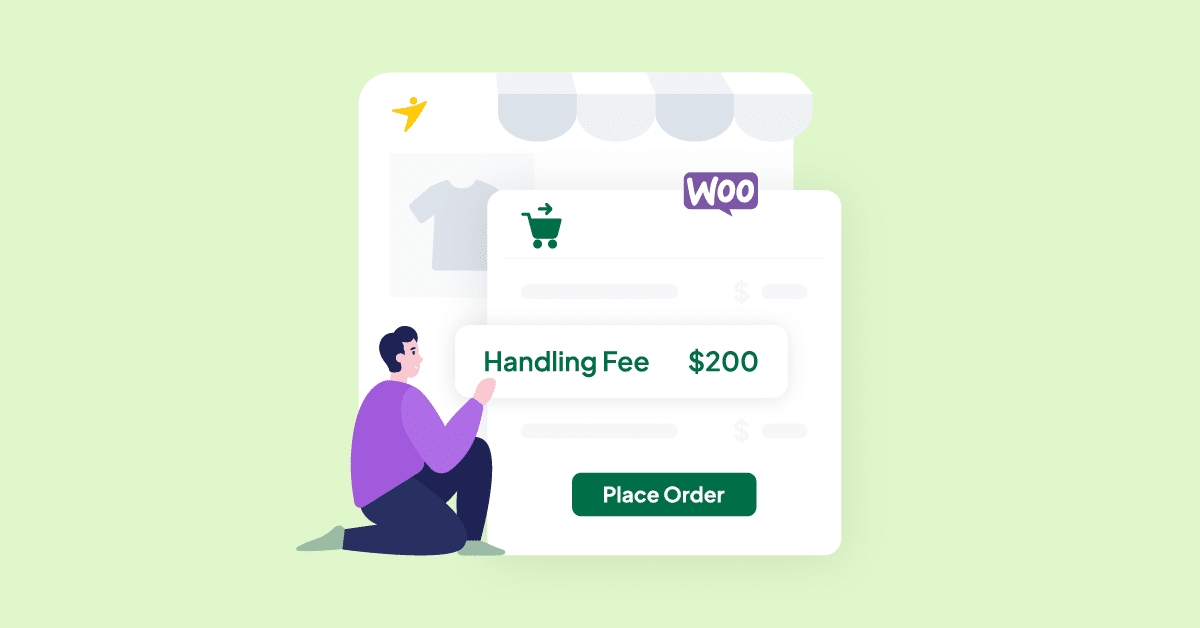
Do you want to add a handling fee to WooCommerce checkout? We have got you covered if you are looking for a step-by-step guide. This article will show you how to add a handling fee to WooCommerce checkout correctly.
WooCommerce can be used for creating online stores that sell physical and digital products. With a powerful plugin like WooCommerce, you can take things to the next level. Since the tool has many payment gateway integrations (in-house and third-party integrations), collecting payments would be simple.
But do you want to modify the pricing of your products and add custom fees?
If you are looking for a step-by-step guide, keep reading this article. Here, we will explain how you can add a handling fee to your WooCommerce store correctly without touching a single line of code.
But before going further, let’s see what a handling fee is.
What Is Handling Fee
A handling fee is an additional charge that can be added to the total order value. The cost is used for managing the order. It means the WooCommerce store owner will use the handling fee to pack, ship, and handle the order.
It can help you from spending your money on order fulfillment and keep the business running smoothly.
When you run an online store with home appliances (products that are not easy to manage), adding a handling fee to every order would be a great idea. On the other hand, you can also add a handling fee to specific orders.
Why Adding a Handling Fee Is a Good Idea
There are several advantages to adding a handling fee in WooCommerce.
- Improved profits: You will add this fee to the total order value. This way, you can improve your profit margins.
- Reduce costs: Since you are not spending your own money, you can reduce the costs of running the business.
- Better transparency: You can offer transparent pricing by keeping the handling fee away from the main product price. This will help you provide competitive product prices and get more sales.
Now you know what a handling fee is and why you should use it. Next, let’s see how to add a handling fee to WooCommerce checkout.
How to Add a Handling Fee to WooCommerce Checkout
This section will show you how to add a handling fee to WooCommerce checkout.
For this tutorial, we will be using the YayPricing Pro plugin. With YayPricing, you can easily modify the pricing of individual products based on certain conditions.
If you need to test the plugin’s features, look at YayPricing lite.
1. Installation and Activation
The first thing you need to do is, get the YayPricing plugin. Once you have completed the purchase, download the plugin files.
Next, go to the WordPress admin area and install the plugin.
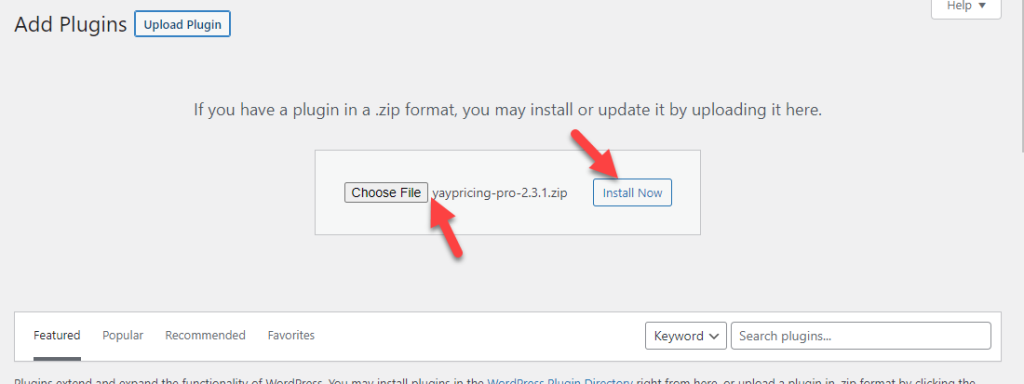
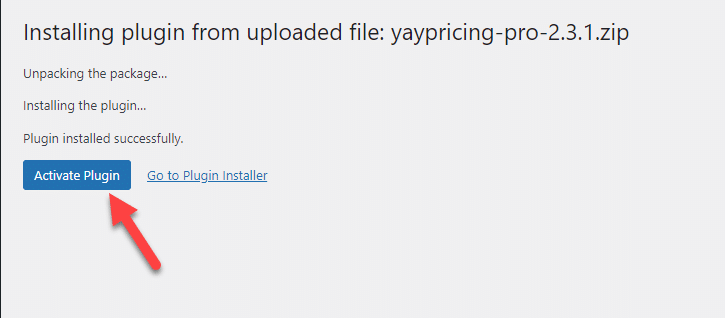
Once you have completed the installation, activate it.
After activation, you need to verify the license key. Verifying the license key will help you get automatic updates and priority support for the plugin.
In your YayCommerce account, you can see every active license key.
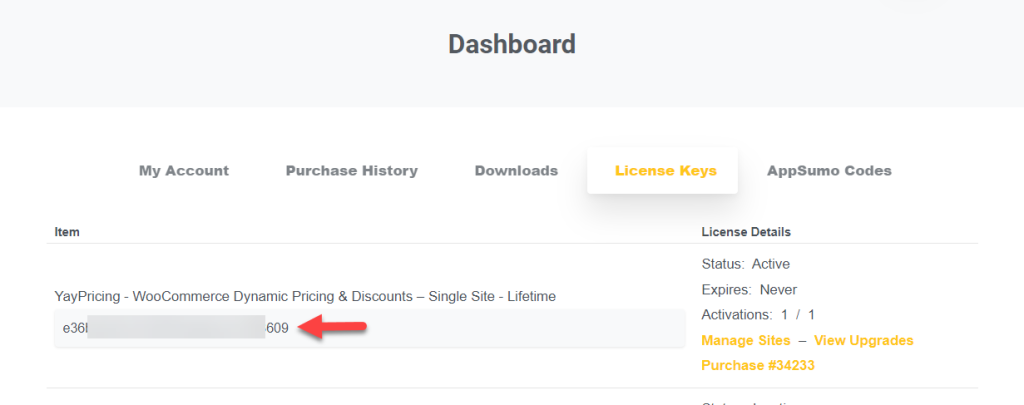
Copy the key from there, open the YayCommerce licensing option in the WordPress dashboard, and complete the authentication.
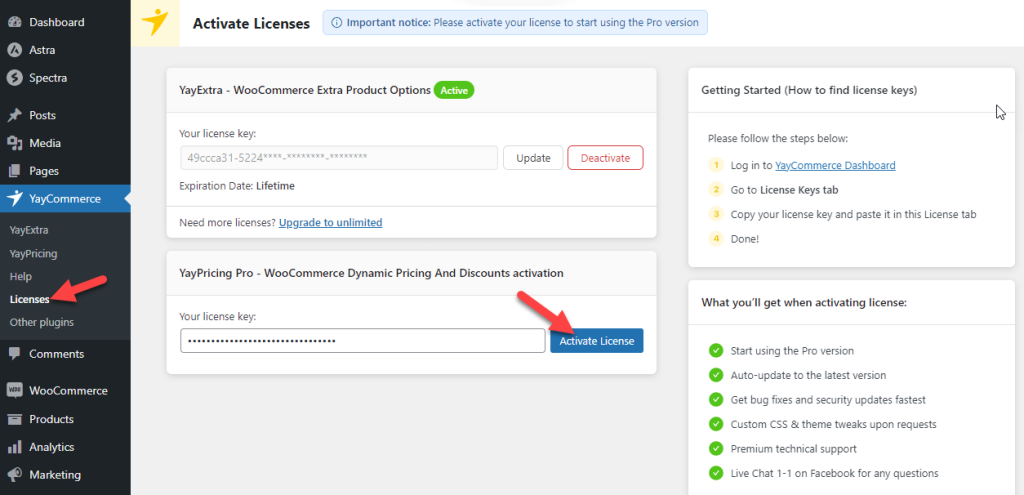
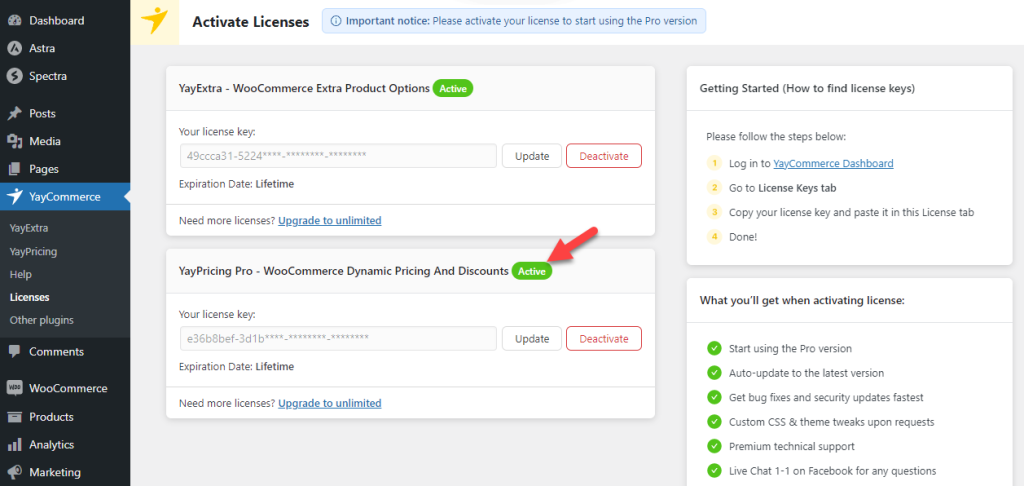
If the process is successful, you will see the active sign beside the plugin name.
Next, let’s configure the handling fees properly.
2. Plugin Configuration
Under YayCommerce, you can see the YayPricing settings. You need to open it.
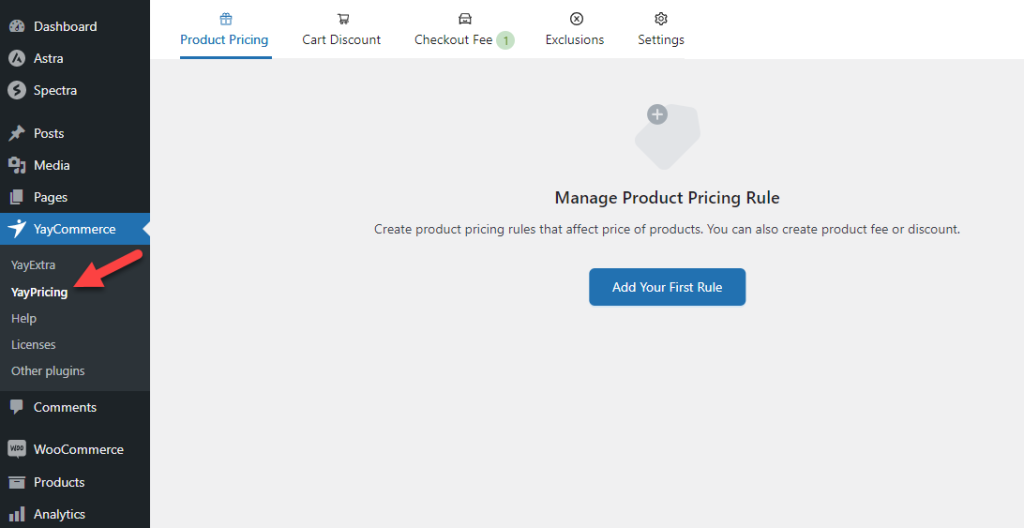
There are five options.
- Product pricing: If you plan to add custom BOGO deals or discounts, you should use this option.
- Cart discount: You can provide discounts using this option based on the customer’s cart.
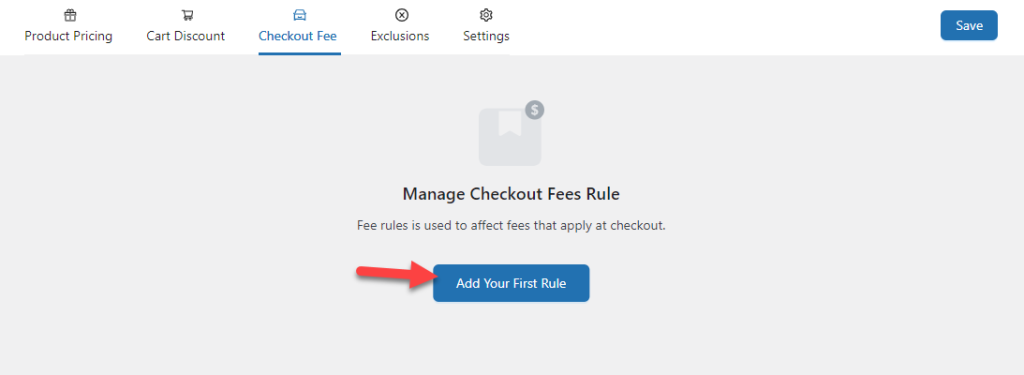
- Checkout fees: If you need to modify the pricing or add custom fees to the checkout page, add custom rules here.
- Exclusions: If you need to exclude any specific product from these additional rules you have added through YayPricing, this is the right section. Apart from products, you can also exclude product pricing rules.
- Settings: Major YayPricing settings. You can tweak the settings to meet your specific needs.
Since we add a custom handling fee, we will add a new rule through the checkout fees option. So, open the checkout fees option and click on add a new rule.
There, you can see four campaigns.
- Your campaign
- Free shipping
- Reduce shipping fee
- Add custom fee
From the list, select the fourth option.

2.1. Custom Fee Configuration
You will be redirected to the dedicated settings page on the next page load.
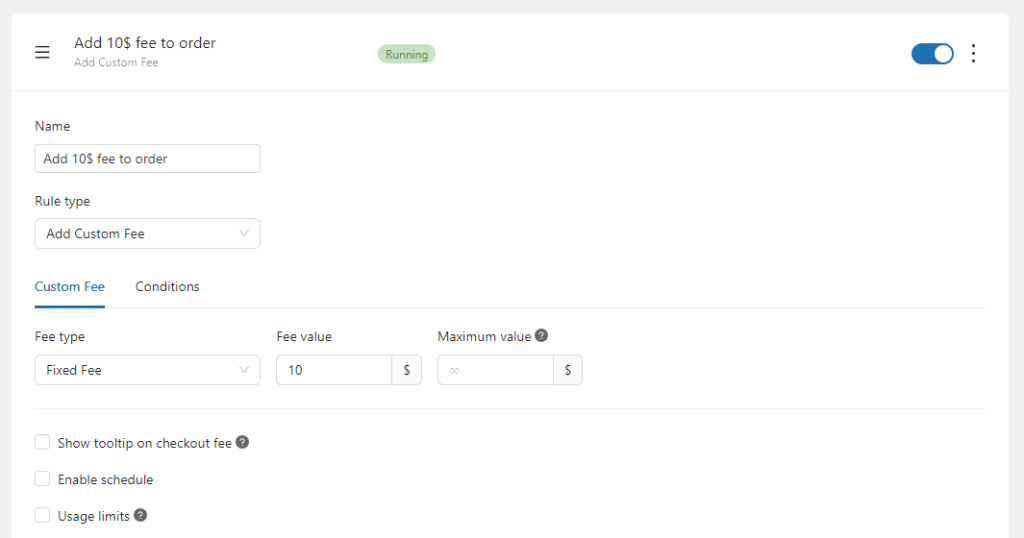
The first thing you need to modify is the campaign name. The name is just for identification. So it will be only visible on the backend of the website.
You do not need to modify the rule type – set it as add custom fee.
Now, pay closer attention to the custom fee section.

You can charge a fixed fee or a custom % of the total amount for orders. In this case, we will charge the customers a flat $200 fee for every fragile shipment.
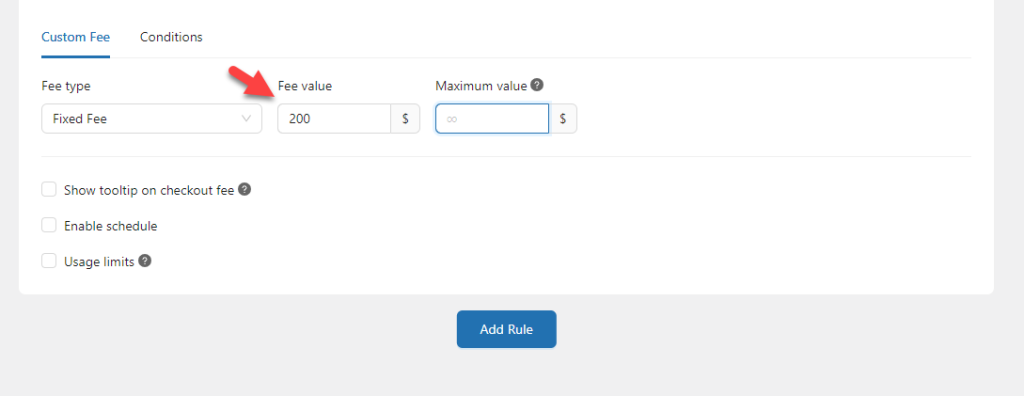
If you plan to charge a specific % of the order value, you must also tweak the maximum value field. The maximum value amount will act as a cap on the handling fee. So the amount won’t go above the pre-defined fees.
Next, enable the tooltip on the checkout fee. This way, your customers can understand why the extra cost was added to the checkout. If you want, schedule the rule if you plan this for a specific date range.
You can also set up usage limits.
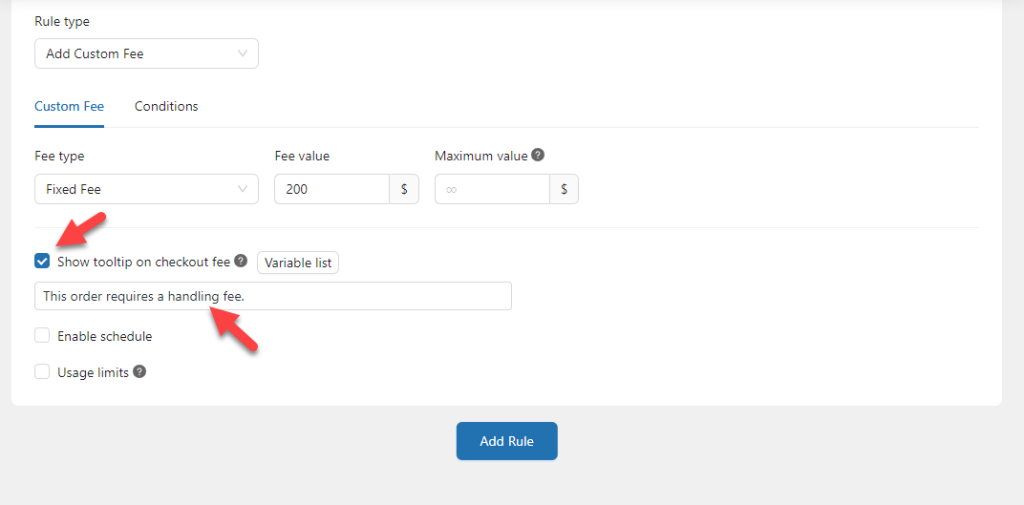
That part is done.
2.2. Conditions
Next, let’s move to the conditions and mention when the rule needs to be applied.
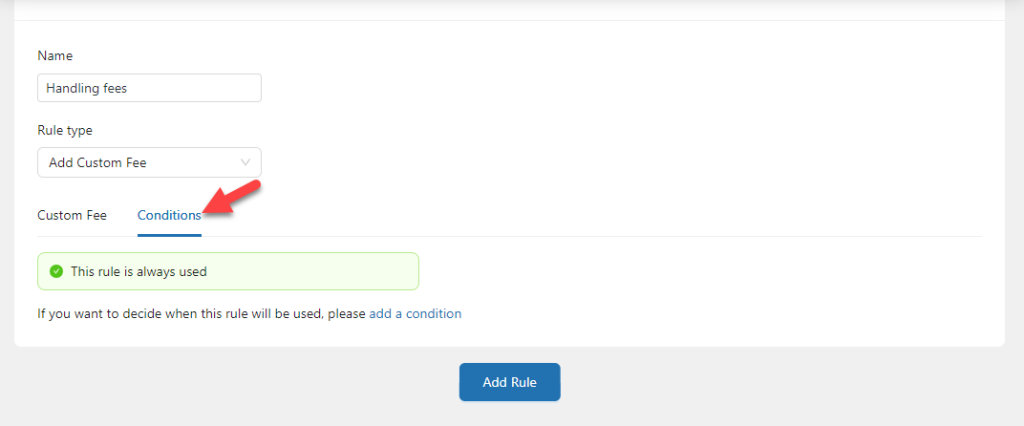
By default, there won’t be any conditions. Let’s fix that by clicking on the add a condition button.
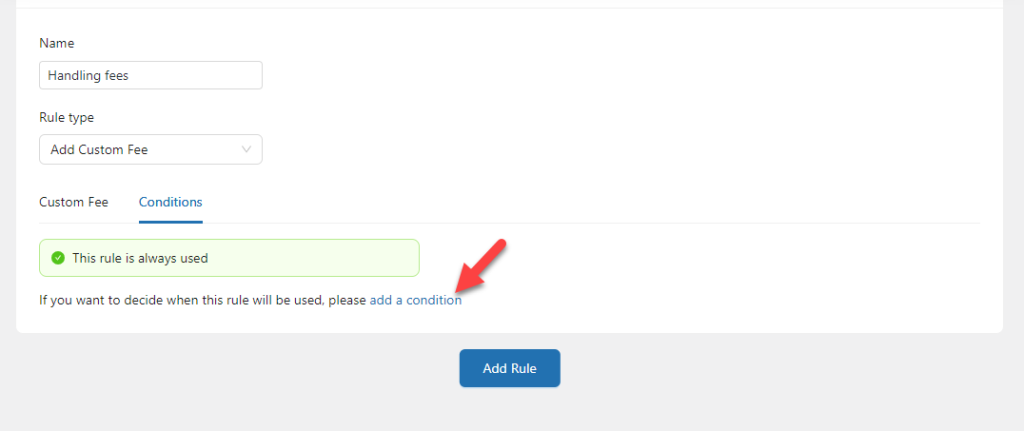
Since we only need to apply the rule to some products, adding a specific condition is mandatory. We will only add this rule to the products that cost more than $2000.
Hence, choose the cart subtotal price as a condition and tweak the values accordingly.
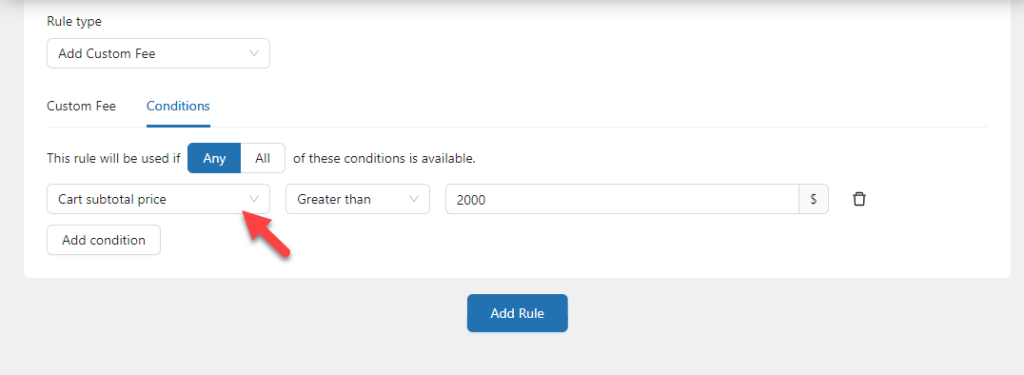
You can always add more conditions to make the rule even more powerful. But for now, in this case, the current configurations are acceptable.
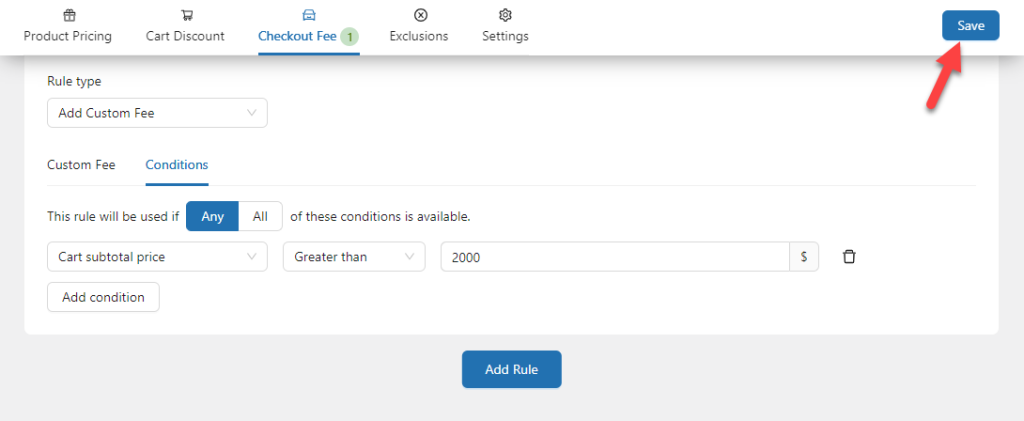
Once you are done with the configurations, save the settings.
Let’s test the configuration in the front end now.
3. Testing WooCommerce Checkout Fees with YayPricing
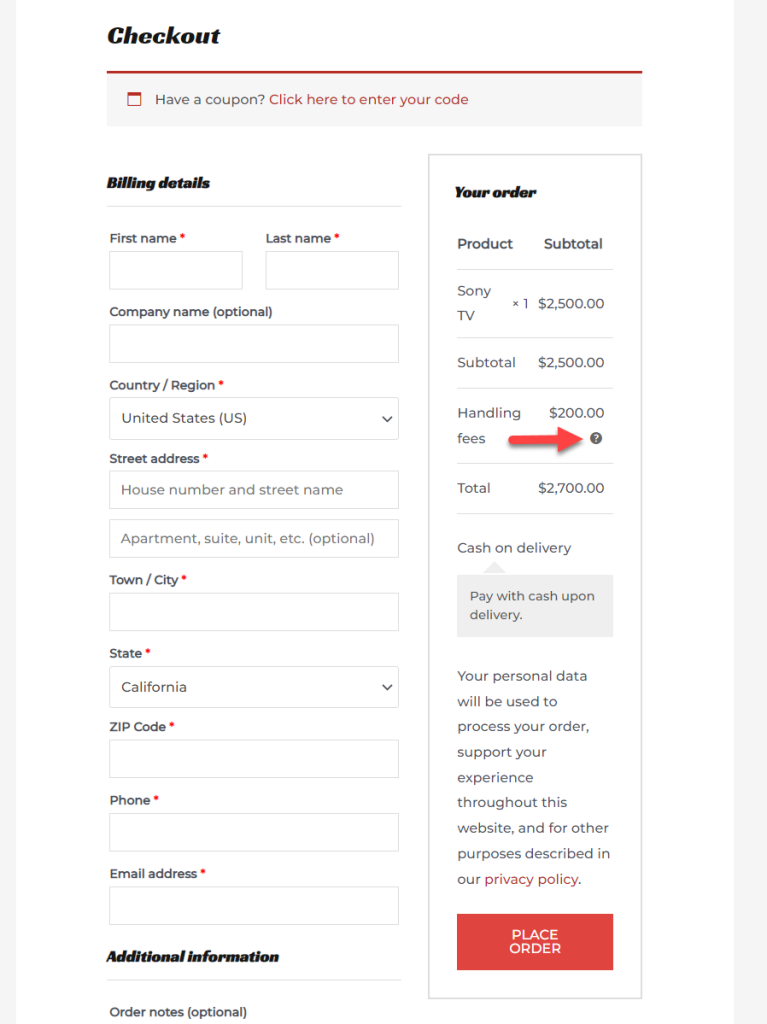
Here, we have a sample product that costs $2500.

Once you have added it to the cart, YayPricing will add the custom handling fee we have mentioned in the settings and display them there.
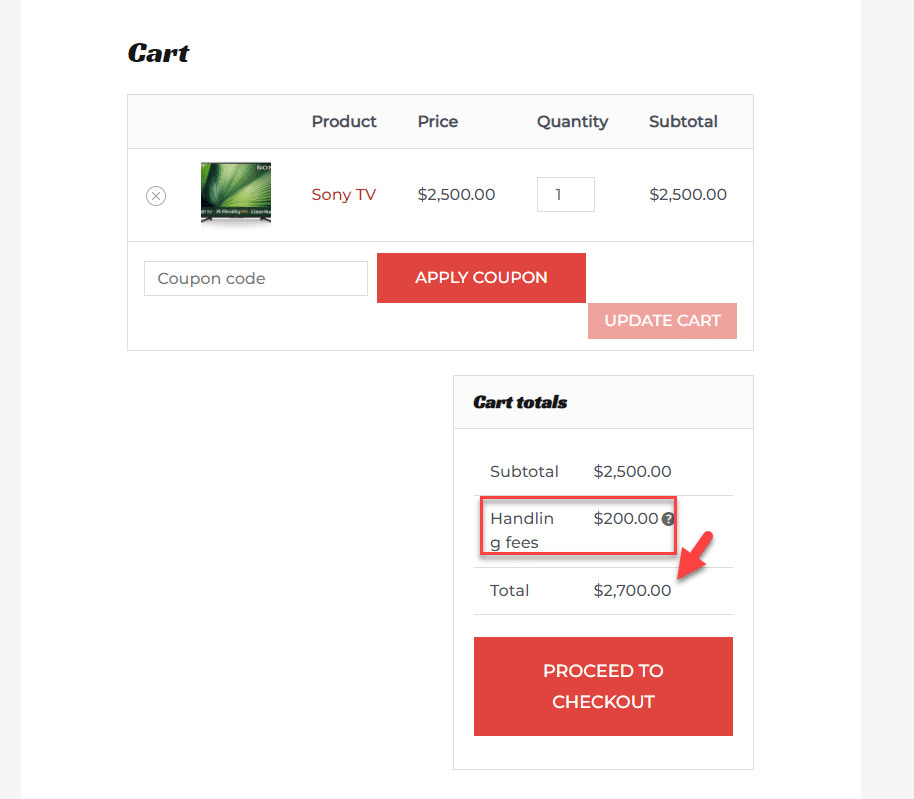
The same can be seen on the checkout page.
That’s it!
This is how you can add a handling fee to WooCommerce checkout. As you can see in this tutorial, adding custom fees to WooCommerce is a cakewalk with a powerful plugin like YayPricing.
Conclusion
When running an online store, you must adjust specific fees to keep your business running smoothly. By default, the WooCommerce plugin doesn’t have a custom fee structure or any fee-adding.
To help you with the process, we have got you YayPricing. Adding custom fees and conditions is pretty simple with YayPricing. With it, you can take your WooCommerce store to the next level.
We hope you have found this article interesting and learned how to add a handling fee to WooCommerce checkout. If you did, please share this post with your friends and fellow bloggers on social media.
If you are looking for more related articles, feel free to go through our blog archive.