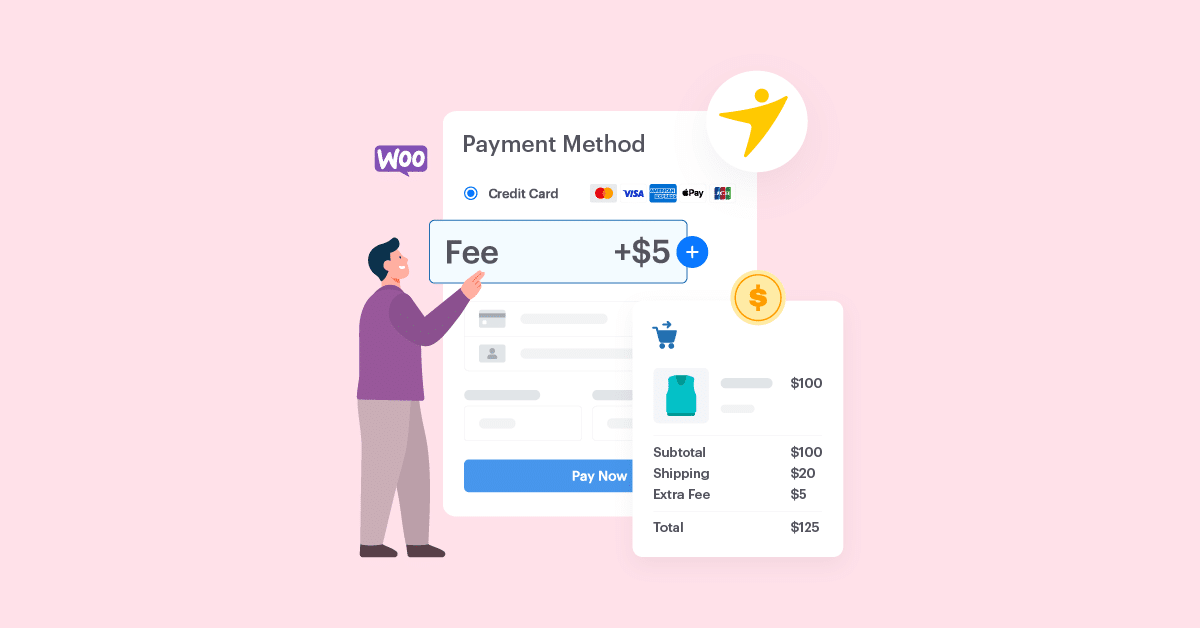
Do you want to add a fee to the payment method in WooCommerce? If you are looking for a step-by-step guide, keep reading this article!
While handling a WooCommerce store, you should manage your shipping efficiently. Customers would prefer live tracking of the shipment and check when they can expect the package. With any reputable shipping company, this is possible.
But to manage the expenses, sometimes you need to add extra fees to payment methods in WooCommerce.
Since WooCommerce doesn’t have this feature, you must use a dedicated snippet or a plugin. If you don’t know how it’s done but would love to add this feature to your online store, keep reading this article.
Here, we will show you multiple methods to add a fee to a payment method in WooCommerce.
Before going further, let’s see why adding an extra fee to the payment method in WooCommerce is mandatory.
Why You Should Add Fee to Payment Method in WooCommerce
When running an online store, you must include multiple payment methods. People prefer using their favorite payment method for online purchases. Some will use a credit card for online transactions, while others will use a payment method such as PayPal or Payoneer.
On the other hand, people will also use cash on delivery payment methods for online purchases.
When you add these payment methods, you must ensure your business will be able to handle it. Some payment gateways will charge the business owner extra for accepting payments. If you haven’t optimized the pricing accordingly, the business will struggle.
Adding extra fees to specific or all payment methods ensures you’re not losing money. That way, the customer would pay extra for the conversion or transaction fee.
Similarly, you won’t get any advance payments if you enable cash on delivery. You will be responsible for the transportation since you must ship the product to a physical location.
This is a considerable risk. If the customer is serious about their purchase, they will pay extra for the transportation fee. Hence, you do not need to invest your money into shipping and can have peace of mind.
Now you know why adding an extra fee to the payment method in WooCommerce is ideal. Next, let’s go to the article’s core, where we will list the main methods to add extra fees to the payment methods.
How to Add Fee to Payment Method in WooCommerce
In this article, we will show you how to
- Add extra fee to all payment gateways
- Add additional fee to specific payment gateways
- Add custom checkout fee with YayPricing
- Add BACS fee with a plugin
- Add currency conversion fee on a payment gateway
- Add cash on delivery fee using YayPricing
- Add Product Fee to Specific Payment Method with YayPricing
Below, we will explain how to do it properly without any errors. Without any further ado, let’s get into the tutorial.
1. Add Fee to All Payment Gateways in WooCommerce
If you do not need to use a dedicated plugin to add extra fees to payment methods in WooCommerce, use this snippet. You can add the code to the child theme’s functions.php file or a site-specific plugin like Code Snippets.
The code you need to use is:
add_action( 'woocommerce_cart_calculate_fees', 'yaycommerce_add_checkout_fee' );

function yaycommerce_add_checkout_fee() {
// Edit "Fee" and "5.99" below to control the Label and Amount
WC()->cart->add_fee( 'Extra Fee', 5.99 );
}
We will add the code to the Code Snippets plugin in this case.
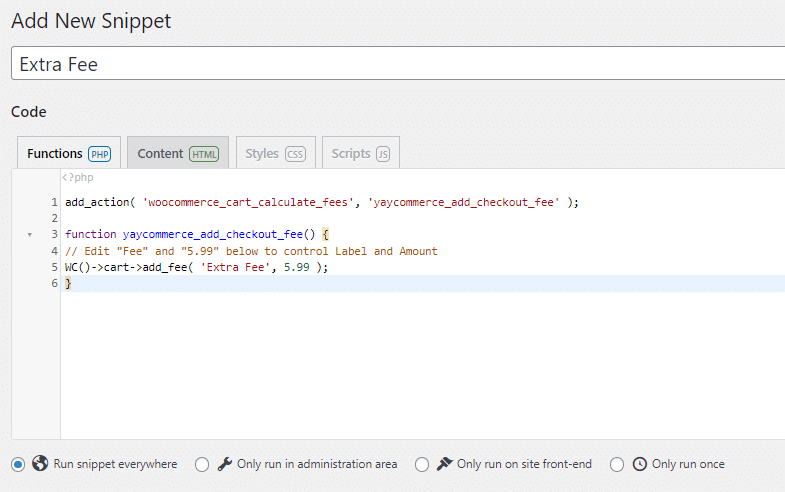
Publish the snippet after modifying the label and fee value. Now, check your checkout page from the front end after adding a product to your cart.
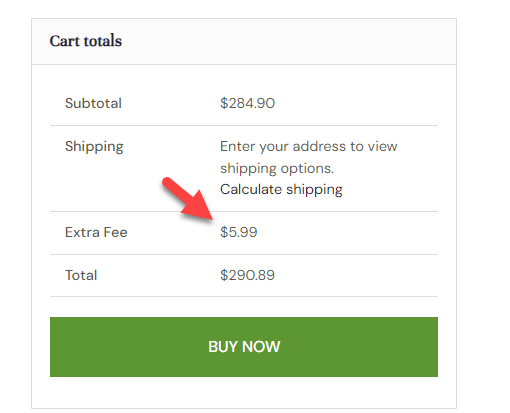
As you can see in the screenshot, the extra fee is added to the total amount.
In the next section, we will show you how to add additional fees to specific payment methods in WooCommerce.
2. Add Fee to Specific Payment Gateways in WooCommerce
In the method we mentioned above, the fee was applied globally. If you need to apply a fee to specific payment methods, use this code:
add_action( 'woocommerce_cart_calculate_fees', 'yaycommerce_add_checkout_fee_for_gateway' );

function yaycommerce_add_checkout_fee_for_gateway() {
   $chosen_gateway = WC()->session->get( 'chosen_payment_method' );
   if ( $chosen_gateway == 'paypal' ) {
      WC()->cart->add_fee( 'PayPal Fee', 5 );
   }
}

add_action( 'woocommerce_after_checkout_form', 'yaycommerce_refresh_checkout_on_payment_methods_change' );

function yaycommerce_refresh_checkout_on_payment_methods_change(){
    wc_enqueue_js( "
      $( 'form.checkout' ).on( 'change', 'input[name^=\'payment_method\']', function() {
         $('body').trigger('update_checkout');
        });
   ");
}
The code we mentioned above will work with the PayPal payment gateway. You can add it to the Code Snippets plugin.
Save the snippet and visit your checkout page. When you choose PayPal as the payment gateway, an additional $5 will be added to the order amount.
That’s it!
Next, let’s see how to add custom checkout fees using the YayPricing plugin.
3. Add Custom Checkout Fee with YayPricing
YayPricing comes with a lot of features. It is one of the best dynamic plugins to add/remove fees to your WooCommerce store. This section will show how to add custom checkout fees with the YayPricing plugin.
If you check the dashboard, you will see three main sections.
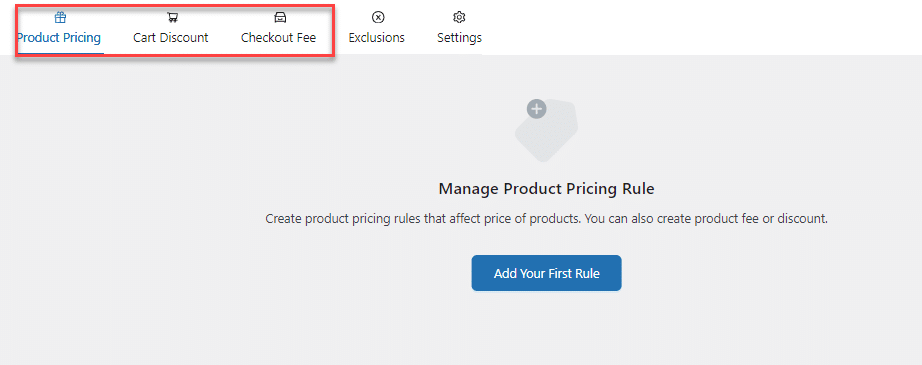
- Product Pricing
- Cart Discount
- Checkout Fee
To add custom fees, you need to check the Checkout Fees section. By default, there won’t be any campaigns. But you can manually create custom campaigns.
You can add a flat fee or percentage-based fee to the total amount.
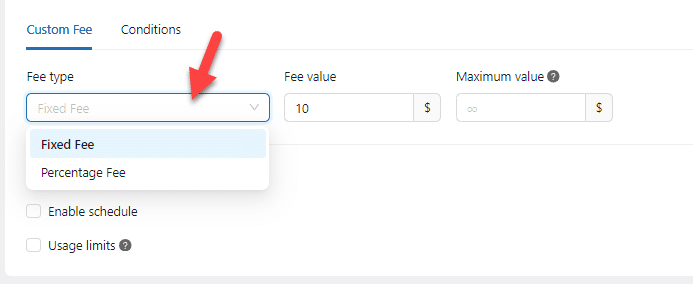
You can configure the fee according to your preferences. Besides that, you can also use custom conditions to make the campaign stronger.
Some of the prevalent condition types are configuring fees based on the
- Total price
- Quantity
- Weight
- Product
- Product category
- Customer role
- Payment method
- Shipping Region
And so on. You can choose a rule type from the dropdown and customize it accordingly. Once you are done with the conditions, save the campaign.
From now on, WooCommerce will add extra fees to the customer’s orders when the order meets specific conditions.
Next, we will teach you how to add a BACS fee to your online store.
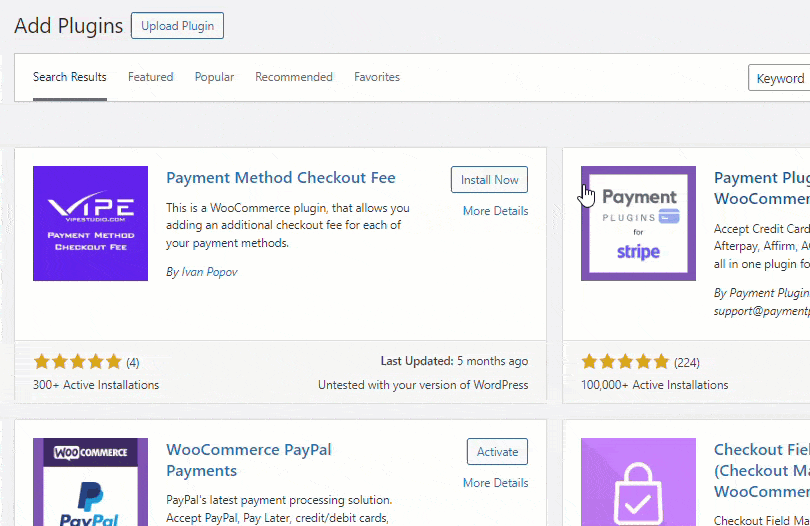
4. Add BACS Fee
This section will show you how to add BACS fees in WooCommerce. We will use a Payment Method Checkout Fee plugin to complete this task.
The first thing you need to do is install and activate the plugin on your WooCommerc store. You can do it manually or directly via the WordPress dashboard.
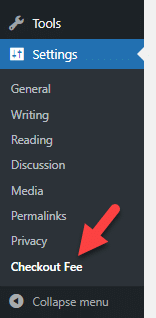
Under the WordPress settings section, you will see the plugin settings.
The plugin comes with minimal configuration. You can enable the BACS (bank transfer) custom fee option, add a label, enter the amount, and save the settings.
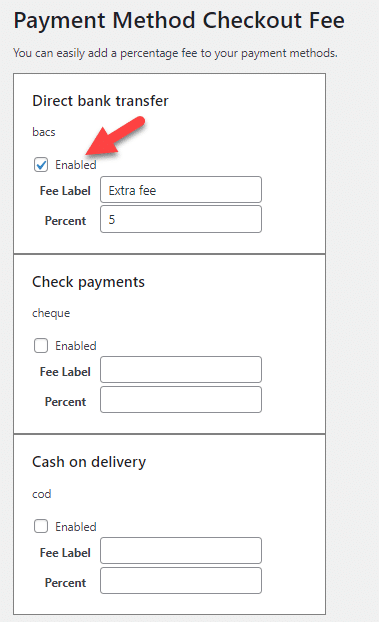
In this case, we have added a 5% fee to every bank transfer method. Now, check the store from the front end to see how the fee will increase.
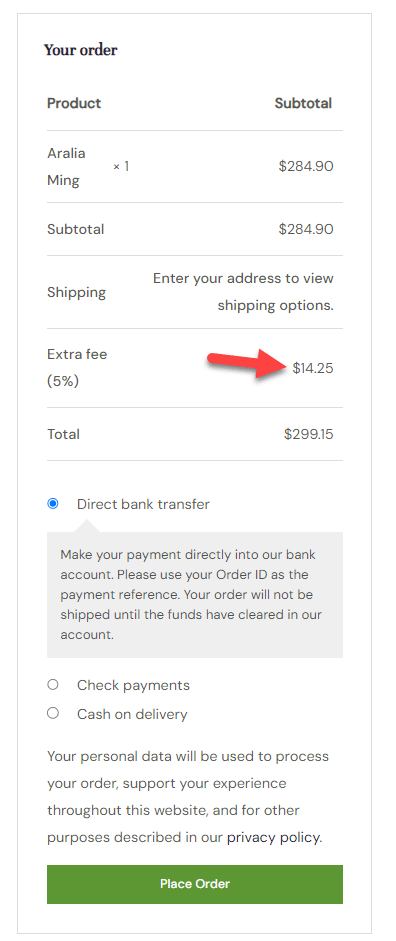
As you can see in the screenshot, a 5% extra fee is added to the order.
That’s it!
Next, let’s see how to add a currency conversion fee in WooCommerce.
5. Add Currency Conversion Fee on Payment Gateways
If you target a global audience through your eCommerce store, you must set up multi-currency. This will help the customers understand how much the product will cost. With a plugin like YayCurrency, you can do it.
But you should also add a currency conversion fee to the configuration to handle the fee structure smoothly.
Here is how to do it.
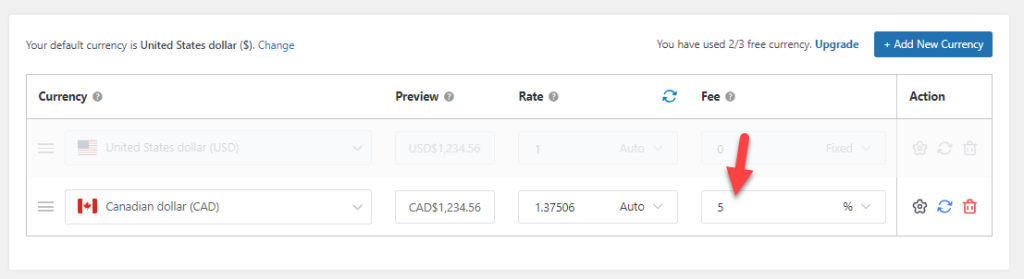
Once you have activated the plugin, you must go to the settings. From there, you can list multiple currencies.
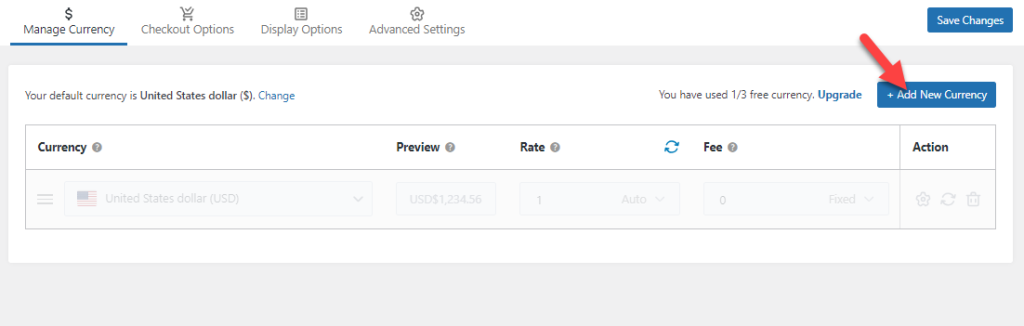
While adding a currency, the plugin will ask you for an extra fee.
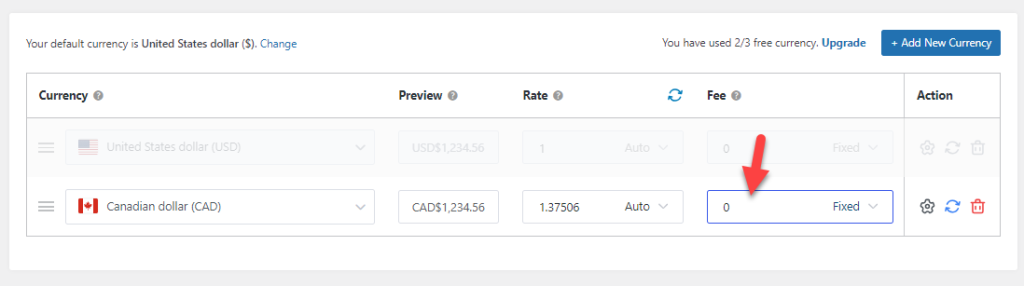
You can add a flat fee or a percentage-based fee to the settings. For this demo, we will add an extra 5% fee.
Once you have done that, save the settings, and you can move forward. Based on your configuration, a fee will be added on the front end. The extra fee will help you with the currency conversion rate.
That’s it!
6. Add Cash of Delivery Fee Using YayPricing
Our final tip for you is to add a cash-on-delivery fee to purchases. You won’t get any payments when someone orders a product but chooses the CoD payment method. You can add an extra fee to the CoD method to optimize the shipping cost.
Here is how you can do it with the help of the YayPricing plugin.
To do this, go to the checkout fee section on YayPricing and add a new rule.
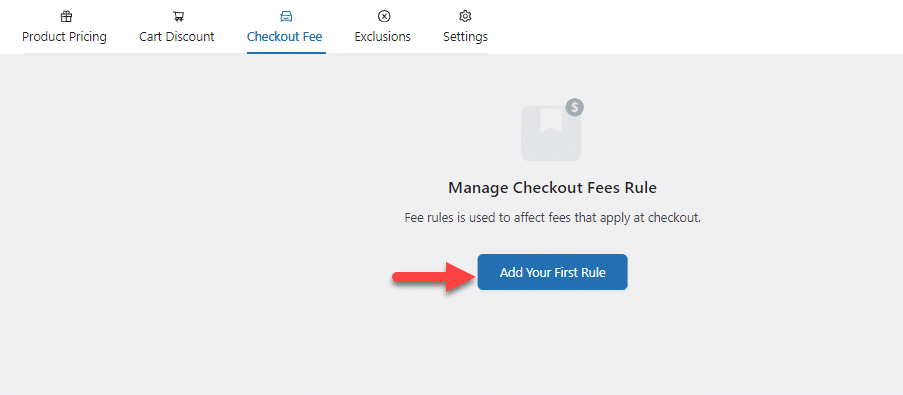
Create a custom campaign.
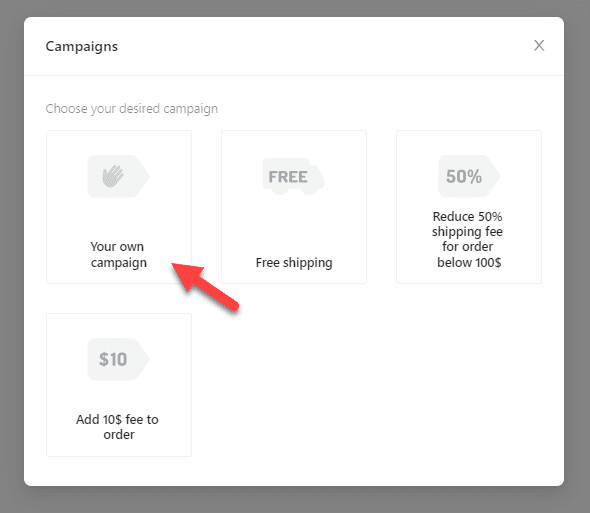
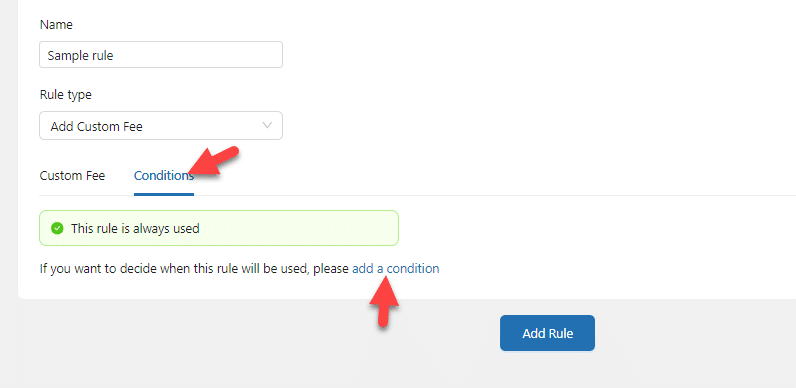
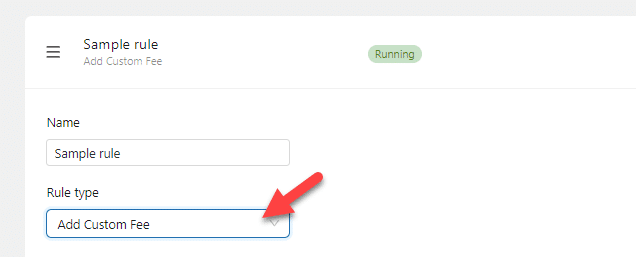
You can name the campaign whatever you want. While choosing a rule type, select Add a Custom Fee.
Next, add the fee you need. In this case, we will add $5.99 as the fee.
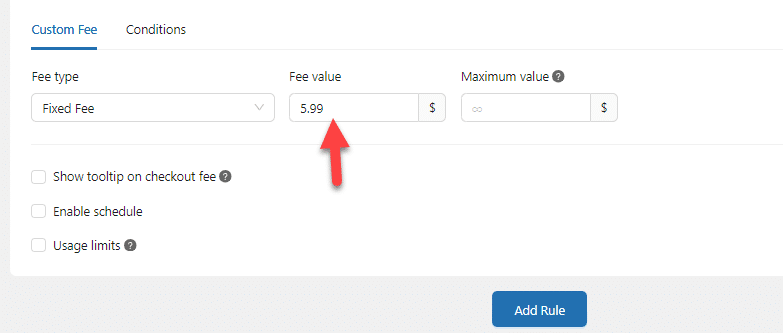
You can also enable the tooltip option, so when the customer selects the cash on delivery method, they will see why the extra fee is added. The next thing you need to do is add a condition.
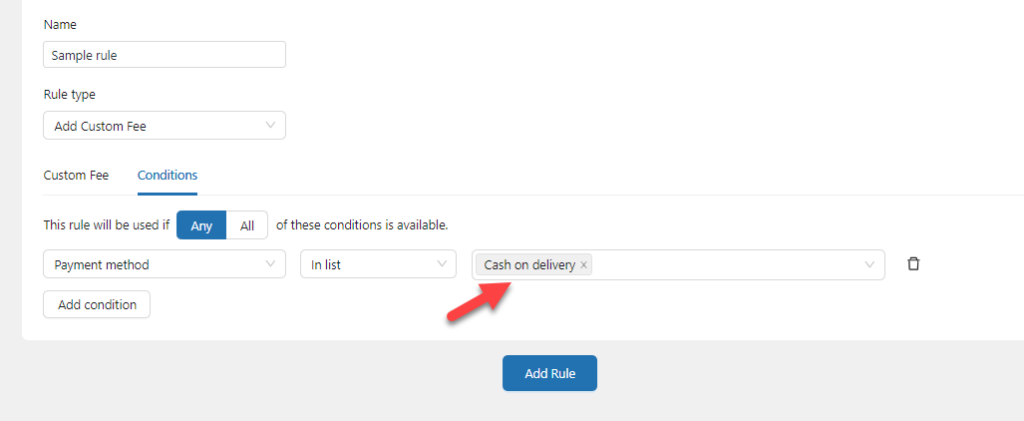
According to the condition we configured, the rule will be triggered when someone chooses cash on delivery as the payment method. Once you have configured the rule, save the campaign.
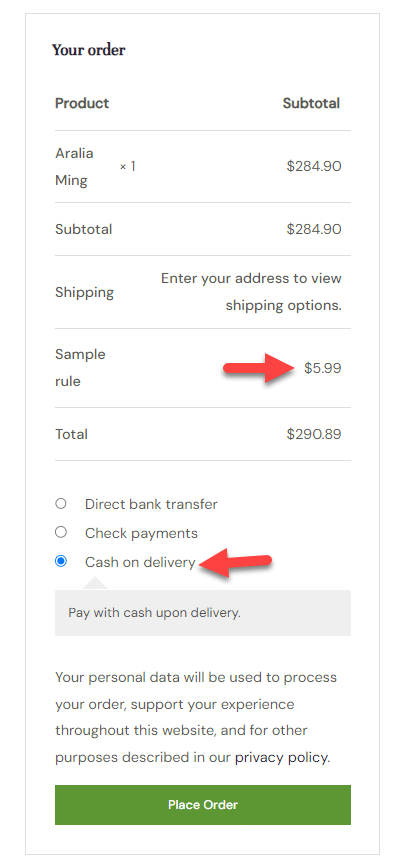
Next, you can check the website from the front end to ensure the fee will be added to every cash-on-delivery order.
That’s it!
This is how you can add cash on delivery fees in WooCommerce.
7. Add Product Fee to Specific Payment Method with YayPricing
Also, with YayPricing, you can choose the “Product Fee” rule to add a fee to payment method. This feature was suggested by many WordPress users. This guide will help you easy to configure this pricing rule.
With the YayPricing dashboard, choose the “Product Fee” rule type and configure the “fixed fee” as $10.
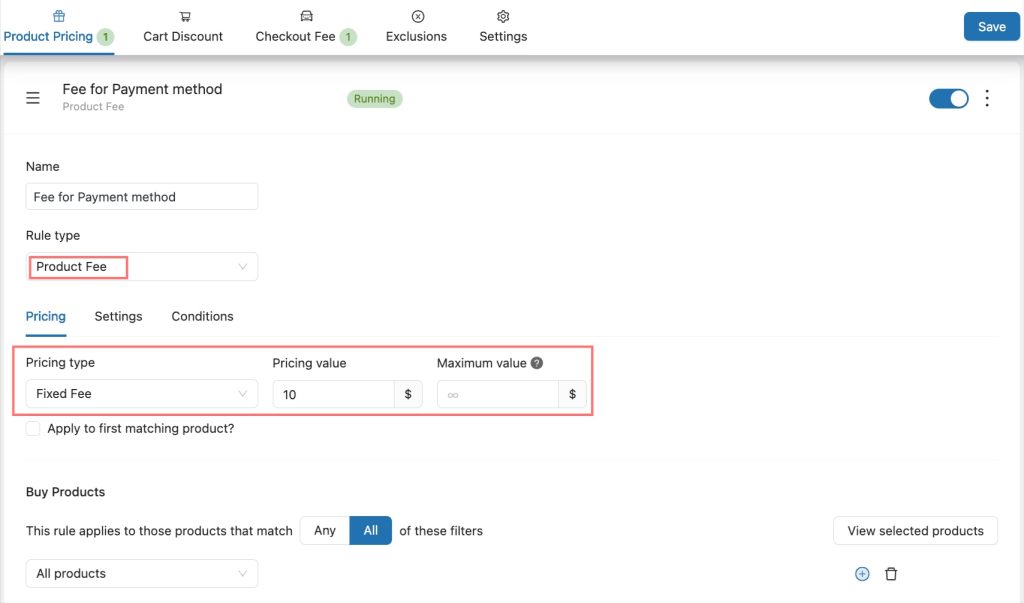
Next, move to the “Conditions” section to assign a specific payment method for this rule to be active. This also means that if customers checkout using this payment method, their card will be charged $10 in total price.
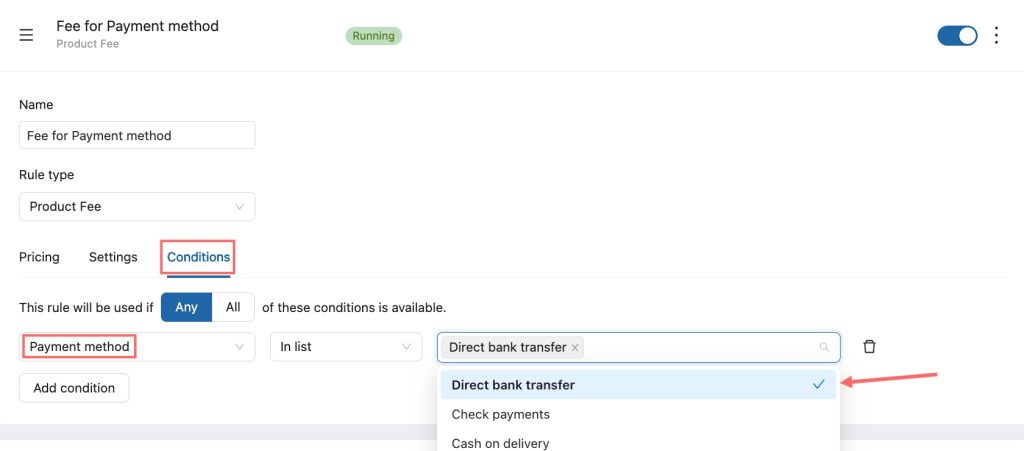
Save the rule and see the result!
Conclusion
As mentioned, you need to optimize the payment gateway fee to maximize your profit. Otherwise, you will be the one who’s paying all the transaction or currency conversion fees.
In this article, we have shown you six methods to add extra payment fees to WooCommerce. You can add a fee to all the payment methods, specific payment methods, custom checkout fees, BACS fees, currency conversion fees, and cash-on-delivery fees.
You can add a fee to the store depending on your payment method. A plugin like YayPricing will make the process so simple.
Which method are you going to use?
Let us know in the comments.
I tried using your snippet “2. Add Fee to Specific Payment Gateways in WooCommerce” but it does not show the fee in checkout . The “1. Add Fee to All Payment Gateways in WooCommerce” worked perfectly. I am using WooCommerce PayPal Payments v2.6.1 on WordPress 6.5.2.
Hi Chip Dyer! Thank you for reaching us! To resolve your concerns, please contact us via https://yaycommerce.com/support/ for a live chat. Our support team will answer all your questions 24/7