Do you want to set up WooCommerce prices based on currency? If so, this article provides a simple method.
You should add multiple currencies to your online store to target global traffic. Most people use USD as their primary currency, but some prefer checking the prices based on their local currency.
If you need a simple way to set up WooCommerce prices based on currency, you should keep reading this article. Here, we will show you how to add multiple currencies to your WooCommerce store without hassle.
But before going further, let’s see why you should set up WooCommerce prices based on currency.
Table of contents
Why Should You Set Up WooCommerce Prices Based on Currency?
Setting up WooCommerce prices based on currency can significantly benefit store owners targeting a global audience.
This approach enables a more personalized shopping experience, allowing customers to view and purchase products in their local currency, thereby increasing customer satisfaction and loyalty.
Here are several reasons why WooCommerce store owners should consider adding multiple currencies to their stores:
- Increased Conversion Rates: Customers are more likely to purchase when they can view prices in their local currency. This is because they don’t have to calculate the conversion rate, which can deter buying. By displaying prices in the customer’s local currency, you can increase the likelihood of a purchase.
- Improved Customer Experience: Offering multiple currencies can make the shopping experience more convenient and comfortable for international customers. They don’t have to worry about currency conversion or hidden fees, which can lead to a smoother and more enjoyable shopping experience.
- Competitive Advantage: Not all WooCommerce stores offer multiple currencies, so by doing so, you can gain a competitive advantage over other stores in your niche. This can help attract international customers and increase your store’s visibility in global markets.
- Reduced Cart Abandonment: One of the main reasons for cart abandonment is unexpected costs at checkout. By displaying prices in the customer’s local currency, you can avoid this issue and reduce the likelihood of cart abandonment.
- Increased Revenue: By making it easier for international customers to purchase from your store, you can increase your store’s revenue. This is because you are expanding your customer base and making it easier for them to buy from you.
Now you know why you should set up WooCommerce prices based on currency. In the next section, we will show you the step-by-step method.
How to Set Up WooCommerce Prices Based on Currency
WooCommerce doesn’t include this feature by default, so we need to use a third-party plugin. The plugin we will use is YayCurrency. It is a freemium plugin that allows you to display a product’s price in multiple currencies on your WooCommerce store.
The free plugin is available from the WordPress plugin repository, and the premium version is available on the official website.
For this tutorial, we will be using the premium version of YayCurrency.
Step 1: Plugin Configuration
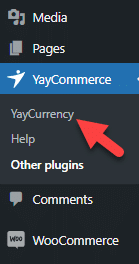
First, install and activate yayCurrency on your website. Once you have completed the activation, you can see the plugin’s settings on the left-hand side.
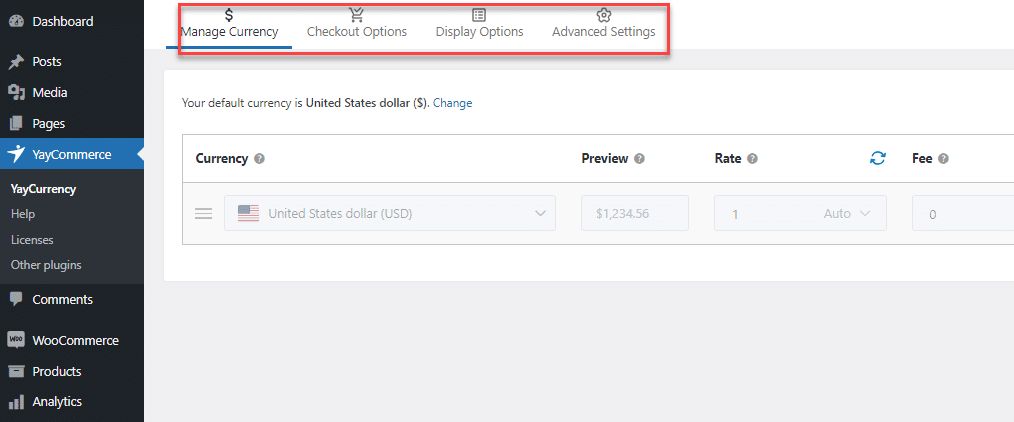
There, you will see four options.
The next step is to add the custom currencies you want to your WooCommerce store.
Step 2: Adding Currencies
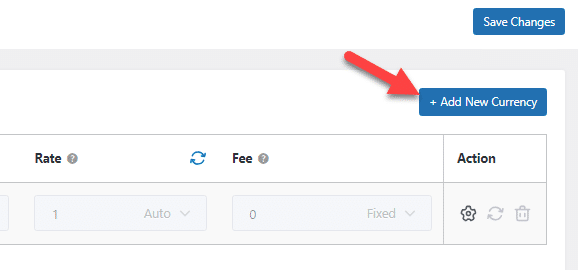
You can do this by clicking the +Add New Currency button.
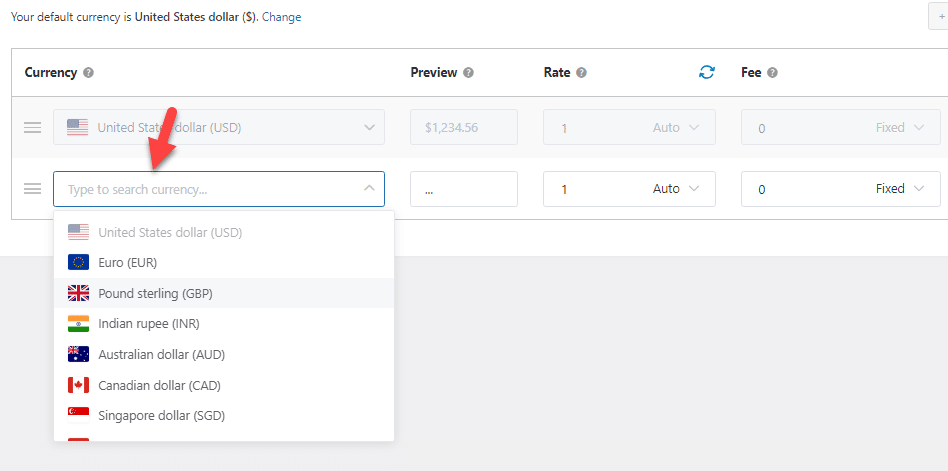
The dropdown menu shows most currencies. You can add the ones you need in the store.
We have added five of the most popular currencies worldwide to the store.
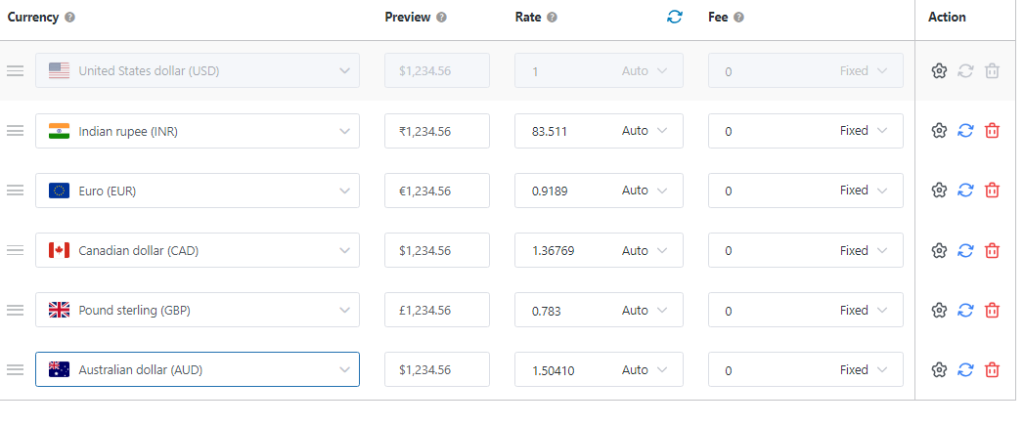
- Indian rupee
- Euro
- Canadian dollar
- Pound
- Australian dollar
The best thing about YayCurrency is that the plugin automatically retrieves exchange rates for the added currencies. You do not need to update the rate whenever the value changes.
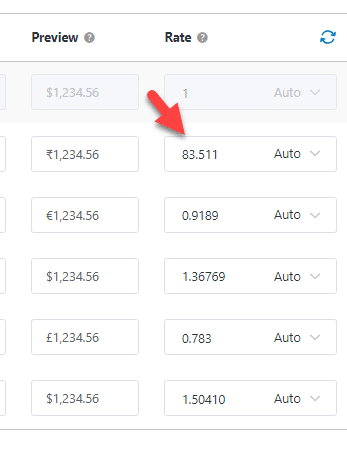
You can also enter the rate manually, which is helpful if you need to use a fixed exchange rate. We also liked the plugin’s ability to add extra fees.
If you accept third-party currencies, you will pay fees. The fees section covers that.
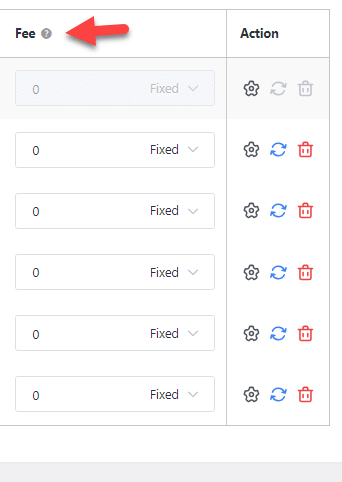
You should save the changes after modifying the plugin’s settings to match your preferences.
Now, you must open the WooCommerce store and visit any product page. There, you will see a currency switcher option.
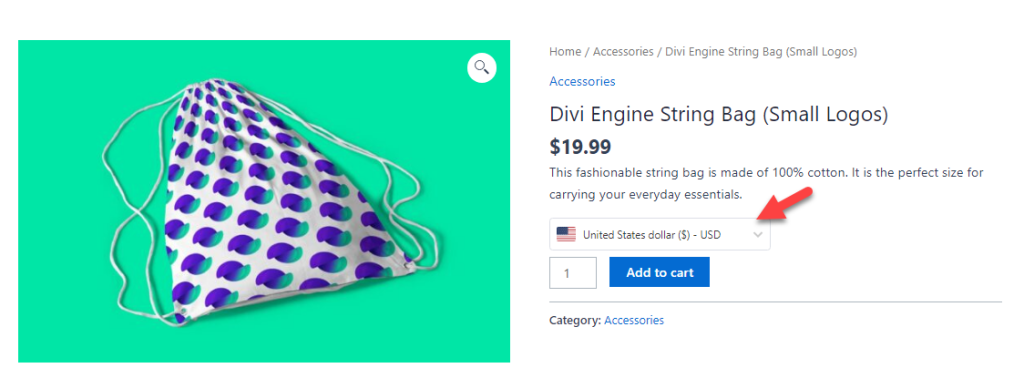
The default currency (in this case, USD) will be used to display the product’s pricing. However, you can change the currency in the dropdown. If you open the dropdown, you can see all the currencies you have added to the website.
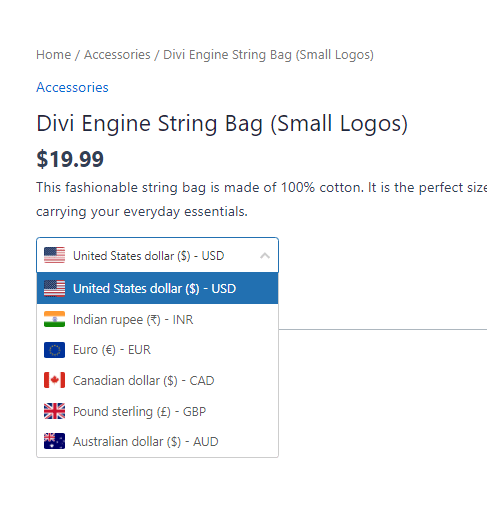
From there, you can change the price to any currency. In this case, we will change the currency to INR.
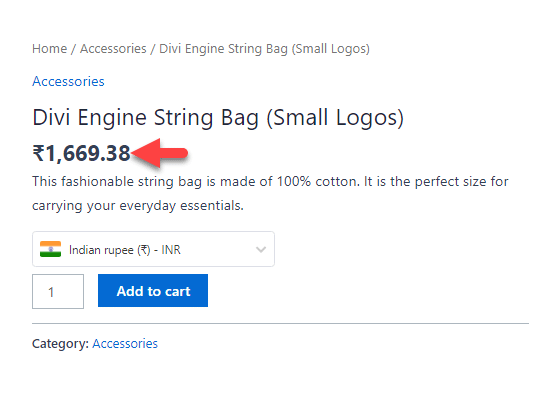
This will help the customer better understand the product’s value. YayCurrency also includes additional configuration options. Below, we explain how to make the most of the plugin.
Step 3: Checkout Options
If you need the user to checkout in a currency different from the primary one, enable this option.
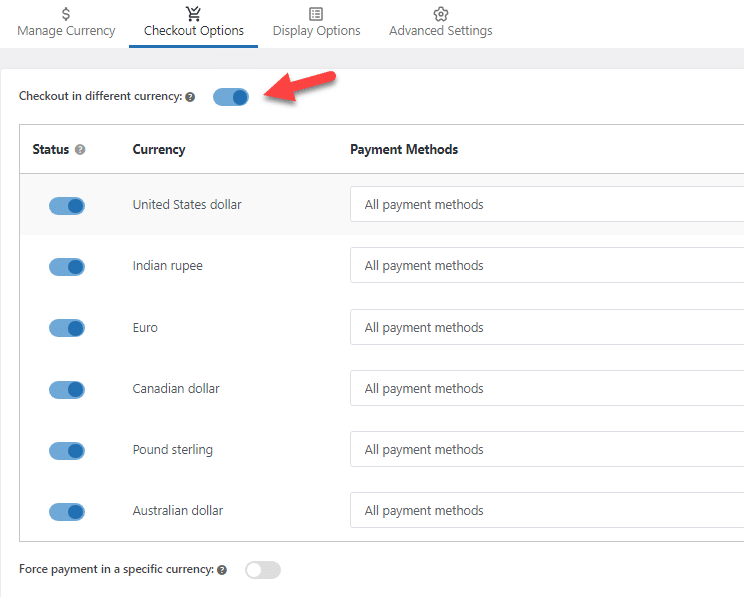
On the checkout page, you can enable or disable which currencies are available. The exact page also lets you set the currency for payment methods.
Step 4: Display Options
The display options contain configurations you can use to edit the dropdown.

As you can see, you can customize the dropdown’s location and style. The default options are plentiful, but if you need to optimize the size and symbols, use the design options.
Step 5: Advanced Settings
You can adjust the plugin’s settings in the advanced settings.

The options available are:
- Fixed product price for each currency
- Automated exchange rate updation
- Auto-detect currencies
- Compatible with cache plugins
If you enable the first option, you can go to individual product pages and set up a different rate for particular currencies.
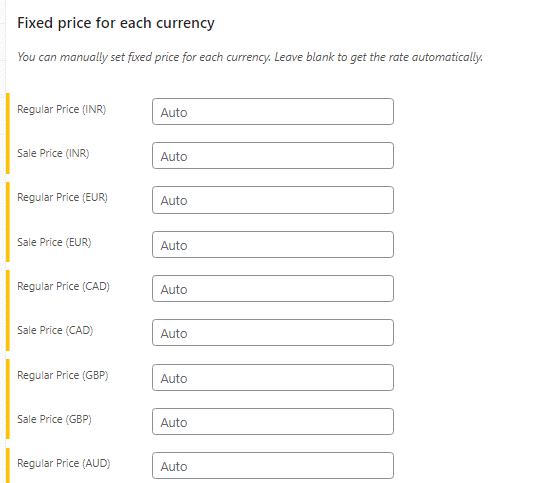
The next option you have is to update the exchange rate automatically. This could be an excellent feature for your WooCommerce store. With the following option, you can detect the visitor’s location and automatically display the price in the local currency.
This way, the user does not need to use the dropdown, and they will always see the price in their local currency.
If you use cache plugins like WP Rocket, W3 Total Cache, or WP Fastest Cache, you should enable the last option. This will help you with website compatibility issues.
That’s it!
Here is how to set up WooCommerce pricing based on currency. As you can see, no coding or technical stuff is needed. Ensure you save the changes after updating the plugin’s configuration.
Frequently Asked Questions
Now, let’s take a look at some of the frequently asked questions and answers regarding this topic.
WooCommerce does not support currency-based pricing out of the box. It supports only a single store currency, so prices remain the same for all customers regardless of location. To apply different prices for different currencies, a dedicated solution like YayCurrency is required.
The most straightforward approach is using a plugin designed specifically for multi-currency pricing. YayCurrency allows store owners to set fixed or converted prices by currency, making it easy to manage international pricing without complex configurations.
Yes. Automatic exchange rates are not always ideal for profit margins. YayCurrency lets you set custom prices per currency, giving you full control over pricing strategies across regions.
Yes, but not all plugins handle this well. YayCurrency fully supports variable products, allowing currency-specific pricing for variations such as size, color, or subscription options.
When implemented correctly, currency-based pricing integrates smoothly with WooCommerce tax rules and checkout calculations. YayCurrency ensures prices, taxes, and totals remain accurate for each selected currency.
Compatibility is a common concern for global stores. YayCurrency is built to work reliably alongside caching and performance optimization setups, ensuring correct prices are displayed without slowing down the store.
YayCurrency focuses on flexibility, accuracy, and ease of use. It supports manual pricing, automatic conversion, product-level control, and seamless WooCommerce integration, making it a strong choice for stores targeting international customers.
Conclusion
If you run an online store targeting international traffic, displaying prices in USD or any other single currency won’t be feasible. In that case, you must use a dedicated plugin for this feature, as WooCommerce doesn’t include it by default.
As you can see in this tutorial, YayCurrency is the #1 plugin you can use to add multiple currencies to the store. It includes minimal configuration options, and you can add as many currencies as needed.
We highly recommend testing this plugin on your website.
Would you add this function to your WooCommerce store?
Let us know in the comments.
