Do you want to setup the next order coupon in WooCommerce emails? If you are looking for a step-by-step guide, keep reading this article. Here is everything you need to know about this function.
When managing an online store, you need to devise strategies to increase sales and conversion rates. These days, most eCommerce stores use coupon codes as one of their strategies for getting more customers.
While this is a good idea, you can always enhance it to become better than your competitors.
In this article, we will show you how coupon codes can be used to get returning customers.
First, let’s see why you need to setup the next order coupon in WooCommerce emails.
Why You Need to Setup Next Order Coupon in WooCommerce Emails
When you setup next order coupon in WooCommerce emails, you will have multiple advantages. Some of the famous pros are:
- Outrank competition: When you run an online store, competition is one of the main things you should focus on. You can outrank most competitors by offering a coupon for the next customer’s purchase.
- Drives more sales: Most people would love a discount on the online purchase. This will drive you more sales and revenue.
- Better customer loyalty: Having loyal customers is a plus. So, with the next order coupon strategy, you can build a set of loyal customers.
- Cost-effective marketing: Usually, we need to spend money on marketing to attract more customers. However, you do not need to pay a single penny to promote the coupon code.
- Creates urgency: If you add a countdown for the coupon, people will get their next purchase as soon as possible.
Now you know why you should setup next order coupon in WooCommerce emails. In the next section, we will show you how to do so.
How to Setup Next Order Coupon in WooCommerce Emails
Here, we need to do two main things:
- Create and customize the coupon
- Add the coupon to WooCommerce emails
Below, we will explain both options.
1. Creating and Customizing the Coupon Code
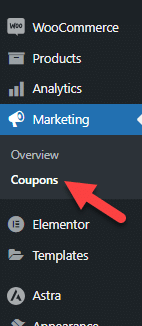
First, you need to create a coupon code. You can do this directly via the WooCommerce Marketing > Coupons option.
If you don’t have a coupon, you can click Add New.
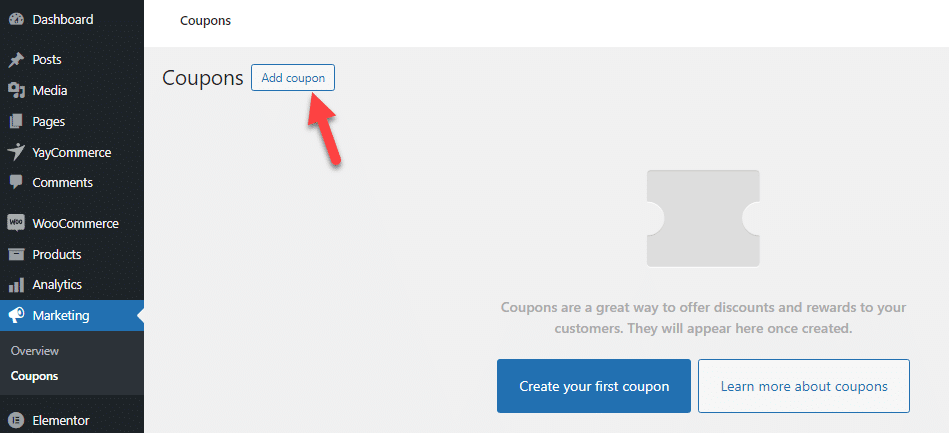
Enter the coupon code and publish the coupon.

The WooCommerce coupon code creation wizard offers several customization options. However, you do not need to use them. To improve coupon customization, you can use a plugin called YayPricing.
YayPricing is a freemium tool. You can get the free version from the WordPress plugins repository; the premium version is available on their official website.
For this tutorial, we will use the premium version of the tool. Once you have installed and activated YayPricing on your website, you can see its customization options on the left-hand side.
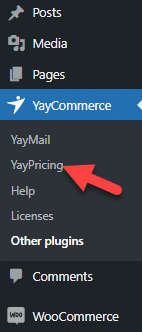
You need to create a new Product Pricing campaign there. You can choose from any pre-made campaigns available in the plugin settings.
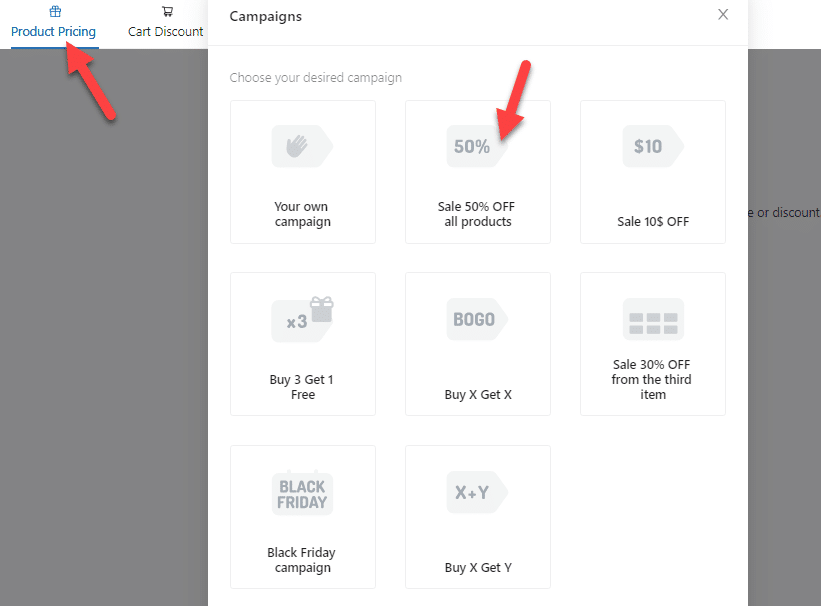
According to this campaign, every product in your store will get a flat 50% discount when you activate this campaign. But you can always tweak the discount from the settings.
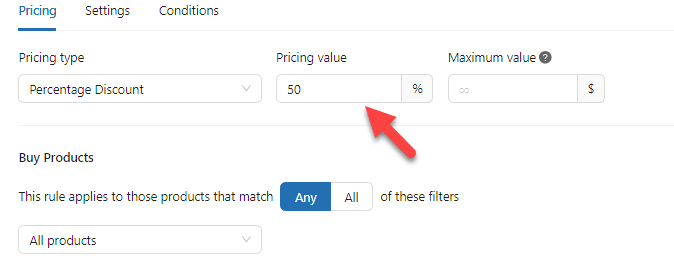
You can also choose the products to apply this rule from the same page.
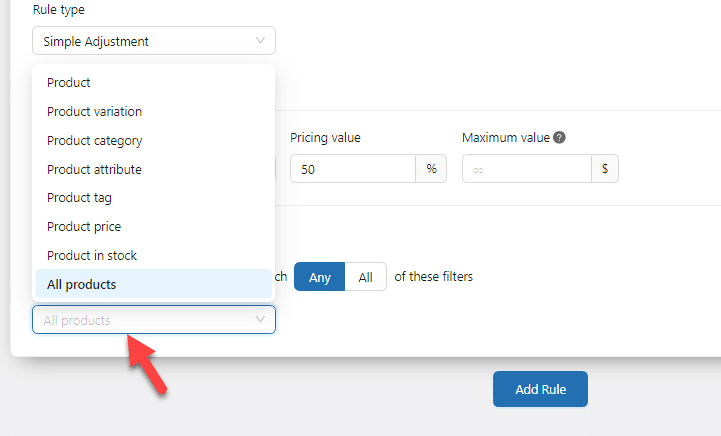
By default, the campaign will be affected by all the products. But from the dropdown, you can choose custom product categories, tags, or something similar. In this case, we will apply the rule to every product in your store.
Next, go to the conditions. There, you need to add a new condition.

The condition we are going to choose is Applied Coupons.

The discount will only be triggered when someone applies the coupon code. Another rule you can add is this:

This way, only customers with previous purchases will get this benefit.
Once you have completed the modification, save the campaign and activate it.

Now, the coupon is working and properly configured. Next, let’s move to the WooCommerce email customization task.
2. Adding the Coupon to WooCommerce Emails
By default, WooCommerce doesn’t have the feature to edit email templates. To do this, we need to use a dedicated plugin.
YayMail is one of the best plugins for editing email templates. It is also a freemium plugin. The lite version can be downloaded from the WordPress plugins repository, and the premium version is available on the website.
Here, we have the premium version of YayMail. After activation, you can see the plugin’s settings under the YayCommerce option.
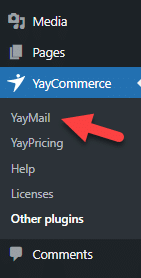
Once you have opened the YayMail option, you will be redirected to the email builder.
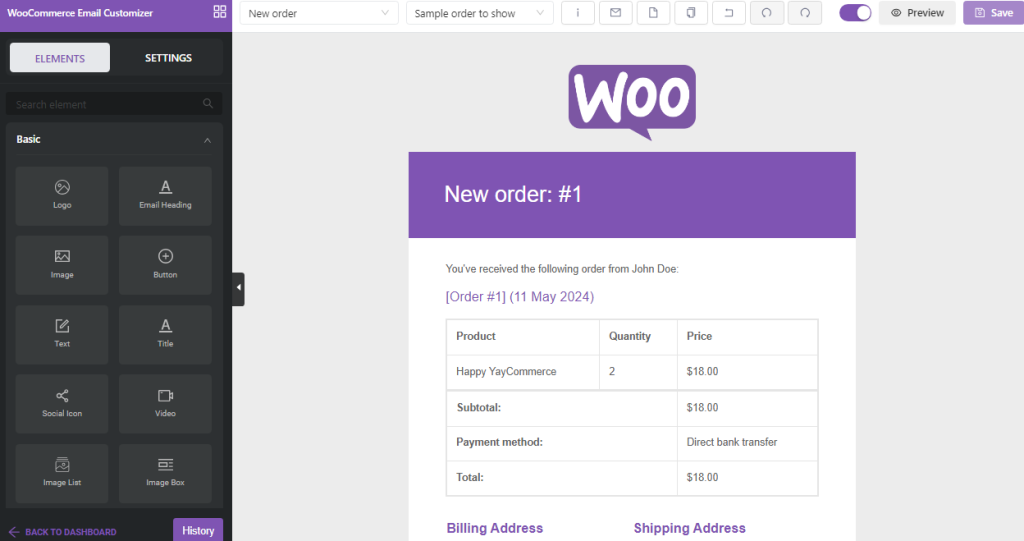
The left-hand side will show you all the elements you can add to the email template. The right-hand side will show you the live preview of the form.
If you need to choose the email template to edit, check out the dropdown at the top of the page.
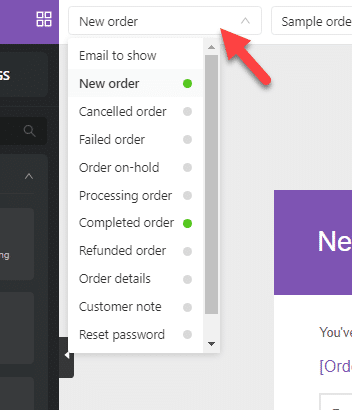
In this case, we will use the order-completed email template. Once you have selected the template, you can start tweaking it. You can drag and drop specific elements to add new ones.
Designing the email template could take a couple of minutes. Here’s the final result:
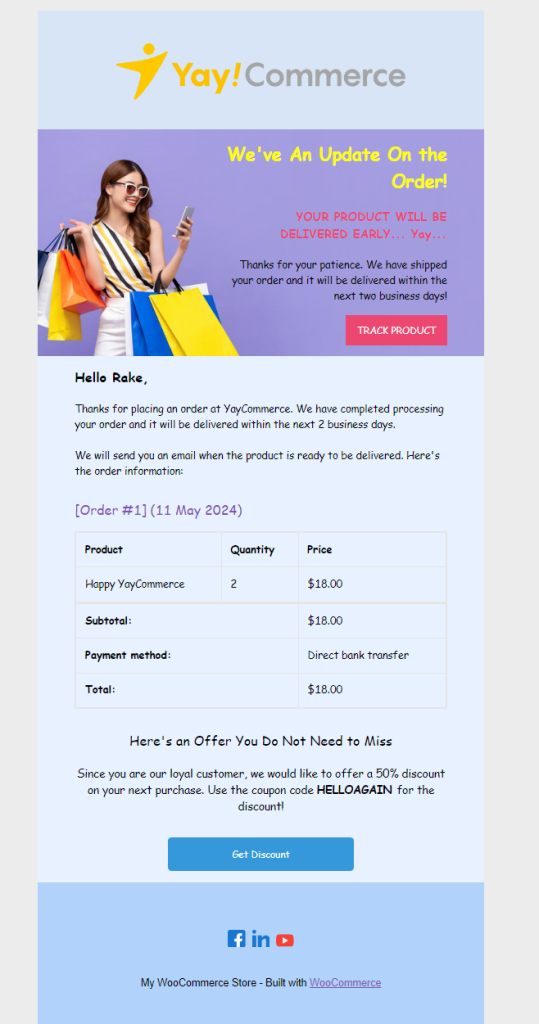
As you can see in the screenshot, we have added a text block inside it explaining the returning customer coupon. So when a customer checks their email, the coupon code will be displayed.
Next, you need to save this email template and activate it.

From now on, this email template will be used.
That’s it!
This is how you can setup next order coupon in WooCommerce emails with plugins.
Conclusion
If running a customer-centric business, you should aim for returning customers. This will ensure that your business always generates revenue. Since coupon codes are an excellent way to boost conversions, offering next-order coupons can be handy.
The best way to promote coupon codes is via the completed order emails. As you can see in this article, you can easily edit your email templates using a dedicated plugin like YayMail.
Hence, we highly recommend testing this feature and improving your conversion rates.
How else will you promote your coupons?
Let us know in the comments!
