What roles should I give to the new users? A question comes to mind for most, if not every, website owner. No matter if it is just a blog site, a WooCommerce store, or a marketplace.
By default, WordPress comes with some user roles to manage a site. When you include WooCommerce, it provides some additional user roles.
However, ARE THEY ENOUGH? It’s a yes-no kind of thing.
Yes, if you are running a basic website, and NO, if you want a more optimized way to manage B2C and B2B customers.
I want to run my own B2B/B2C store; what can I do? Many website owners asked!
Don’t worry; we will show you how to create WooCommerce user roles to manage B2C & B2B customers today.
But first, let’s go through the default ones so nobody feels left out!
- Exploring the Default WordPress and WooCommerce User Roles
- How to Assign WooCommerce User Role
- How to Create WooCommerce User Roles to Manage B2C and B2B Customers
- Step 1: Install and Activate WholesaleX
- Step 2: Create a New User Role
- Step 3: Give the Role a Name
- Step 4: Set Credit Limits
- Step 5: Adjust the Price to Display
- Step 6: Adjust Payment Methods
- Step 7: Adjust Shipping Options
- Step 8: Additional Settings
- Step 9: Save and Update the Role
- Step 10: Assigning Role to Users with WholesaleX
- Conclusion
Exploring the Default WordPress and WooCommerce User Roles
User roles come with permissions, which you can assign to a particular user. However, WordPress user roles are most efficient when you have a website with plenty of users.
Here are some of the most common WordPress user roles:
- Administrator: The administrator has complete control over the website and can do anything.
- Editor: Editors can create, edit, and publish posts and pages, and they can also manage comments.
- Author: Authors can create and publish posts but can’t edit or delete other users’ posts.
- Contributor: Contributors can create posts but can’t publish them or edit or delete other users’ posts.
- Subscriber: Subscribers can only read posts and leave comments.
If you install and activate WooCommerce, you’ll get two additional user roles. Which are:
- Customer: Customers can view and edit their account info and view orders.
- Shop Manager: Shop managers can manage all WooCommerce settings, create/edit products, view reports, and use the WordPress editor.
You can also create custom user roles to give users specific permissions that aren’t included in the default roles.
How to Assign WooCommerce User Role
As we mentioned the default roles above, you cannot create new user roles. However, you can assign the default roles to any user. Let’s see how to do that.
Install And Activate WooCommerce
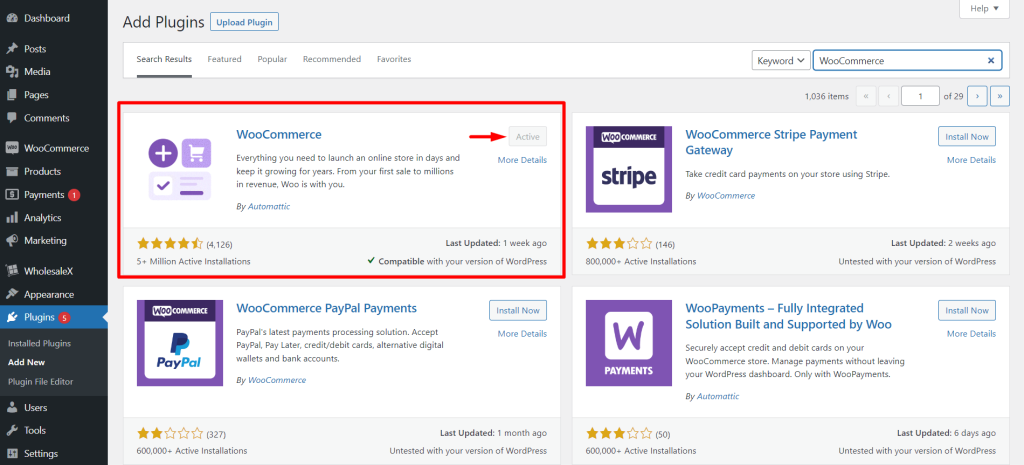
Firstly, you’ll need to install WooCommerce. You can do it from the plugin section. Once you activate it, you can easily assign WooCommerce user roles to users.
Assigning Roles to a New User
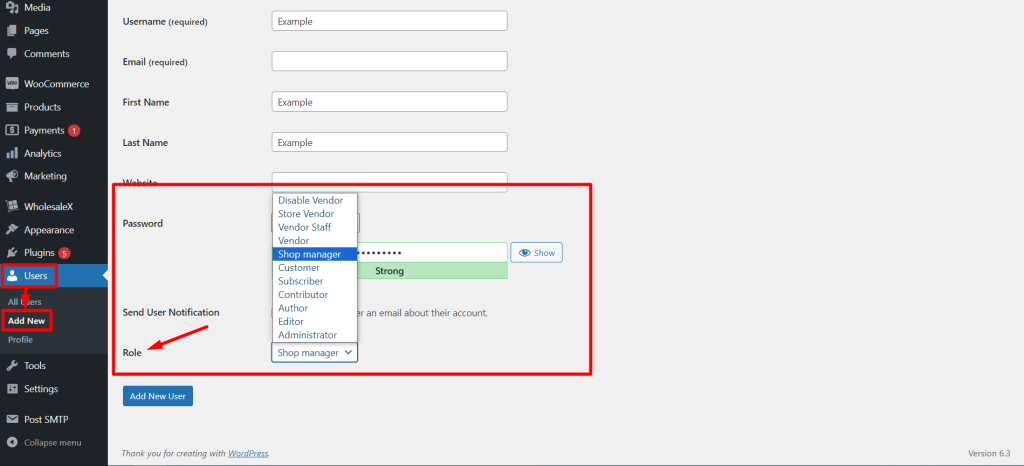
To create a new user and assign roles:
- go to Users > Add New to see a user generation form. Add all the necessary information.
- In the role dropdown, pick your desired role (Customer / Shop Manager).
- Then click the Add New User button to create a new user with the assigned role.
Assigning Roles to Existing Users
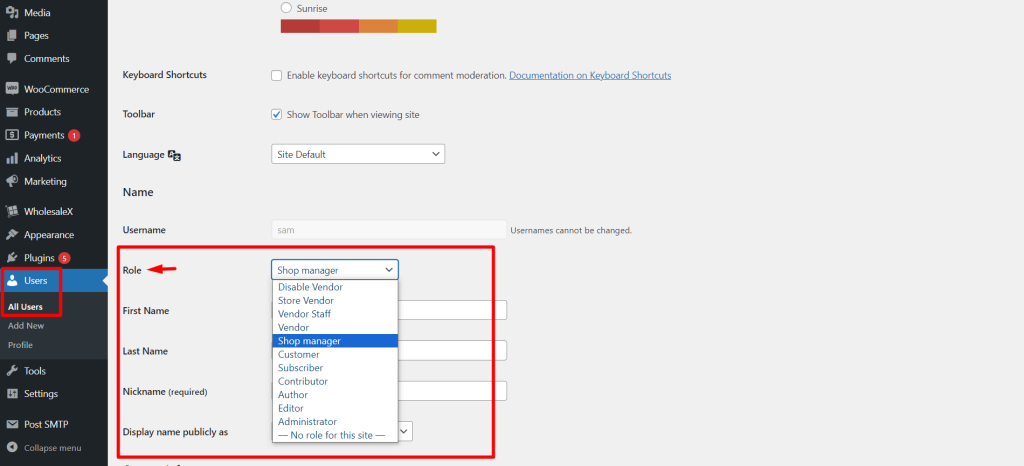
To assign roles to an existing user:
- go to Users > All Users. Here you will see the list of all of the existing Users.
- Now, click the checkbox beside the user or users you want to change roles.
- Then, pick your desired role (Customer / Shop Manager) from the “Change role to” dropdown. Then that selected user’s role will be changed accordingly.
How to Create WooCommerce User Roles to Manage B2C and B2B Customers
If you want to create new roles, you’ll need plugins. WordPress currently has no options to do it. As we’re talking about managing both B2C and B2B, WholesaleX should be the perfect choice.
Why? Because it provides B2B, B2C, and Hybrid modes (B2C+B2B both Enabled).
Let’s check out how you can create new user roles.
Step 1: Install and Activate WholesaleX
First of all, we need to install the WholesaleX plugin. It is the simplest and all-in-one solution to create and manage B2B+B2C stores in WooCommerce.
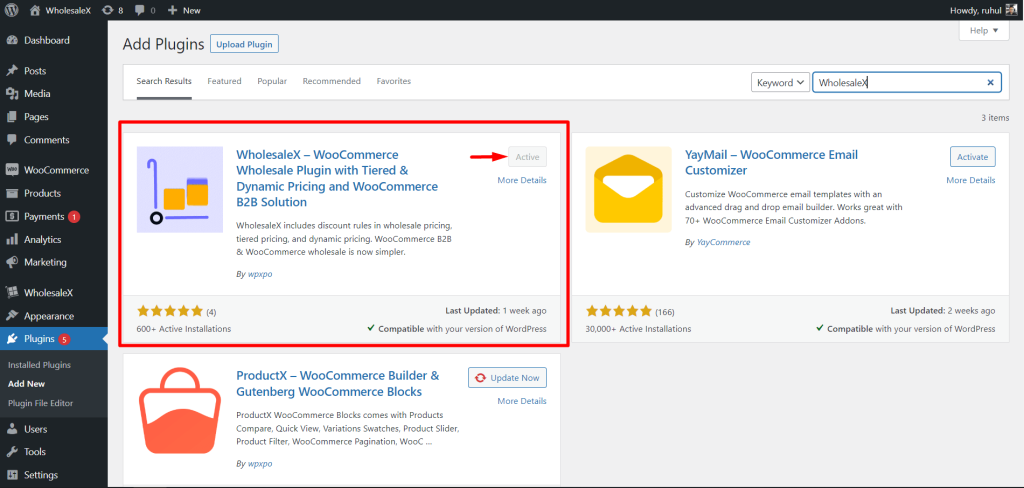
To install WholesaleX:
- Go to the plugin section in your WordPress dashboard.
- Click on the “Add New” button.
- Search for “WholesaleX” in the search bar.
- Install and activate the plugin to start using it.
Once the plugin is installed and activated, you can access its settings from the WooCommerce menu.
The plugin offers a wide range of features, including the ability to:
- Switch between 3 store modes B2C, B2B, and Hybrid (B2C+B2B enabled).
- Create user roles and assign different prices and discounts.
- Create wholesale pricing rules and set prices for different products or product categories.
- Create bulk order forms.
- Create registration forms.
- Make the store private.
- Manage subaccounts.
- Use a built-in wallet as a payment method.
- And much more!
WholesaleX is a powerful plugin that can help you easily create and manage a successful B2C and B2B wholesale store.
Step 2: Create a New User Role
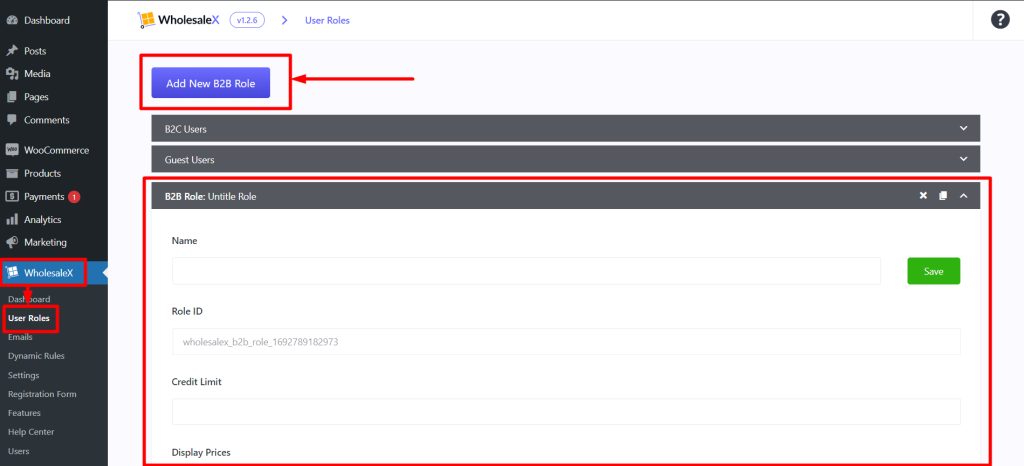
- To create a B2B User role, go to the User Roles section of WholesaleX. Once there, you will see some default roles (Guest users, B2C Users) already added.
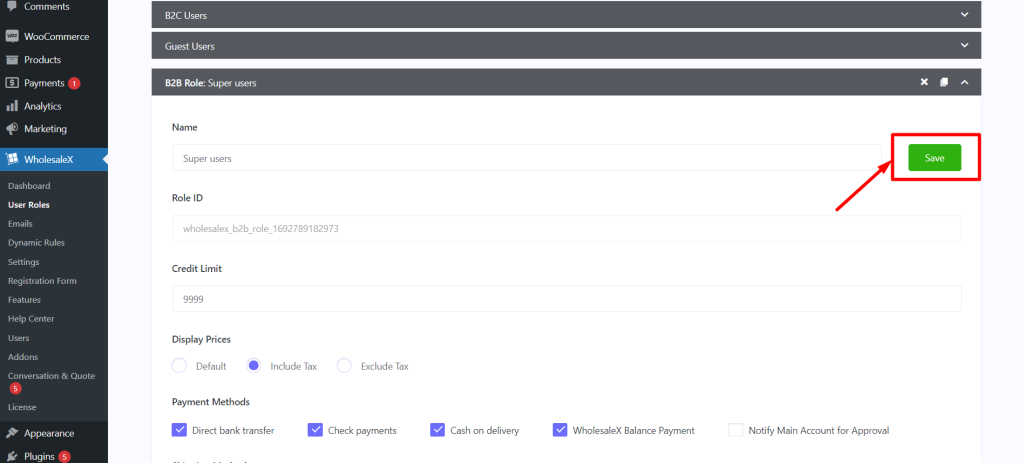
- You will also see a button that says “Add New B2B Role“. When you click on this button, a new field will be added called “Untitled Role“. When you expand this field, you can customize it according to your choice.
- Once you have finished setting it up, click on the “Save” button to create a new role.
Step 3: Give the Role a Name
The first thing to do is to name the role. This is important because you need the name when assigning user roles. You’ll need multiple roles with different permissions when you have many users and want to set different parameters.
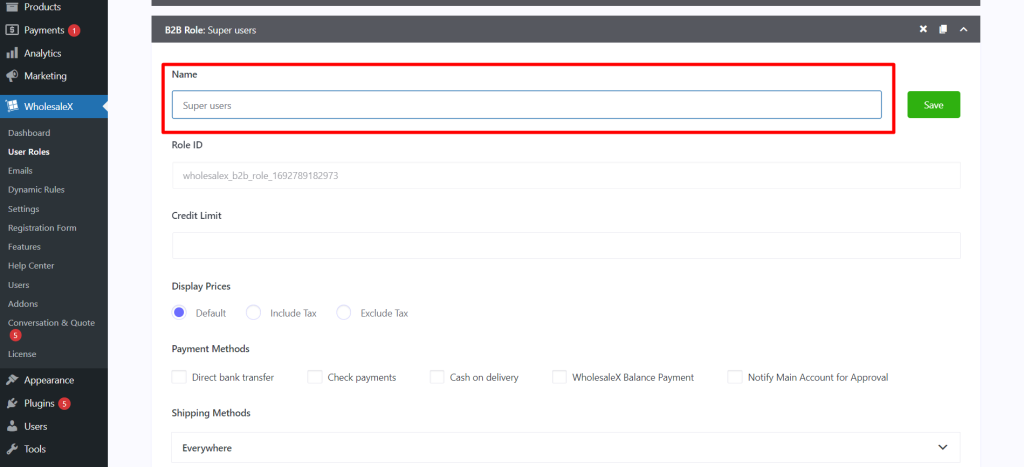
Also, properly naming roles can help you keep them organized and easy to find.
Step 4: Set Credit Limits
It may be necessary to impose a credit limit on certain users. This would prevent them from having more than a specified balance in their WholesaleX Wallet.
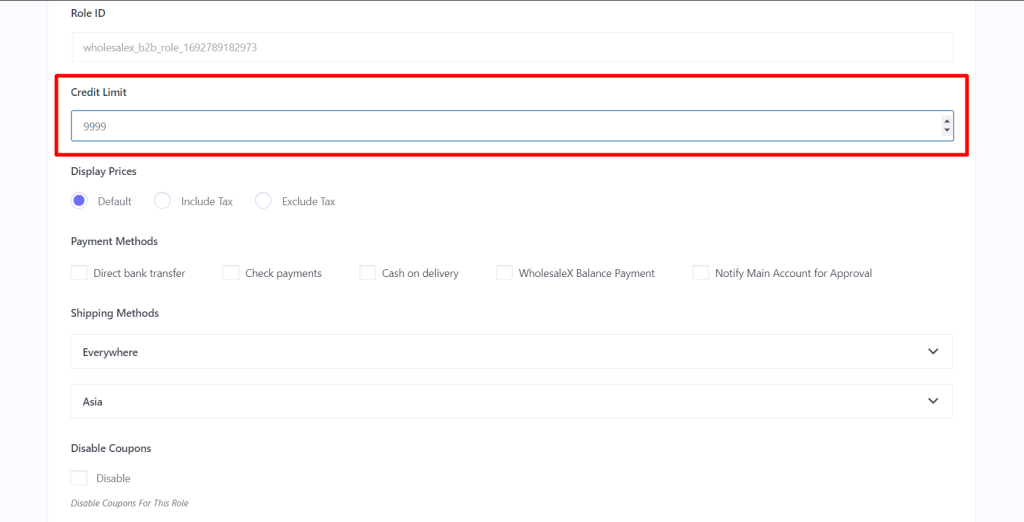
Step 5: Adjust the Price to Display
You may need different tiers of users like, Regular B2B Users, VIP Users, Platinum Users, and so forth. And you want to set whether to include tax or not.
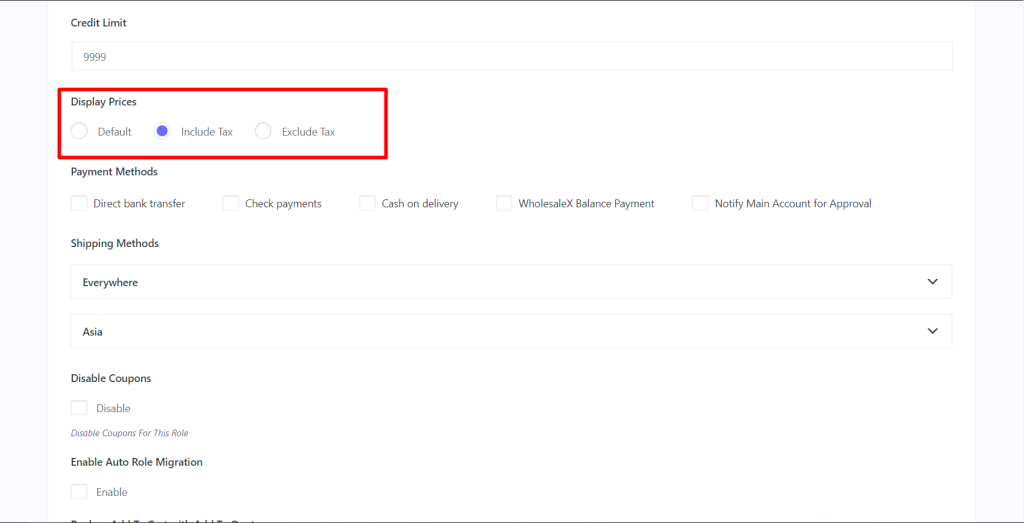
This setting is important because it determines whether the tax will be included or excluded or whether the default WooCommerce settings will be used.
Step 6: Adjust Payment Methods
You can also enable different payment methods for specific user roles. The following options are available in the Payment Methods section:
- Direct bank transfer
- Check payments
- Cash on delivery
- WholesaleX Balance Payment: This will allow users with this user role to use the WholesaleX Wallet as a payment method.
- Notify Main Account for Approval: This option is for Subaccounts, and enabling it will notify the main account when their subaccount users try to purchase a product.
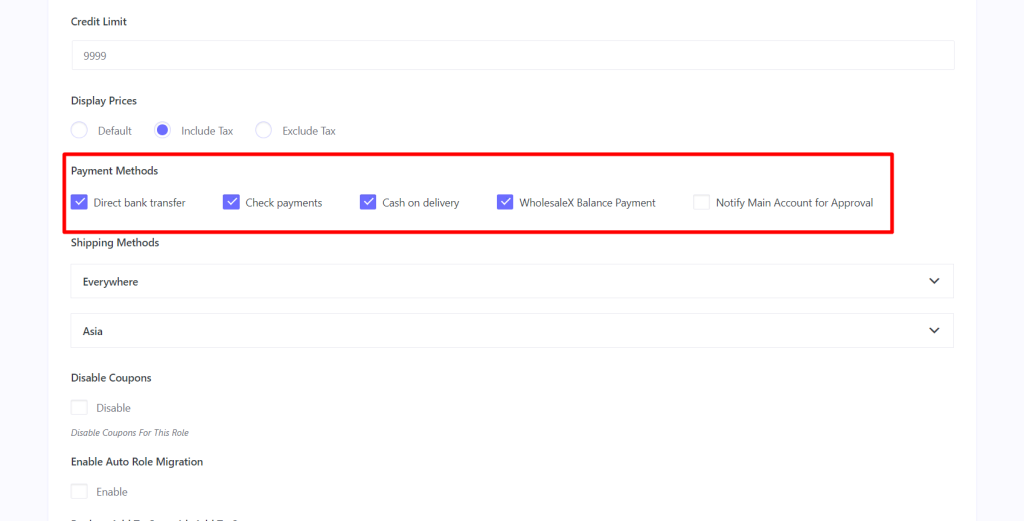
Note: The payment methods you add in WooCommerce will be shown here.
Step 7: Adjust Shipping Options
WholesaleX also allows users to specify shipping methods, such as free shipping, flat rate shipping, and local pickup options. Users can choose multiple options for single-user roles according to their preferences.
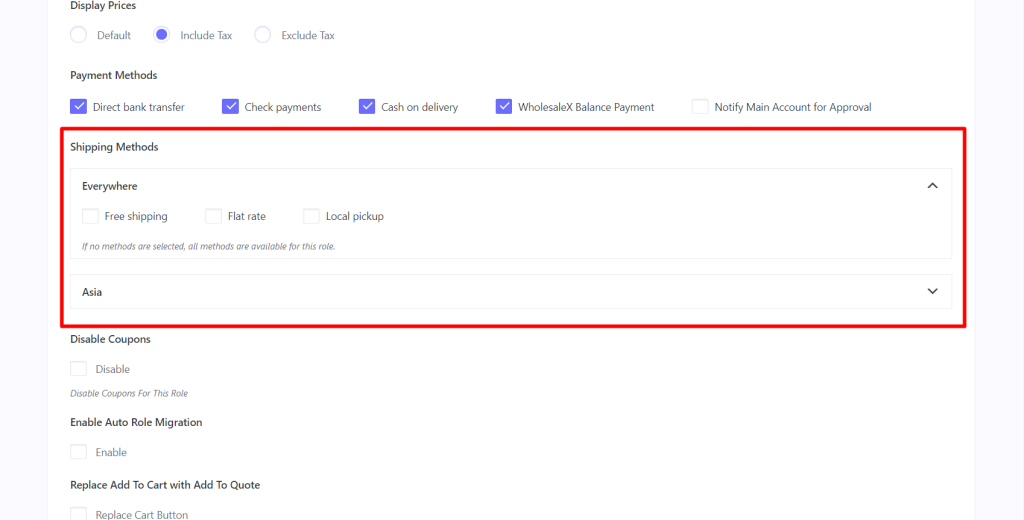
Note: Shipping methods must be added in WooCommerce settings before they will be available in WholesaleX.
Step 8: Additional Settings
WholesaleX offers the following additional restrictions and facilitation options for user roles:
- Disable coupons
- Enable auto role migration
- Replace “Add to Cart” with “Add to Quote”
- Enable subaccount creation
- Disable Wallet addon
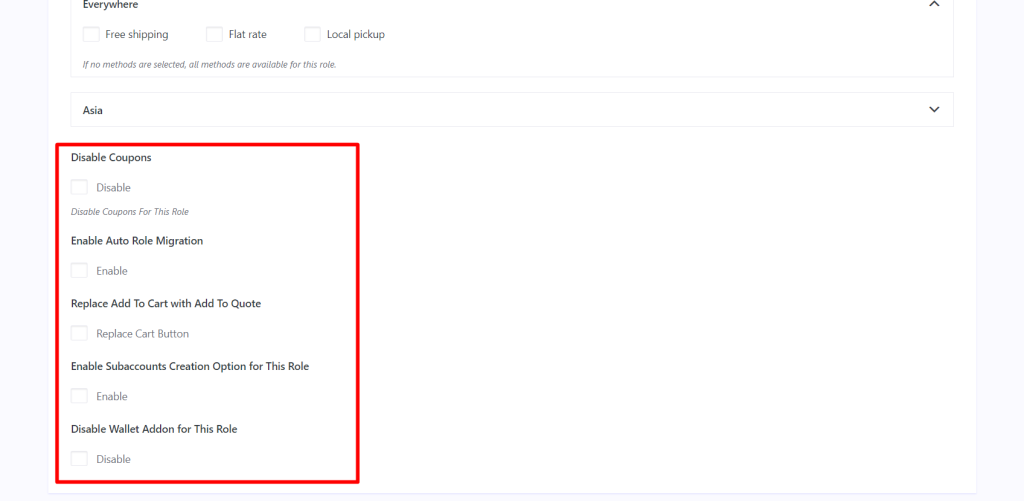
These options can be used to customize the user experience for different roles.
Step 9: Save and Update the Role
After adjusting all the settings, you must save the changes. Otherwise, the role will not be created. You can also make any necessary changes to any roles in the future.
This is how easily you can create wholesale user roles using WholesaleX.
Step 10: Assigning Role to Users with WholesaleX
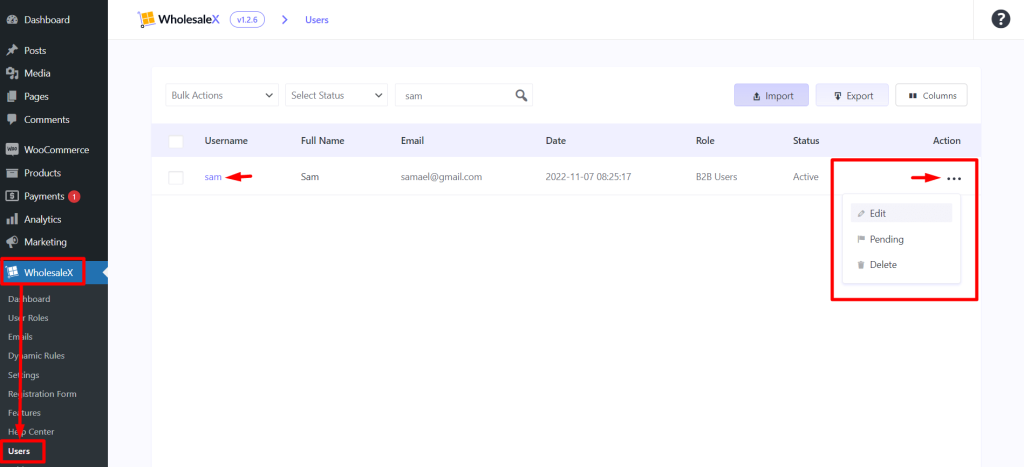
- To assign roles, go to WholesaleX > Users. Now click on a user to edit.
- Now, scroll down to “WholesaleX Profile Settings.” And look for the “WholesaleX User Settings.“
- From the “WholesaleX Role” dropdown, select the roles you created with WholesaleX.
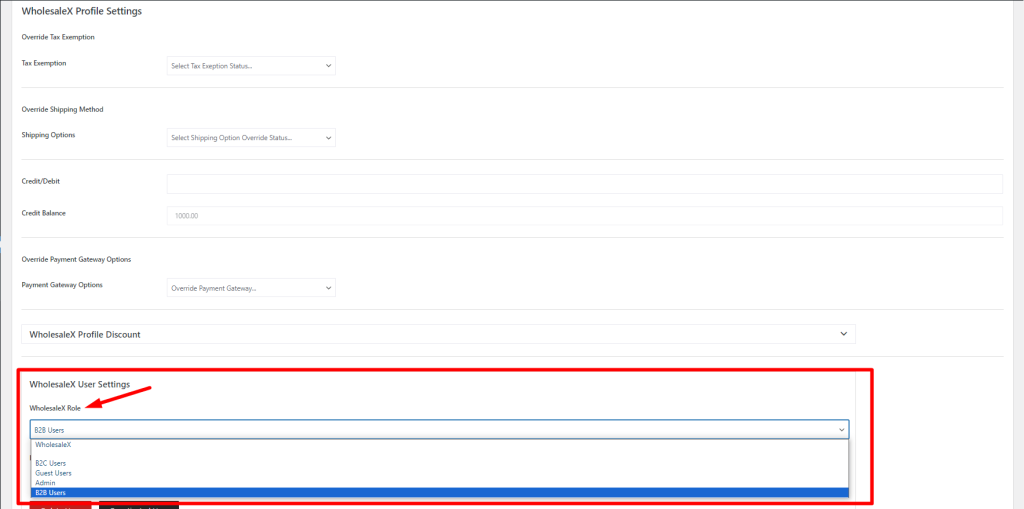
- Then click “Update User” to assign the selected role.
Conclusion
And we have successfully created WooCommerce user roles to manage B2C & B2B customers. You can assign these roles to efficiently manage your wholesale business and cater to the specific needs of your B2C and B2B customers.