Do you want to send WooCommerce custom emails per product? We have got you covered if you are looking for a step-by-step guide. Keep reading this article to learn more about how to customize WooCommerce custom emails per product!
With a powerful plugin like WooCommerce, you can create any online store. You can either sell physical products through the store or sell digital products.
However, keeping the customer experience up to mark is one of the mandatory things you should focus on. It will help your store gain more revenue and conversions. You can use many strategies to boost the customer experience of a WooCommerce installation.
One of the underrated methods is – sending out custom emails based on the product they have purchased.
There are not so many small online stores doing this thing.
That’s why, in this article, we will show you how to send WooCommerce custom emails per product! If you are looking for a simple guide to sending custom emails for your products, keep reading this article.
But first, let’s see why customizing WooCommerce order emails based on products is a good idea.
Why Should You Send WooCommerce Custom Email Per Product?
By default, WooCommerce comes with a default email template. It is pretty basic, and if you need to stand out from the crowd, you should start tweaking the template.
When you run an online store with a custom email template, customers will take your business seriously, and you can provide a better experience this way.
When you need to add extra notes or something a customer knows about the product, sending Woo custom emails per product would be a good idea.
The next section will show you the top situations where you need to configure custom emails on your WooCommerce store.
When You Should Start Sending Custom Emails
The feature would come in handy in multiple situations. Some of the famous cases are:
- The product takes time to ship: if the ordered product takes more time to handle and ship, you should customize the email and let the customer know.
- Bad weather/climate: If you can’t ship the product due to some weather conditions, you should add it to the email template. However, this would be temporary. So, you must tweak the email template after the situation gets better.
- The product needs additional clearance: Some products need additional permissions. So, the delivery time depends on the approval. Adding the information to the email template is a good idea.
- To add an extra manual on how to use the product: If you need to let the customer know how to use the product, ensure you have added a dedicated section.
- Customizing thank you note: If you need to add a personal thank you note, you could customize the email template.
- Add coupons: If you need to encourage customers to spend more on the store, offer them coupon codes.
And so on.
Now you know why and when you should send WooCommerce custom emails per product. Next, let’s move to the article’s core, where we will explain how to send WooCommerce custom emails per product.
How to Send WooCommerce Custom Emails Per Product?
In a nutshell, we will show you how to customize the email template in situations like:
- You need to add a custom coupon code to the email
- Add external links to manuals/guides
- Thank them for completing the purchase
- There’s a delay in the shipment
- Customize related posts
Let’s check each situation and see how to do the task properly.
Before You Start…
Before you start, we will use the YayMail plugin to customize the email templates. We will also use the Conditional Logic add-on to specify custom display rules. So, install and activate the plugin on your website.
There is a free version of the plugin available in the WordPress plugin repository, but in this case, we will use the premium version.
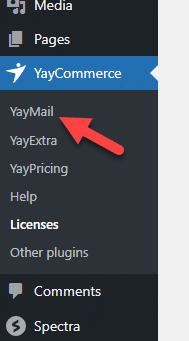
Once you have completed the process, let’s start tweaking the email templates. Under YayCommerce settings, you can see the YayMail email editor.
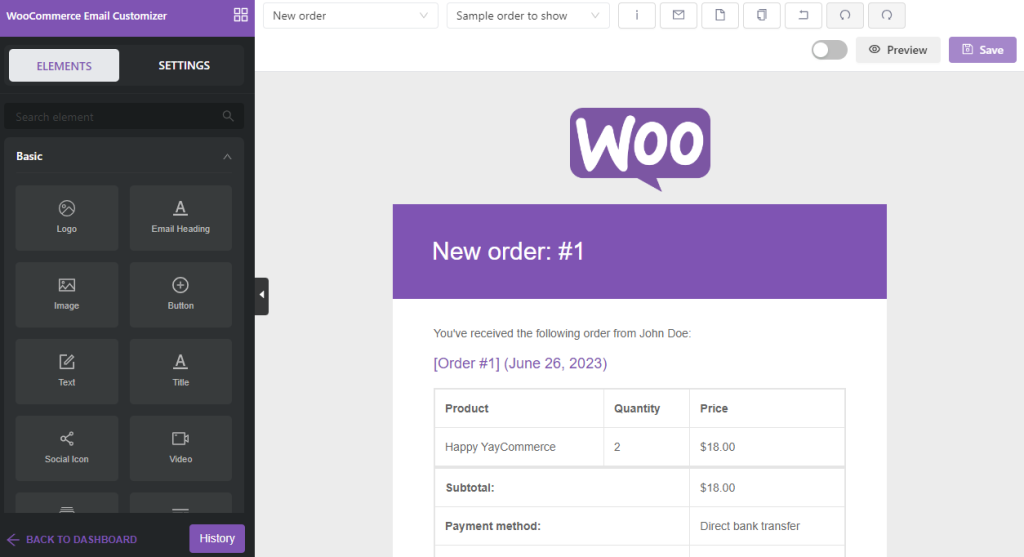
Once you have opened the option, you can see the live email customizer.
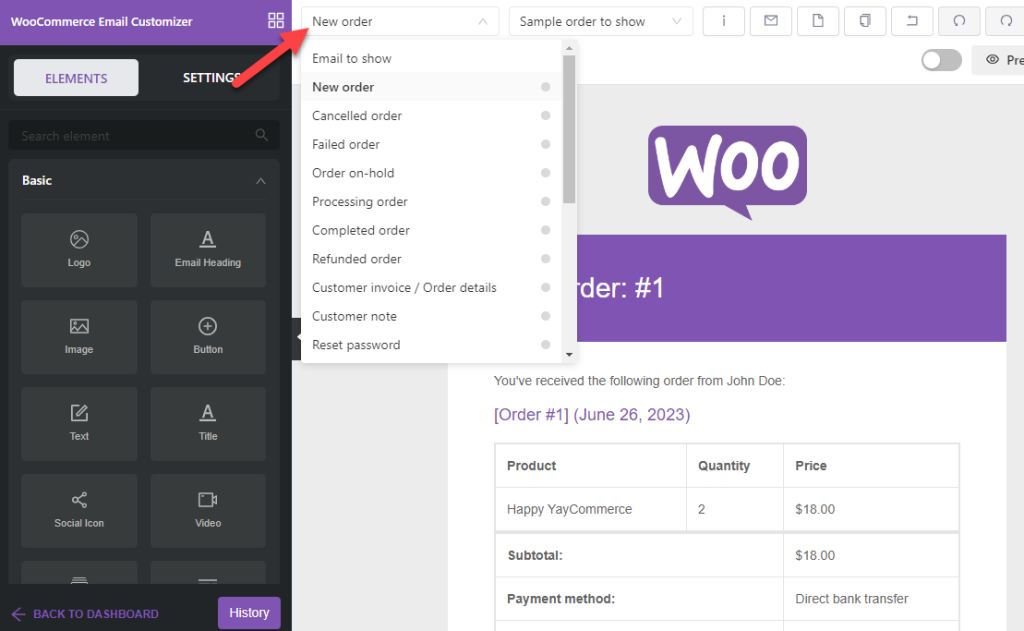
If you need to change the email template you edit, use the dropdown.
Once you have understood the basics, let’s start the process.
1) Add Custom Coupon Code to the Email
If you want a simple way to boost your sales, offering coupon codes would be the best option. Most customers will add products to their cart and leave the website without completing the purchase.
This is known as cart abandonment.
If you need to boost your sales, offering coupon codes would be a good idea. WooCommerce comes with an in-built coupon creator. With the feature, you can create a coupon code and add rules.
And when it comes to promotion, you can use the email template. We will be tweaking the customer invoice/ order details template.
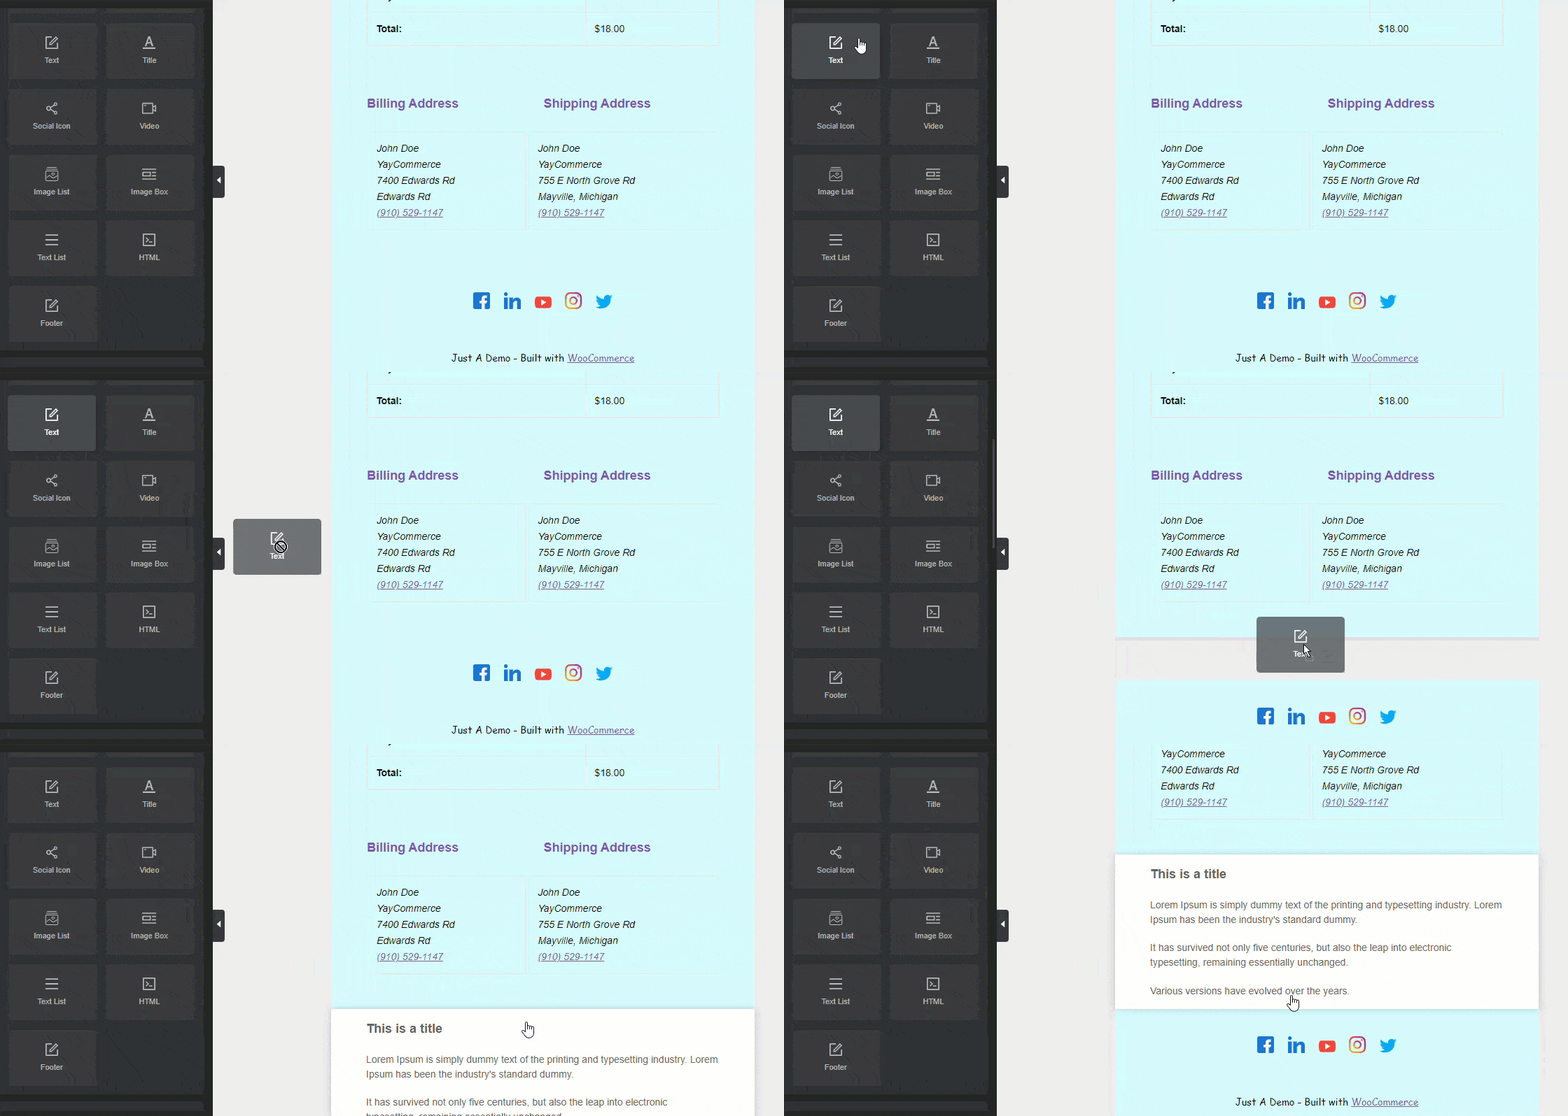
You can add the details regarding the coupon there.
In our case, we modified the text block into this:
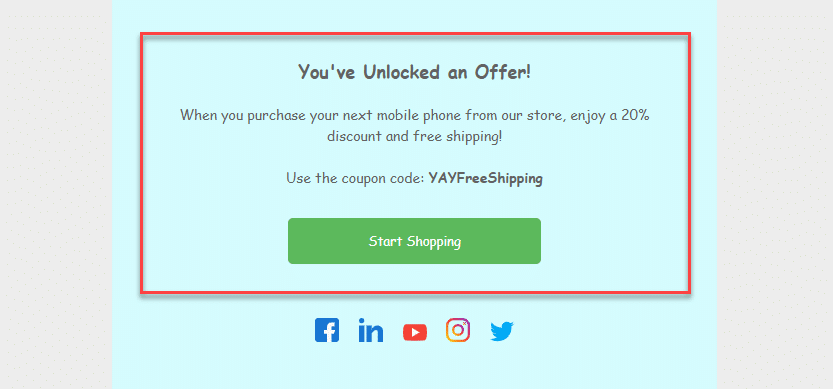
Also, we have added a new button to the block so customers can visit the store and utilize the offer directly from the email.
Right now, the template will be displayed to every customer.
But with the conditional logic feature, you can add custom rules. For example, you can show the coupon block to every customer who purchases a specific product or from any particular product category.
Here’s how to do it.
First, select the block and open the settings. If you scroll down, you will see a section for conditional logic rules.
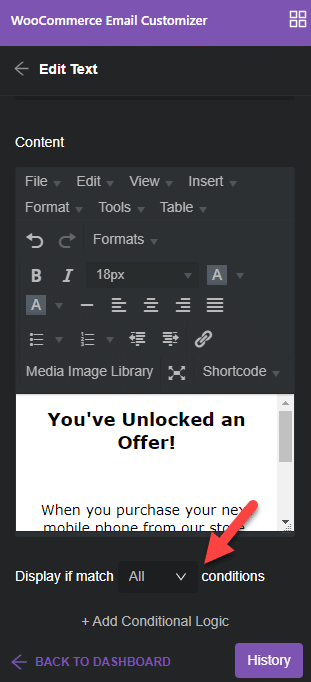
Configure the rule this way:
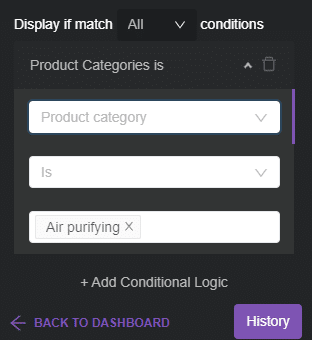
So when someone purchases a product from the air purifying category, the coupon code section will be displayed. Apart from product category, you can also choose options like:
- Billing country
- Product
- Product SKU
- Minimum order total
- Maximum order total
- Payment method
- Shipping method
- Coupon code
- Payment status
You can choose a rule based on your preference and customize the coupon code display options.
This way, you can add a coupon code to your email. If you need another method, check out the next option. In the next section, we will explain how to add a custom external link to your email newsletter.
2) Add External Links to Guides/Manuals
You must add external links to PDF guides or manuals in various cases. For example, if you are selling a decent-sized product like a sofa, adding a manual on how to clean the product correctly will come in handy.
Re’s how you can do it. You can edit the customer invoice/ order details template or the completed order template for this task.
In this case, we will tweak the customer invoice/order details template.
The best thing you can do for this task is to add a Two Column block.
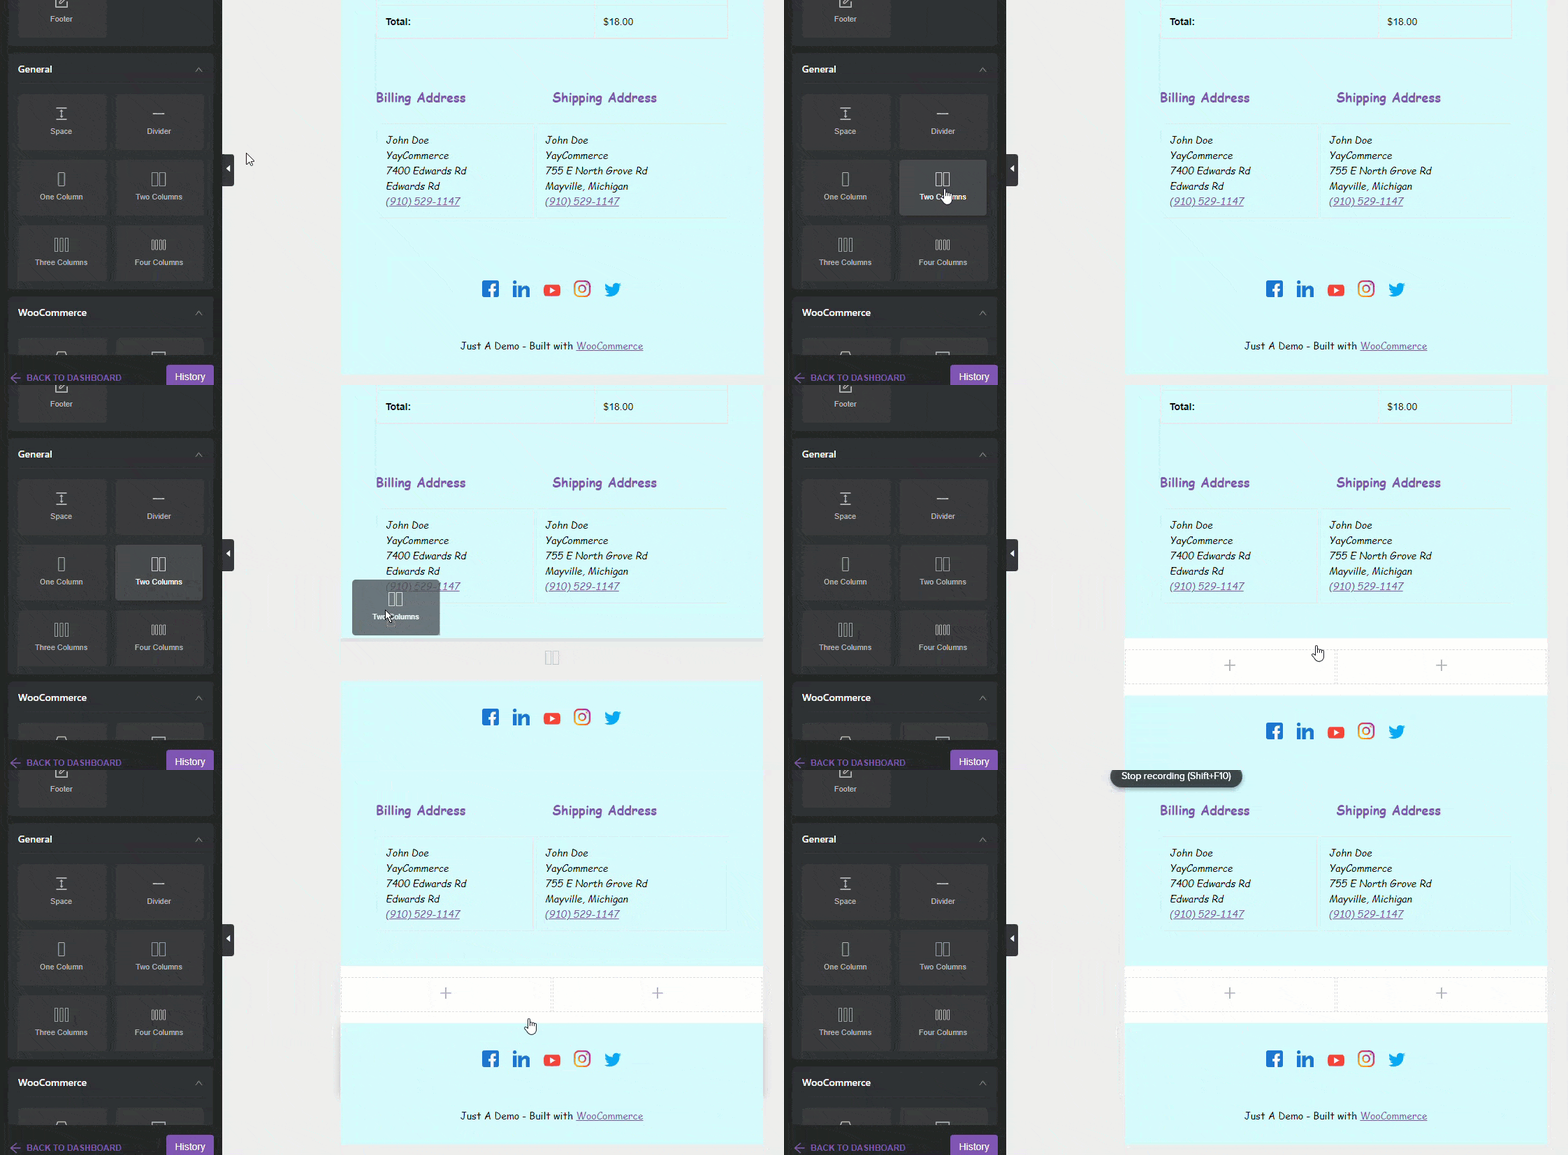
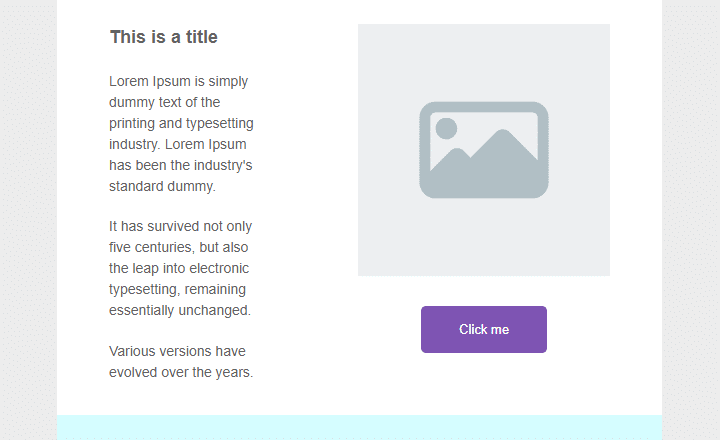
In the first column, you can add a text block. On the right-hand side, add an image and a button. Here’s an example:
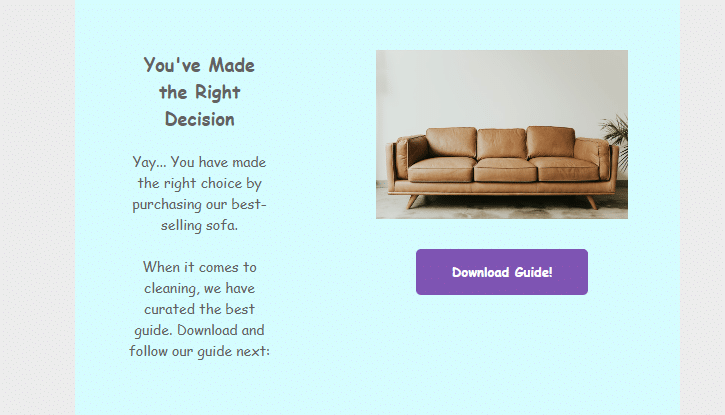
Tweak the content according to your interest. Here’s our email template after all the modifications:
If you check the button customization, you can see an option to add links.
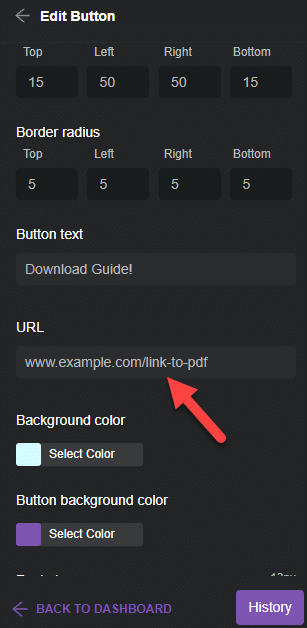
Add the link to the PDF file/user manual.
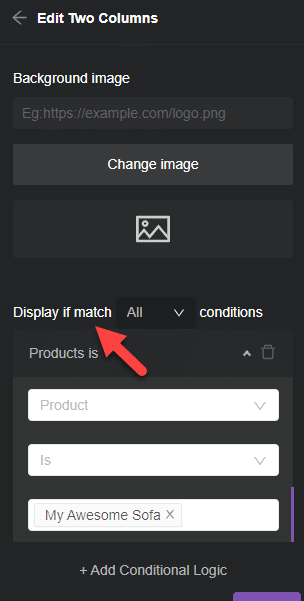
Again, we only need to show this for some purchases. So as we did before, add a new conditional logic rule where this block will be displayed only when a customer purchases a specific product, i.e., a sofa.
Next, let’s see how to display a thank you note to the customer.
3) Thank Them for Completing the Order
If a customer purchased products worth more than $500 from your store, showing a thank you message would be nice. Using a text block, you can customize the thank you note.
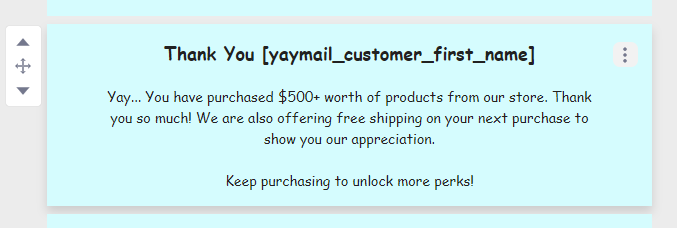
Offer them free shipping on the next purchase too. This would increase customer satisfaction, and they will always return to complete more orders.
Once you have added the message to the email template, customize the conditional logic feature.
In our case, the rule is configured this way:
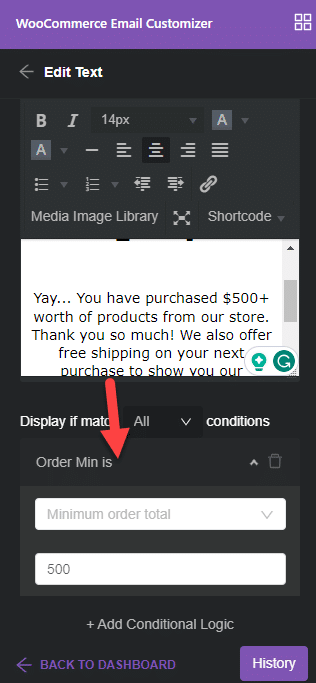
According to our configuration, the message will be displayed when someone purchases products worth $500 or more from the store. You can constantly adjust the value according to your preferences.
In the next step, we will explain how to let the customer know if there is an unexpected delay in the shipment.
4) There’s a Delay In the Shipment
Unexpected delays can happen. The causes can differ. Sometimes, it could be due to bad weather, regulations, local areas, military reasons, etc.
If something happens, you must let the customer know about the situation. Here’s how you can use YayMail and the conditional logic feature to inform customers about the shipment delay.
Adding a notice to your order emails would be great if your location is affected by strange situations. This will help understand the customer about the problem that’s going on.
You can edit the completed order/ customer order template to add the content. You can use a text block for the message.

Adding a custom coupon code/offering free shipping is a great addition. Well, this works fine when your warehouse’s location is affected. What if a specific country is affected?
That’s where conditional logic can be helpful. With the billing country rule, you can show this message only to specific people.
Here’s the configuration option:
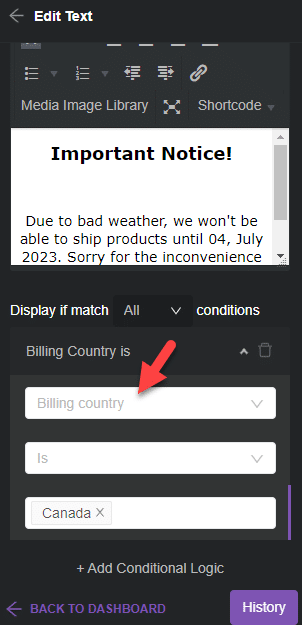
Ensure you have edited the text block based on the new configuration. Based on our setup, when someone from Canada completes the purchase, YayMail will display the notice.
This way, they can better understand the situation.
In the next step, let’s see how to customize and enhance the related posts section.
5) Customize Related Products
Customizing the related products section is an excellent idea to boost conversion rates. Here’s how to do it. First, add the Featured Product block to the email template:
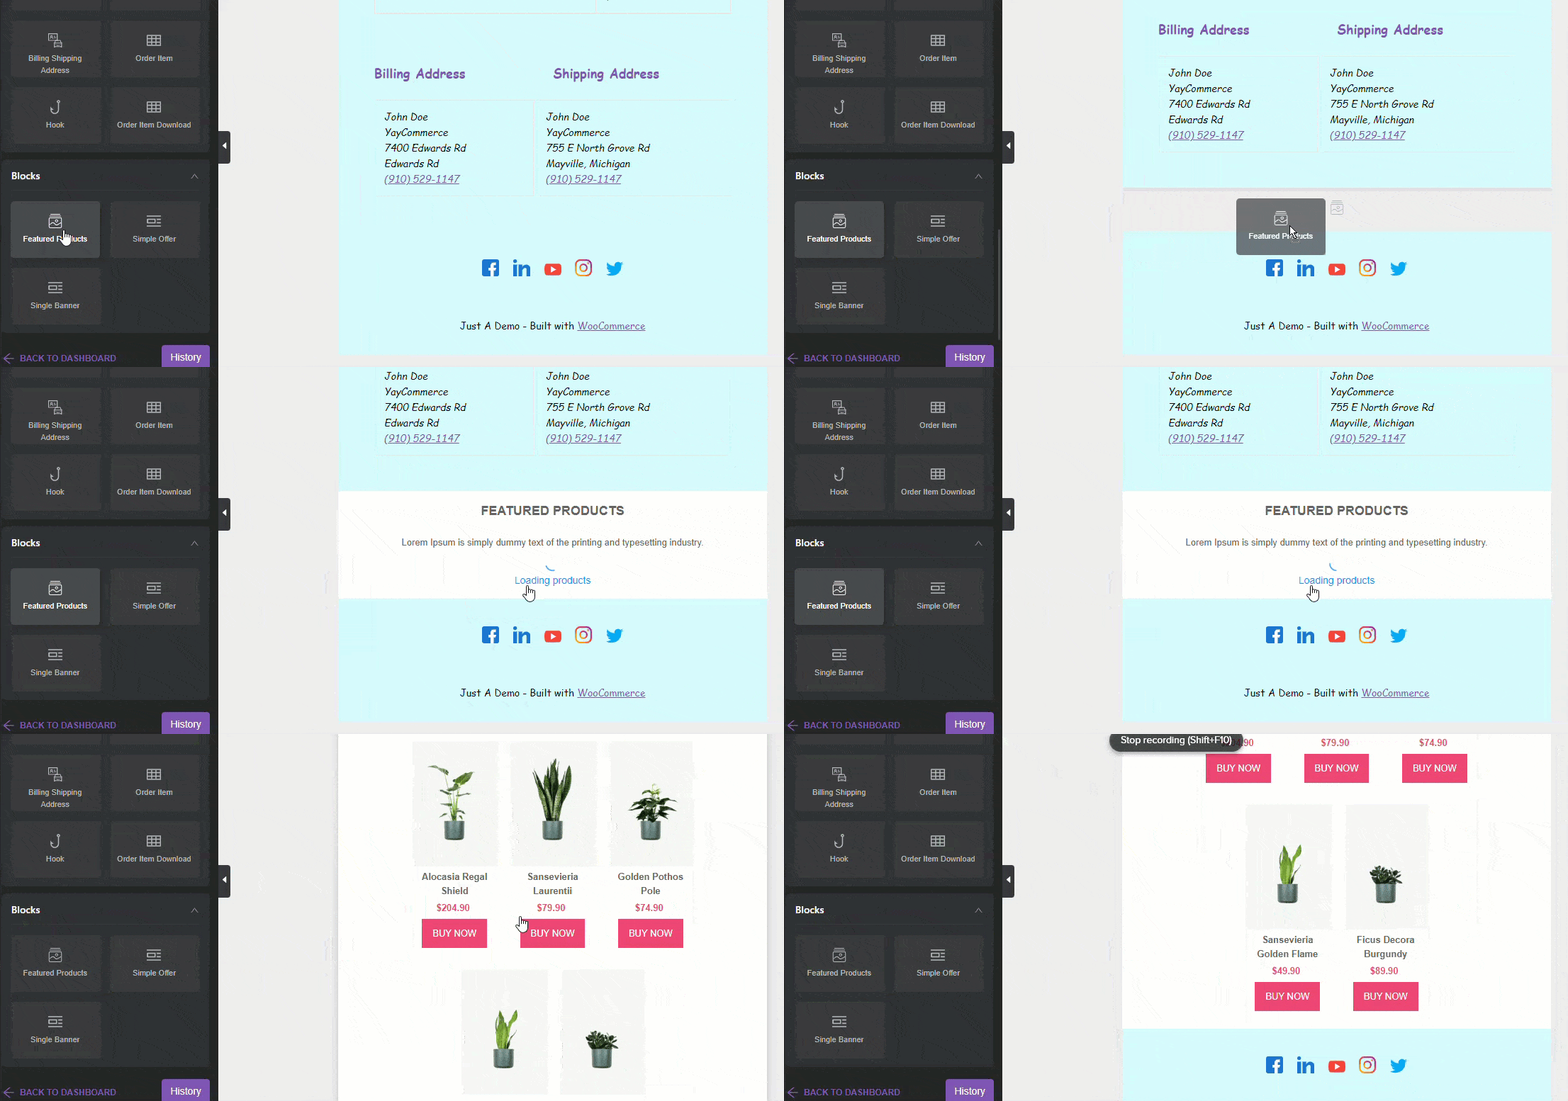
Next, customize it in the way you need. You can decide on a background color and choose how many products you need to display. Plus, you can pull products from a specific category.
In our demo, we will display three products from the plant accessories category.
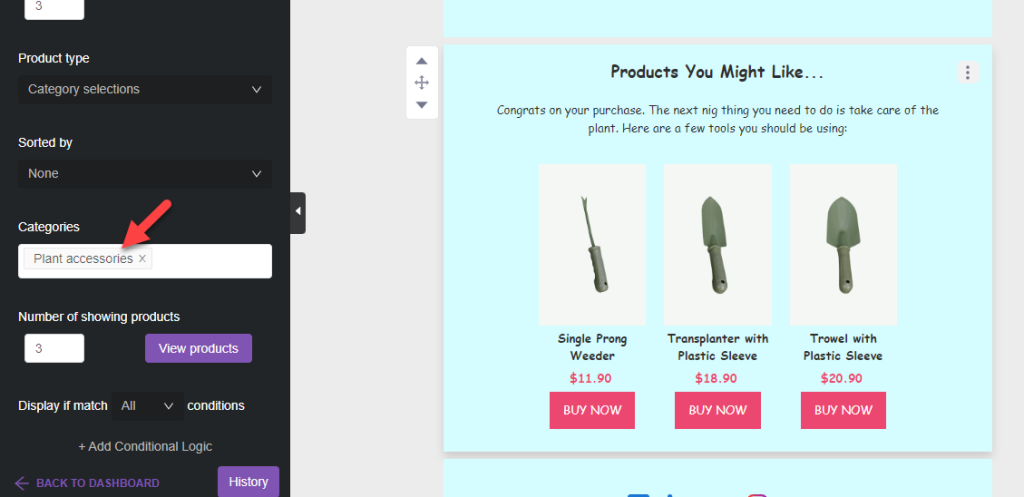
From now on, the block will be displayed with every customer’s email. However, we only need to show it with some orders.
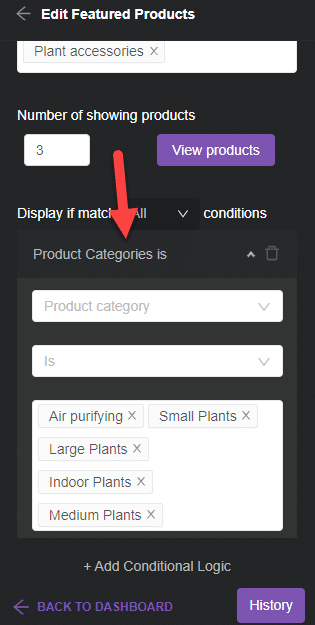
Hence, using the conditional logic is a good idea. With the product category rule, you can decide when to display the block. Here, we will show it when someone purchases plants (which is a good idea to boost sales).
That’s it!
This is how you can customize related products and ensure maximum conversion rates. As you can see, there are so many ways you can send WooCommerce custom emails per product.
The conditional logic feature offered by YayMail is so powerful you can add any rule you need and start customizing the emails.
Conclusion: WooCommerce Custom Email Per Product
When you run a WooCommerce store, you should customize it to improve the customer experience. Tweaking the order email templates is one of the popular things most store owners would forget.
This guide shows you how to tweak the emails and match them with your branding. With a plugin like YayMail and its conditional logic addon, tweaking the emails are so simple.
As you can see in the tutorial, you do not need to write a single line of code to change the email templates.
YayMail would be an excellent addition to your WooCommerce store.
What do you think about the idea?
Is it an excellent way to boost the customer experience/satisfaction?
Let us know in the comments!
