
Do you want to add icons to the WordPress navigation menu? In this post, we will show you two methods for adding custom icons to your WordPress menu.
Adding icons to your WordPress navigation menu can improve the visual appeal and user experience of your website. Menu icons help visitors quickly identify different sections and make your navigation more engaging and professional.
In this tutorial, we will show you two simple methods to add icons to your WordPress menu. The first method uses a plugin, which is beginner-friendly and requires no coding.
The second method uses Font Awesome icons along with custom CSS classes, allowing you to add icons to your menu items without using any plugins. Both approaches are effective and widely used by WordPress users.
First, let’s see why you should add WordPress menu icons.
Table of contents
Why You Should Add WordPress Menu Icons?
Adding icons to your WordPress navigation menu can significantly improve the visual appeal of your website.
Menu icons help visitors quickly understand the purpose of each menu item without reading long text, making navigation more intuitive and user-friendly.
By using WordPress menu icons, you can make your site look more modern and professional. Icons also enhance the overall user experience, especially on mobile devices where space is limited.
Whether you choose to add menu icons using a plugin or without plugins, this small improvement can make your website more engaging and easier to navigate for your visitors.
How to Add Icons to WordPress Navigation Menu?
There are two ways to add icons to WordPress menus.
- Add icons using a dedicated WordPress plugin
- Insert icons using custom code
We will show you both options below so you can choose the one that best fits your preferences and requirements.
Without any further ado, let’s get started with the tutorial.
1. Add Menu Icons Using a Plugin
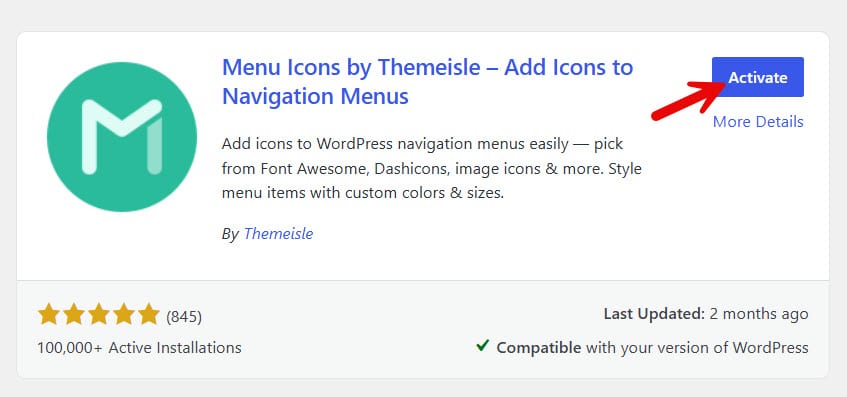
If you are looking for a simple way to add an icon to your WordPress website, use the plugin method. The first thing you need to do is log in to your WordPress admin area and go to the “Add New Plugins” section. The plugin we will be using is Menu Icons by ThemeIsle.
Install and activate the plugin.
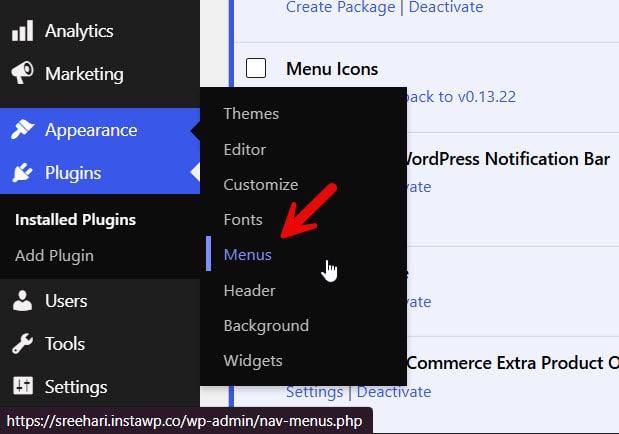
To add an icon to the menu, first go to the site’s navigation menu settings.
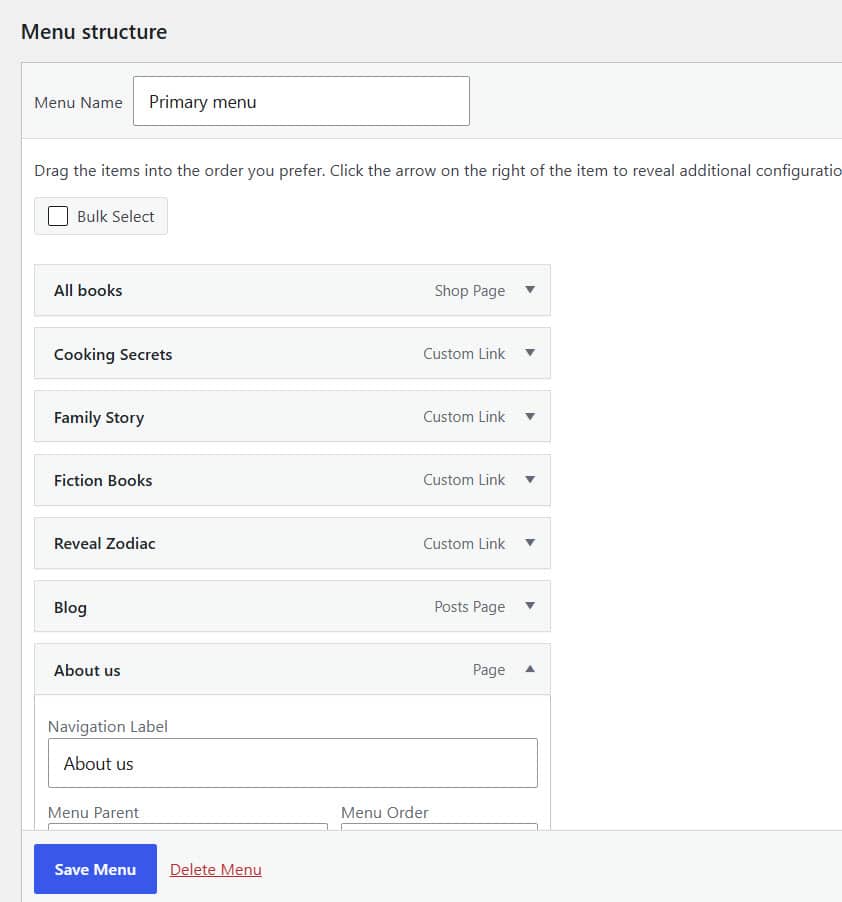
If you do not have a menu, you can create a WordPress menu and customize it. Feel free to add WordPress menu items to it. In this case, we already have a sample menu structure.
Once you have added an item to your menu, it is time to add WordPress menu icons using the plugin. If you expand the menu, you will see an option called Icon.
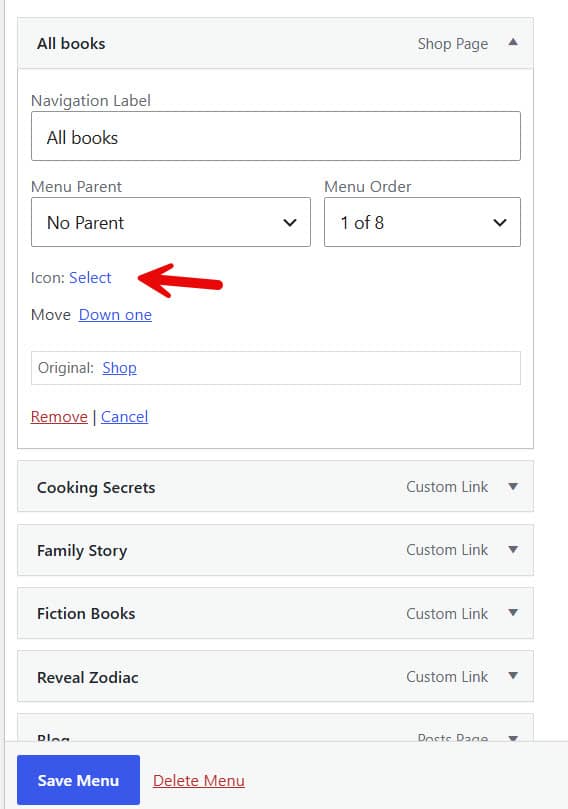
If you can’t see it, open the screen options and enable the icon from there.
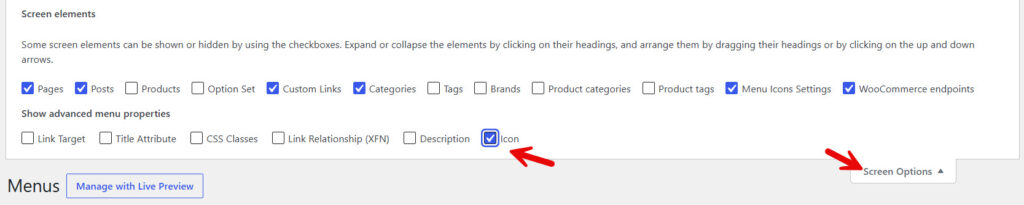
Now, click the icon option available in the individual menu. It will open up a page like this:
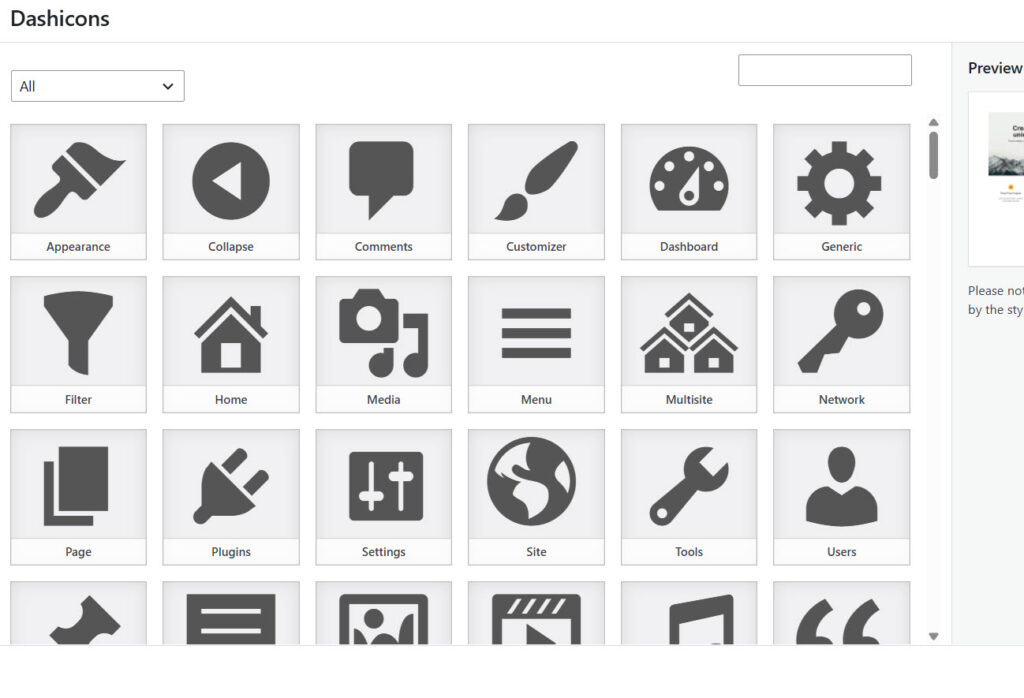
By default, the plugin loads Dashicons. But you could add more font libraries, such as Font Awesome, from the menu settings.
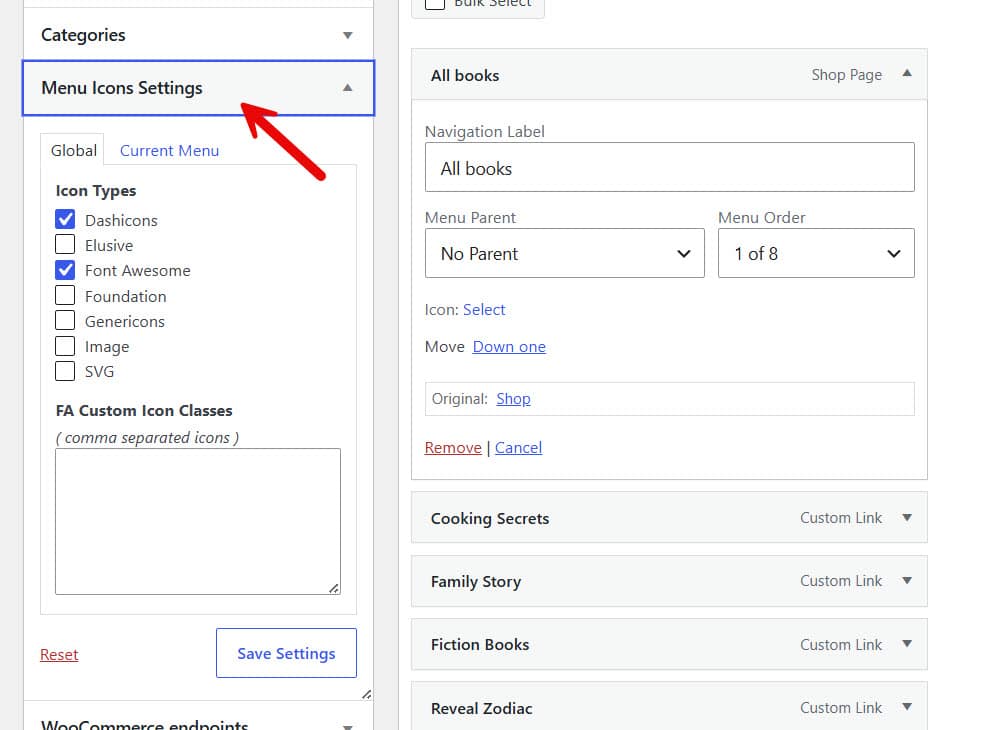
In our case, we have added Font Awesome and Dashicons in the settings. From the menu selector, you can choose individual icons for the menu items.
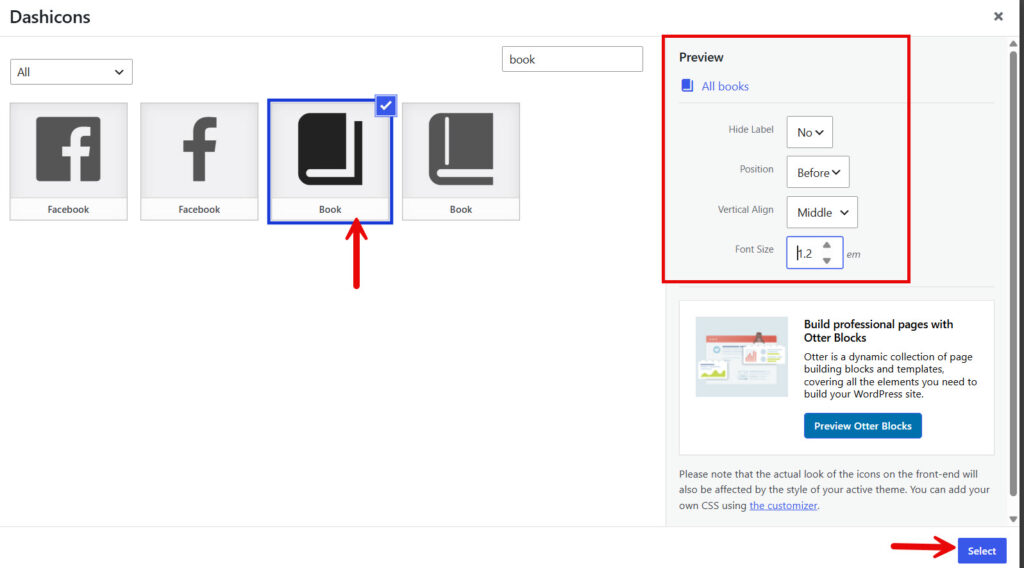
As you can see in the screenshot, there are several configuration options, including label hiding, position, vertical alignment, and font size. Tweak it according to your requirements. The good thing is, you can see a live preview with real-time changes.
Once you are done customizing the icon, save the changes.
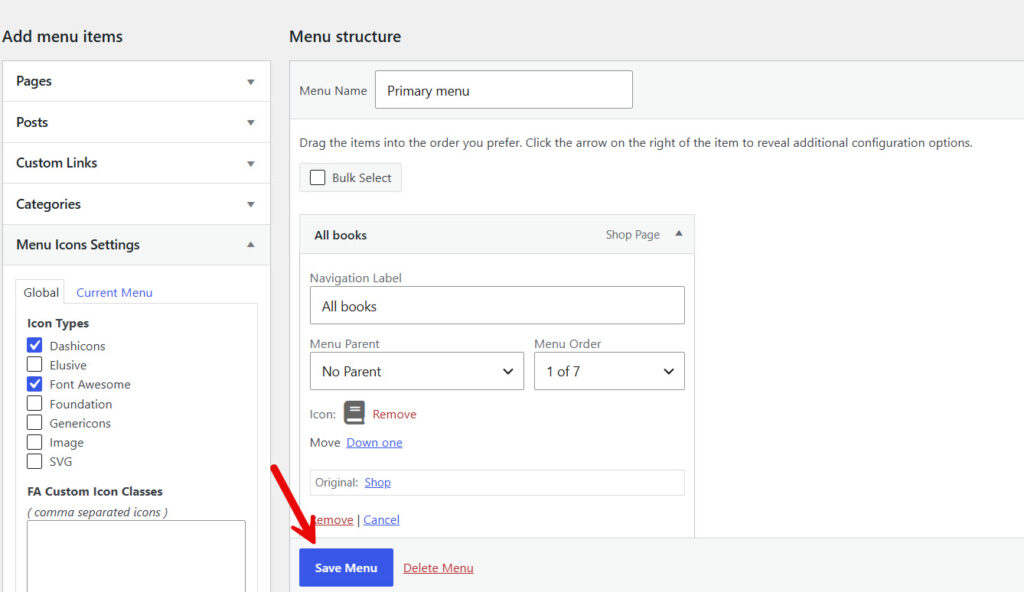
Now, if you check your website on the front end, you can see the menu icons.
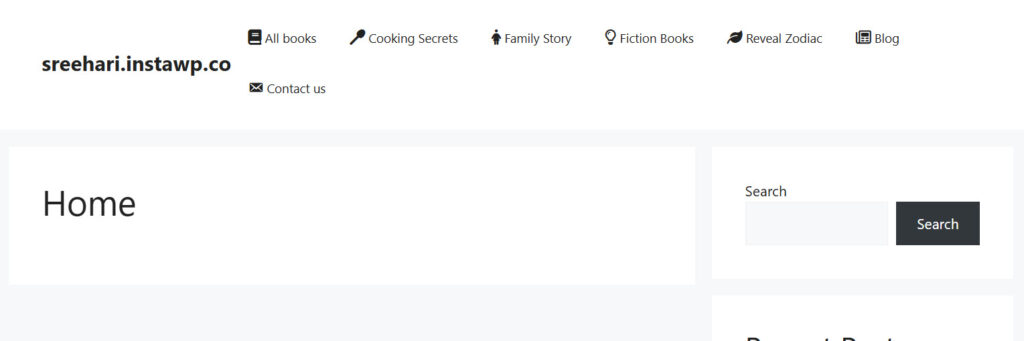
As you can see, this was a simple method to add any icon you like to the menu. All you need to do is select the menu, add different icons to it via the WordPress menu section, tweak the menu text if needed, and that’s it.
In the next section, we will show you how to manually add menu icons to your site.
2. Add Menu Icons Manually
If you do not need to use a dedicated plugin, use the coding method instead. The first thing you need to do is go to Font Awesome and get a free kit code.
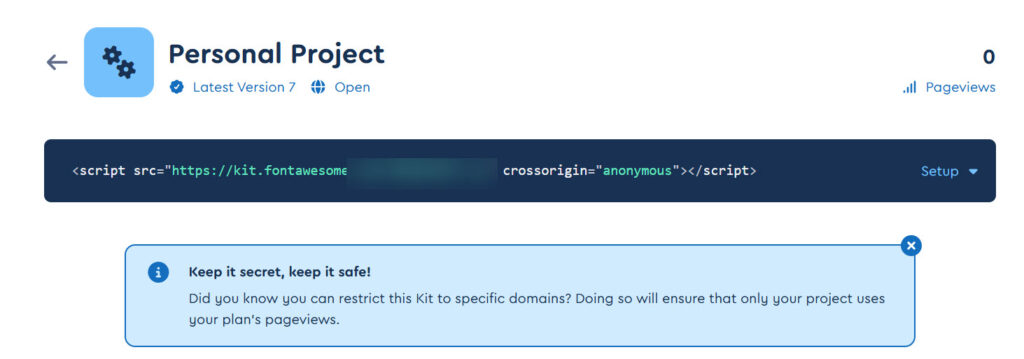
Next, add this code to your website’s header just before the </head> tag.
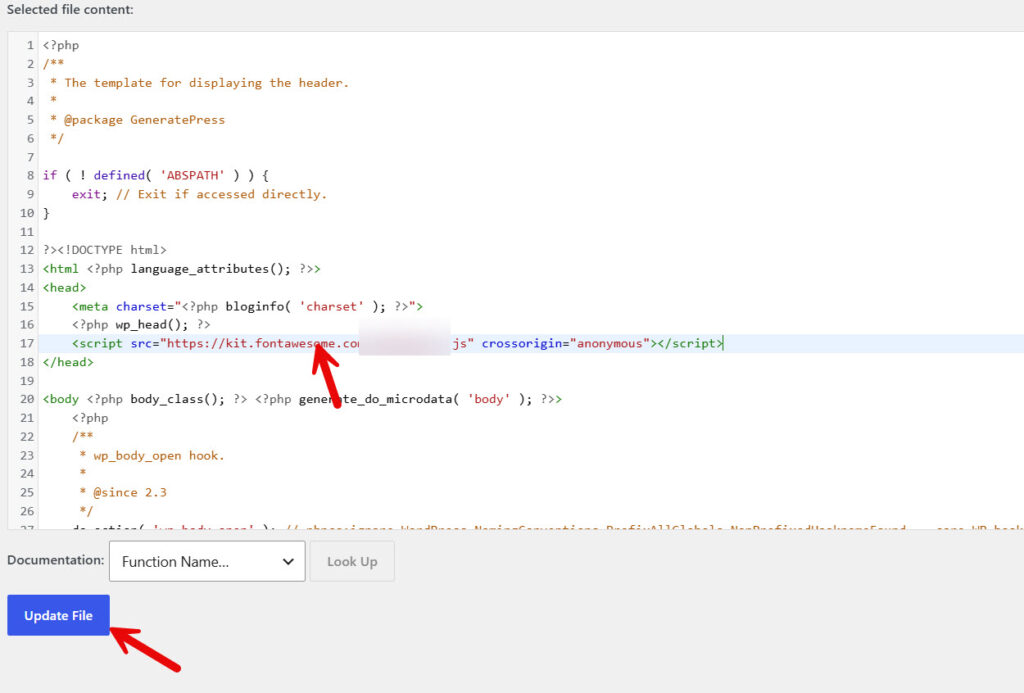
Now it is time to add icons to the website. The next thing you need to do is go to Font Awesome and find an icon. In our case, we will add a home icon.
Once you have found an icon, open it and copy the HTML code.
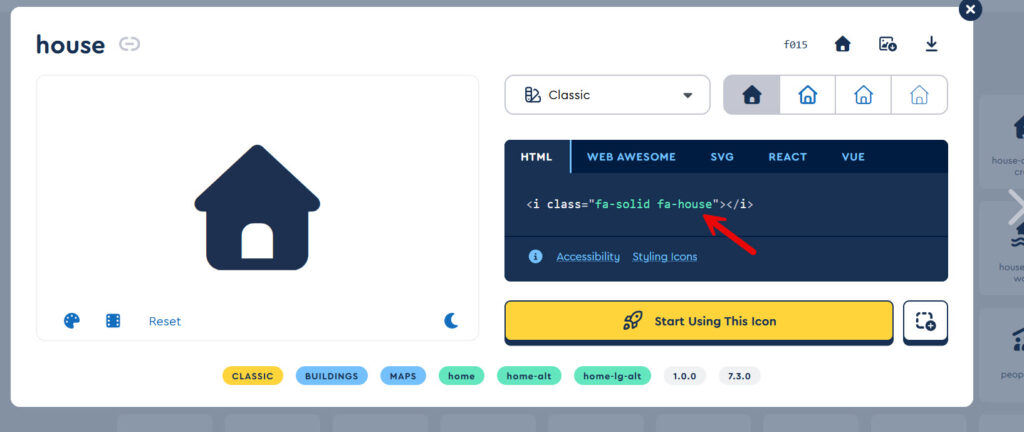
Now go back to your menus, add this code before the actual navigation label. For example, if your current navigation label is HOME, modify it to like this <i class=”fa-solid fa-house”></i> HOME.
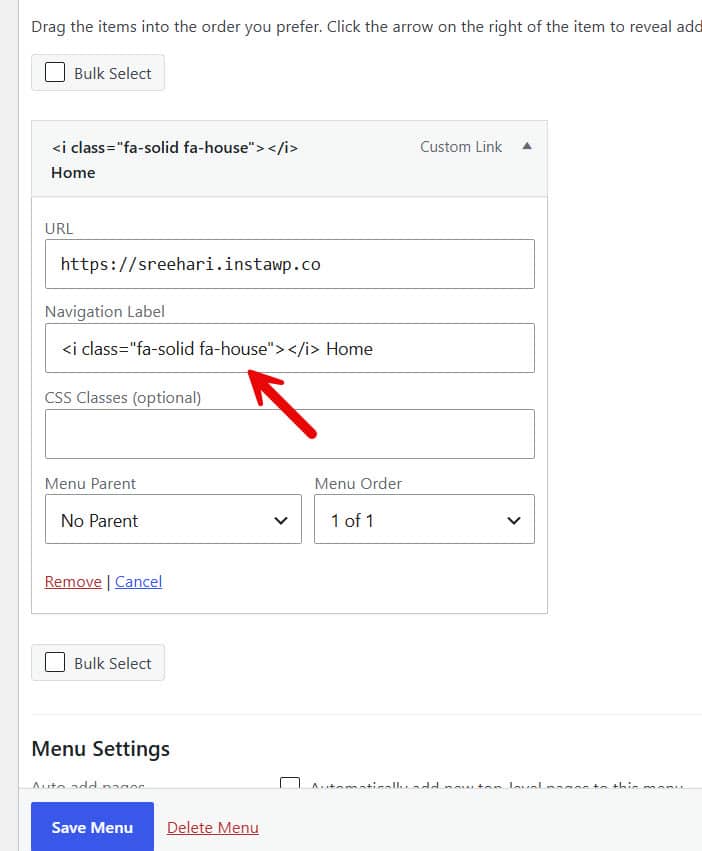
Save the menu and check it from the front end.
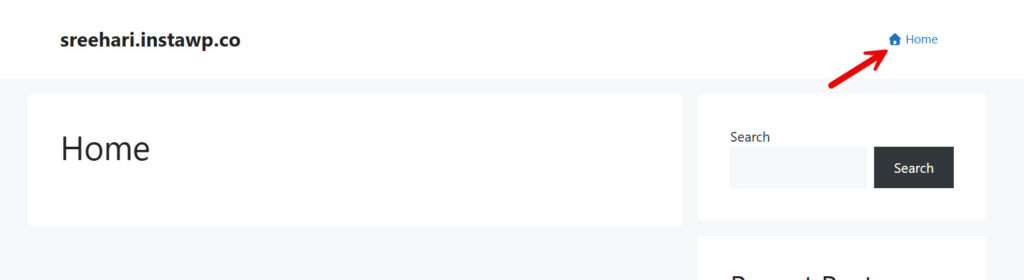
As you can see in the screenshot above, the home icon is visible. Similarly, you can add as many icons as you need.
That’s it!
This is how you can add icons to the WordPress navigation menu. Adding custom menus will make your website look more appealing. If you choose the plugin method, it would be easy to add a new icon or switch the library of icons without hiring any WordPress expert.
Without editing any code or theme files, you can have Font Awesome’s icons added to your menu with minimal hassle.
If you do not need to have another plugin on the website, use the coding method. It is not that hard.
What are the Pros and Cons of the Plugin vs. the Manual Method
If you need help choosing the right method, check out the pros and cons of both methods.
Pros and Cons of the Plugin Method
| Pros | Cons |
|---|---|
| Easy to use, even for beginners | Adds another plugin to your WordPress site |
| No coding or technical knowledge required | Limited customization options in some plugins |
| Supports both icon libraries and image icons | May slightly affect site performance |
| Quick to set up and manage icons | You depend on the plugin developer for updates |
| Good for managing many menu icons | Some features may only be available in the premium version |
Pros and Cons of the Manual Method
| Pros | Cons |
|---|---|
| No extra plugin needed | Requires basic knowledge of CSS and HTML |
| Lightweight and does not affect site speed | More time-consuming to set up |
| Full control over icon styling and size | Harder to manage if you have many menu items |
| Works with any WordPress theme | You need to manually update Font Awesome if required |
| Good long-term solution without plugin dependency | Not beginner-friendly |
Common Mistakes to Avoid While Adding Icons to Menu Items
Many WordPress users face issues when adding icons to their navigation menus due to small but common mistakes. Here are the key mistakes you should avoid:
- Not Adding the CSS Class Properly: Forgetting to add a CSS class to each menu item is one of the most common errors. Make sure you enable the CSS Classes field in Screen Options and correctly enter the class name for each menu item.
- Not Enqueuing the Font Awesome Library: If you are adding icons without using a plugin, you must properly enqueue the Font Awesome library in your theme’s functions.php file. Without it, the icons will not appear on your website.
- Using Incorrect Icon Class Names: Always double-check the icon class name from the Font Awesome library. Even a small typo can prevent the icon from displaying correctly in your WordPress menu.
- Not Clearing the Cache: After adding icons, many users forget to clear their site cache. This can make it seem like the icons are not working, even though the changes have been applied.
- Ignoring Mobile Responsiveness: Adding icons without testing on mobile devices can break your menu layout. Always check how the icons look on smaller screens and adjust the font size if needed.
- Depending Too Much on Plugins: While plugins like Menu Icons by ThemeIsle make the process easier, relying on them completely can create problems if the plugin stops receiving updates or conflicts with your theme in the future.
Bonus: Best 3 WordPress Menu Icon Plugins to Try
Here are the three best WordPress menu icon plugins you should try.
1. Menu Icons by ThemeIsle
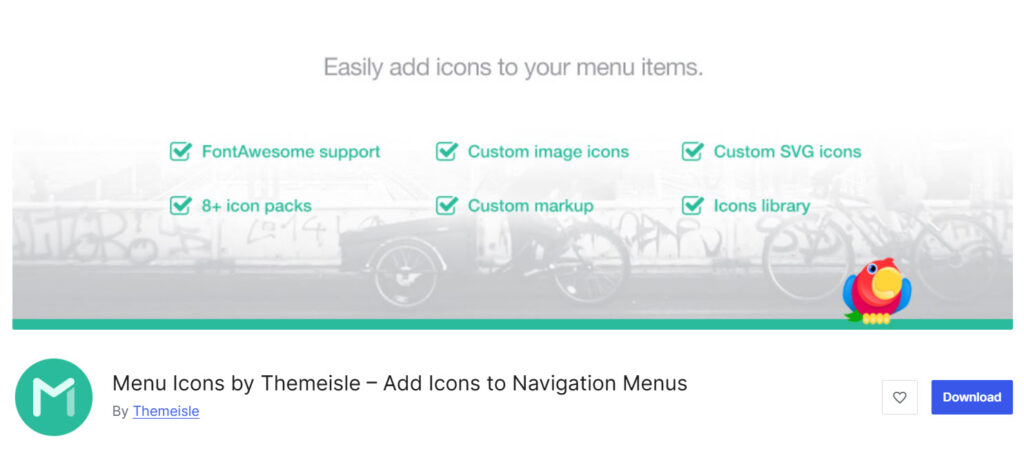
Icons by ThemeIsle is a user-friendly WordPress plugin that allows you to easily add icons to your navigation menu. It supports popular icon libraries such as Font Awesome and Dashicons, and also lets you upload custom image icons.
The plugin integrates directly into the WordPress menu editor, making it simple to assign and customize icons for each menu item without writing any code.
It works well with most WordPress themes and helps improve the visual appeal and usability of your website’s navigation. Whether you want to enhance menu clarity or give your site a more professional look, this plugin offers a straightforward solution.
2. WP Menu Icons
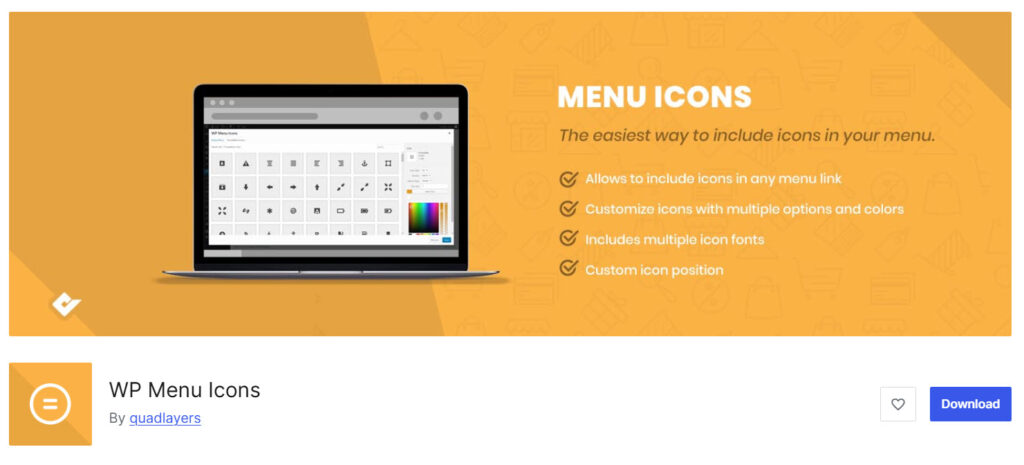
WP Menu Icons is a free WordPress plugin that allows you to add icons to your navigation menu items. It supports popular icon libraries such as Font Awesome and Dashicons, and also lets you upload custom image icons.
The plugin integrates directly into the WordPress menu editor, making it simple to assign and manage icons for each menu item. It offers basic customization options, such as icon position and size, and it works well with most WordPress themes.
This plugin is suitable for users who want to improve the visual appearance of their navigation menu without writing any code or relying on complex setups.
3. Easy Menu Icons
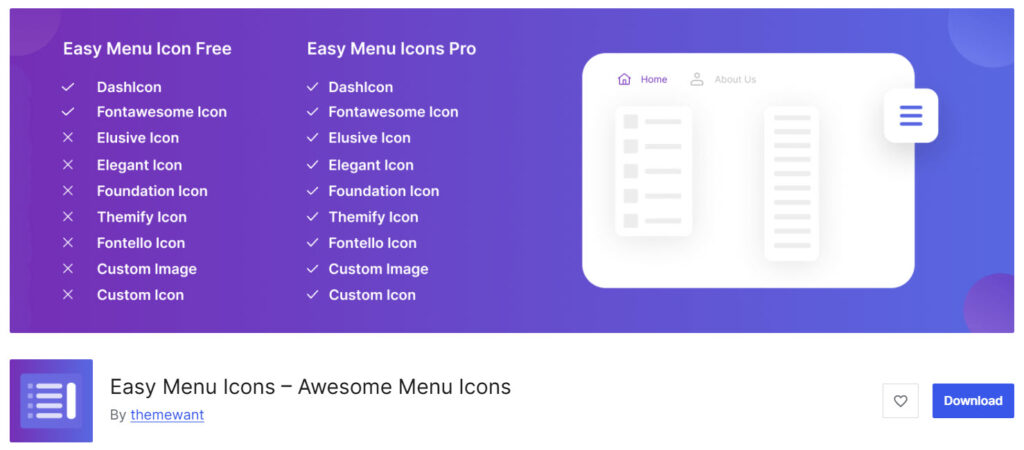
Easy Menu Icons is a simple, lightweight WordPress plugin that lets you add icons to your navigation menu items.
It supports Font Awesome icons and also lets you upload custom image icons directly through the WordPress menu editor. The plugin is beginner-friendly and integrates smoothly with most WordPress themes.
You can easily control the position and size of the icons without writing any code. It is a good choice for users who want to enhance the visual appeal of their menu in a straightforward way while keeping the setup process simple and hassle-free.
Frequently Asked Questions
Now, let’s take a look at some frequently asked questions and answers on this topic.
You can add icons to your WordPress navigation menu in two main ways. The easiest method is by using a plugin like Menu Icons by ThemeIsle. The second method is to add icons manually with Font Awesome and custom CSS classes, without plugins.
Menu Icons by ThemeIsle is currently one of the best and most popular plugins for adding menu icons to WordPress. It supports both icon libraries and image icons, offers good customization options, and works well with most WordPress themes.
You can add icons to your WordPress menu without using any plugins by using the Font Awesome icon library. This method involves enqueuing Font Awesome in your theme and adding a CSS class to each menu item from the Appearance → Menus screen.
To use Font Awesome icons, first enqueue the Font Awesome stylesheet in your theme’s functions.php or header.php file. Then go to Appearance → Menus, enable the CSS Classes field, and add the Font Awesome icon class (such as fa-home) to the desired menu item. Or use the HTML snippet in the navigation label.
By default, the CSS Classes field is hidden in the WordPress menu editor. To enable it, go to the Menus screen, click on Screen Options at the top right, and check the box next to CSS Classes. This will allow you to add custom classes to your menu items.
Using a lightweight plugin like Menu Icons by ThemeIsle usually has minimal impact on site speed. However, manually adding Font Awesome can slightly increase load time if not properly optimized. Using a CDN version of Font Awesome or only loading the icons you need can help reduce the performance impact.
Yes. Some plugins, including Menu Icons by ThemeIsle, allow you to upload and use your own image icons in the navigation menu. This gives you more design flexibility compared to using only icon libraries like Font Awesome or Dashicons.
Dashicons are the default icon library in WordPress. You can use them by adding the Dashicons class (such as dashicons-admin-home) to the CSS Class field of your menu item. However, Dashicons offer fewer icons compared to the Font Awesome library.
If the icons are not appearing, first clear your site cache. Then check if you have correctly added the CSS class and properly enqueued the icon library (Font Awesome). Also, make sure there are no CSS conflicts with your theme that are hiding the icons.
Using a plugin is better for beginners because it is faster and easier. Adding icons manually with Font Awesome gives you more control and avoids the need to add extra plugins. If you are comfortable with basic code, the manual method is often a cleaner long-term solution.
Conclusion
Adding icons to your WordPress navigation menu is a simple way to improve the visual appeal and user experience of your website. In this guide, we covered two effective methods to add WordPress menu icons.
The easiest and most beginner-friendly approach is using the Icons by ThemeIsle plugin. It allows you to quickly add icons to your menu items without writing any code. This method is ideal if you want a fast and hassle-free solution.
On the other hand, if you prefer not to use additional plugins, you can add icons to your WordPress menu manually using Font Awesome and custom CSS classes.
While this method requires basic technical knowledge, it gives you more control and helps keep your site lightweight.
Choose the method that best suits your needs and comfort level. Both approaches can help you create a more professional and engaging navigation menu on your WordPress site.
Which method are you going to choose?
Let us know in the comments below.
We hope you found this article helpful and enjoyed reading it. If you need to learn more WooCommerce tips and tricks, check out the YayCommerce blog. Also, feel free to check out our social media handles, such as Facebook, X, Instagram, and YouTube, for more interesting content.